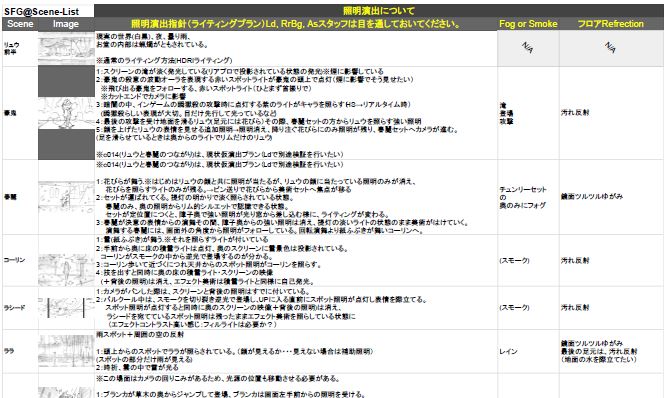
<2>Look Development to Stick to the way of Stage Direction
Whilst the cinematic had always been planned to be designed to look like a staged event, an important question that remained was 'how to reflect this through CGI?' Mr. DAISUKE UENO, the visual effect designer in charge of 'Look Development', Lighting and composition said: "[w]e wanted to work under the policy of 'as on stage so to in image'. I was troubled by this because there are a lot of long set pieces in the cinematic which are akin to shooting real actors on the stage. For this reason, setting the lighting effects were difficult. Due to this, I collected a lot of reference material from stage show productions around the world. This allowed me to visualize how the 'stage' should look. From this research, I then placed emphasis on 'Floor reflection', 'Fog & Smoke Visuals' and the 'Spot light'." (Mr. Ueno)
-

-
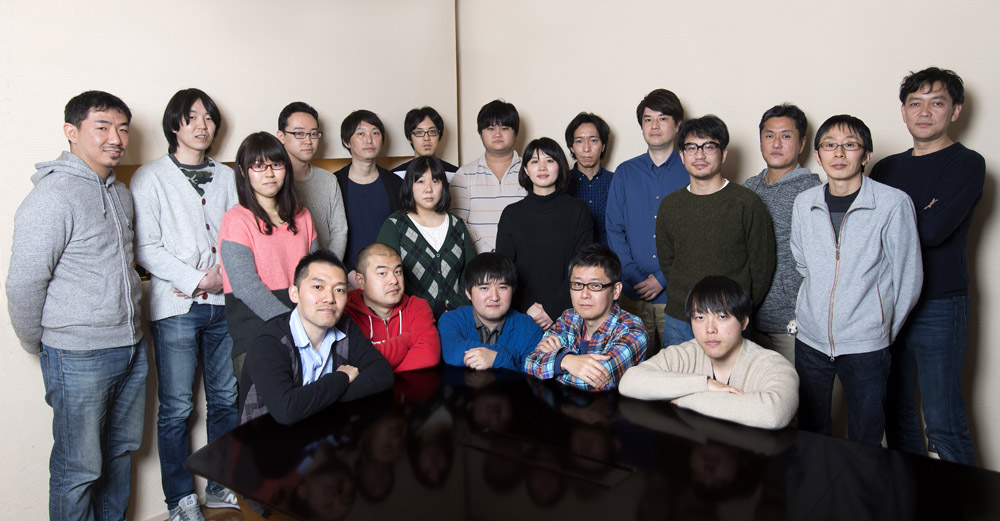
Daisuke Ueno
Visual Effect Designer, Shirogumi Inc.
Point 1: 2 types of flooring
With reference to the flooring, two types of floors were created. The first was designed to be 'mirror-like' reflective. The second had reduced reflective properties but added other elements such as dirt and scratches. This was done using 'Substance Painter'.
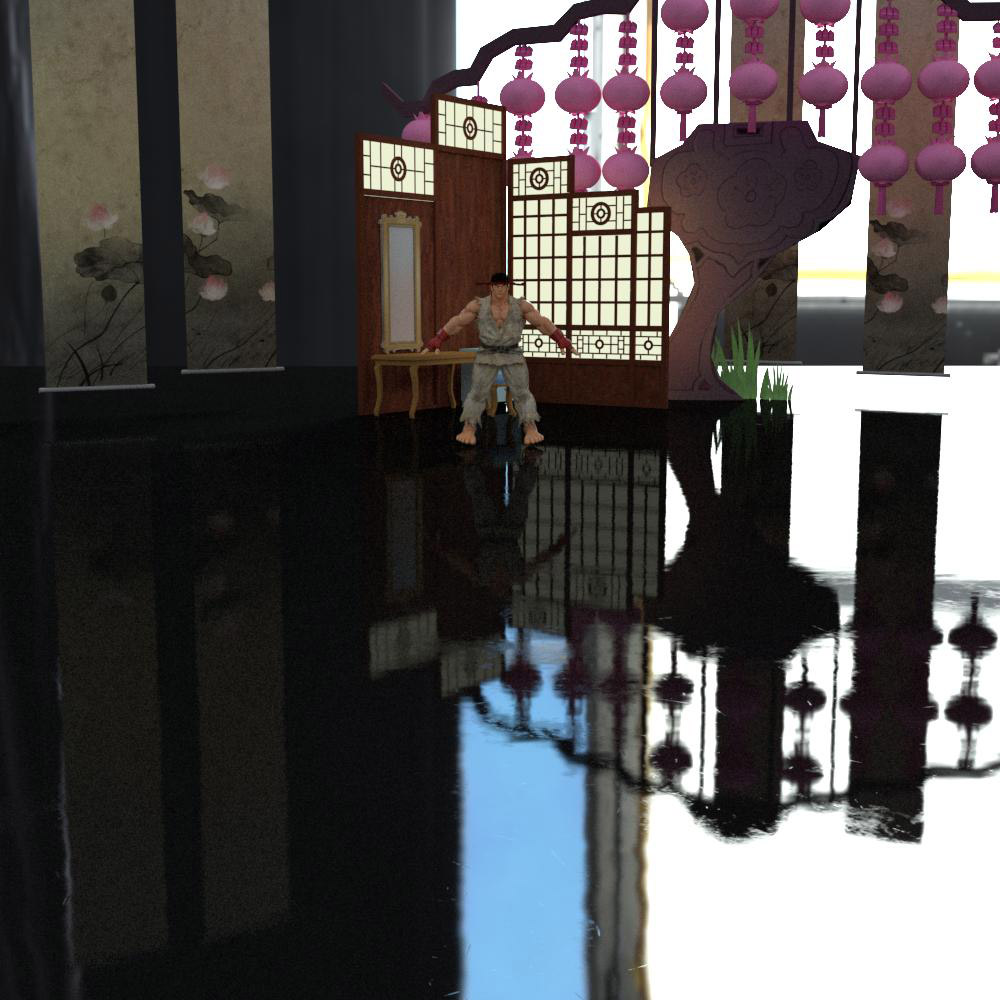
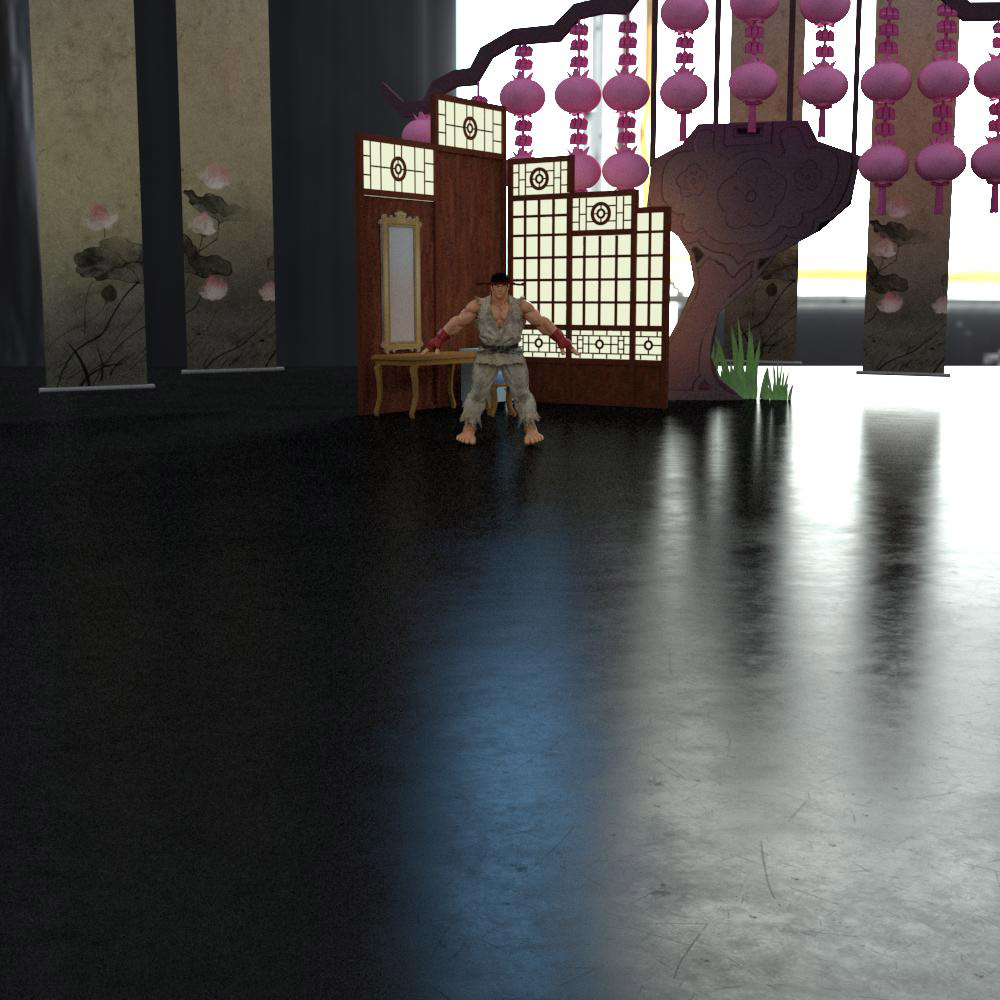
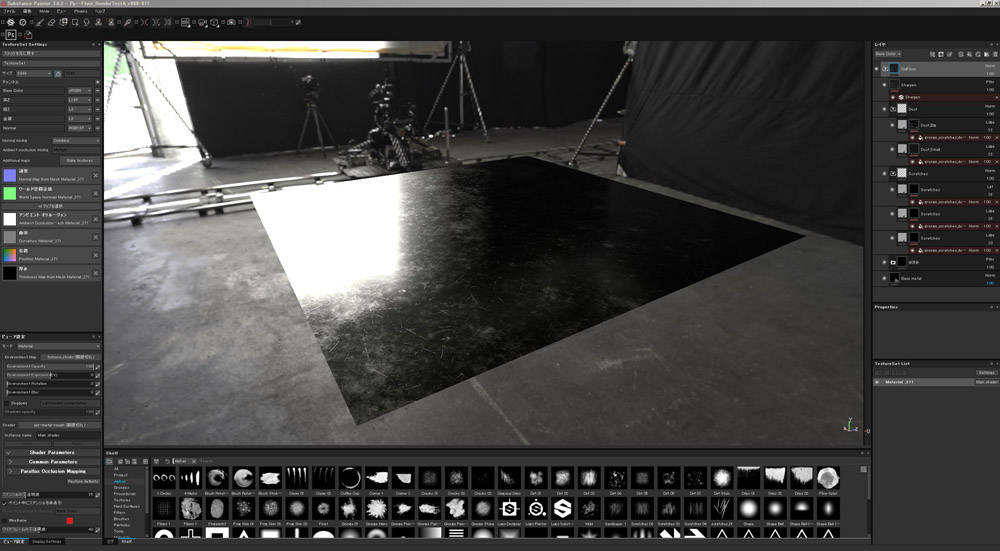
Screen-Shot of Substance Painter 2. The flooring was copied and tiled so as to make the scratches and dirt appear seamless. Texturing was also completed using Substance Painter with minor adjustments being made using 3ds Max.
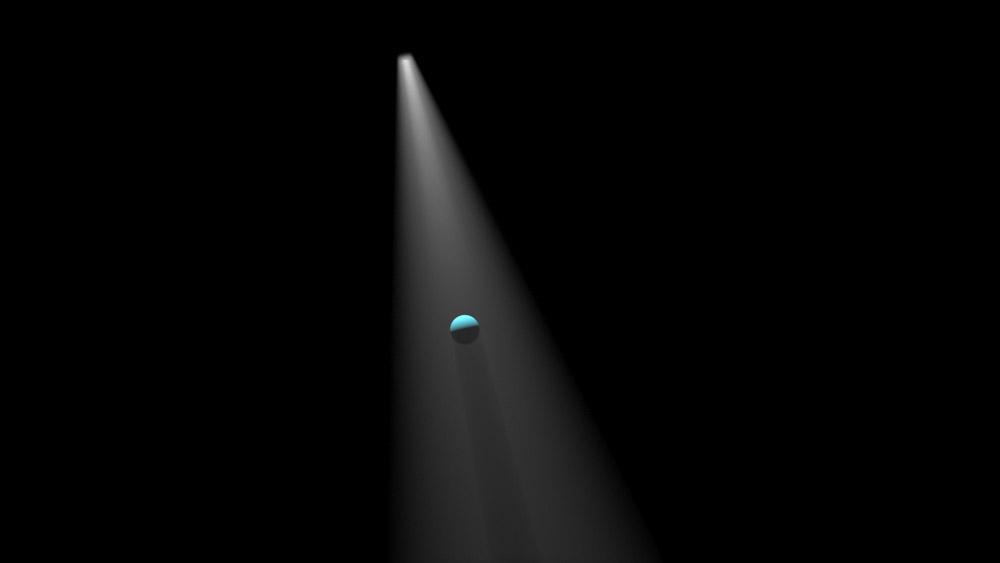
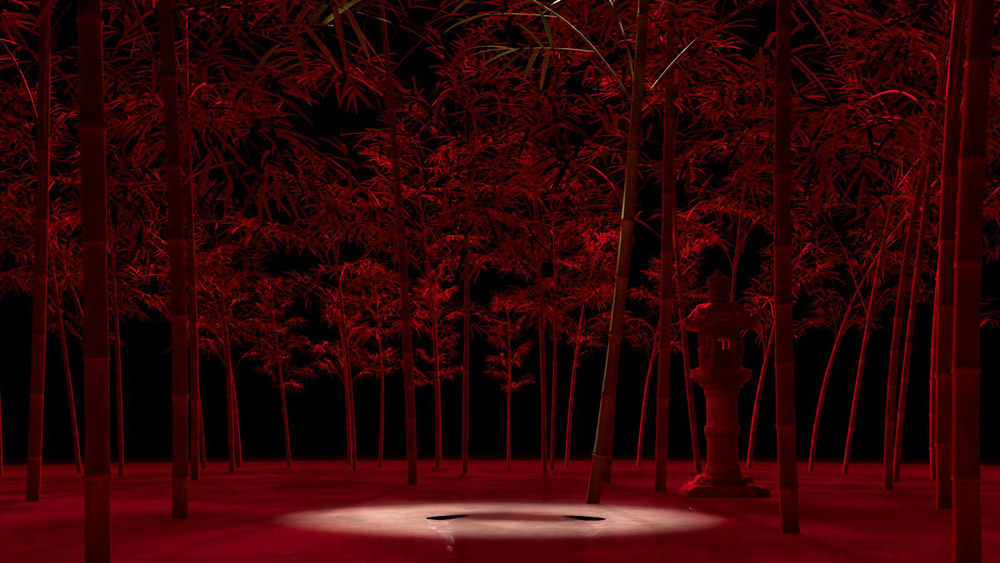
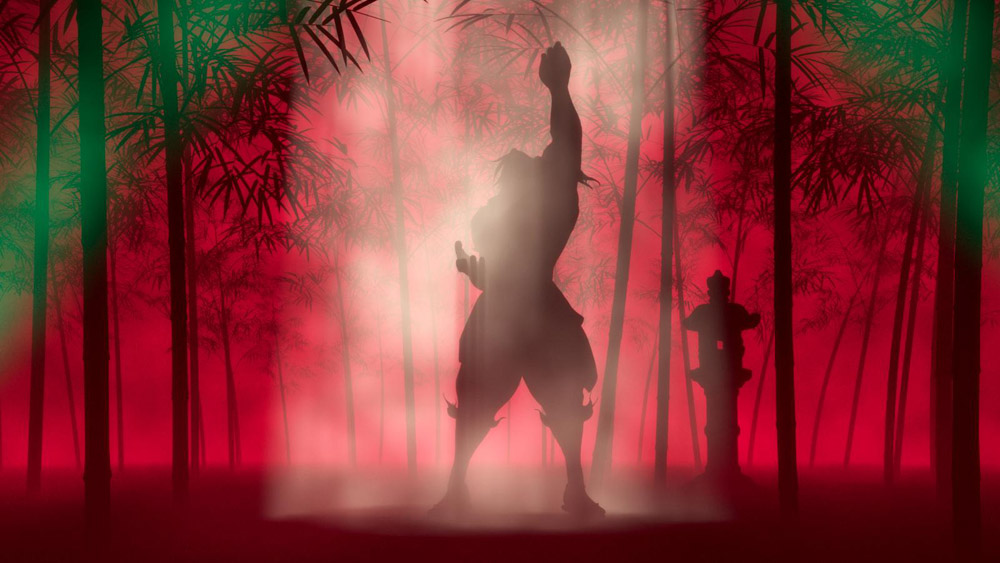
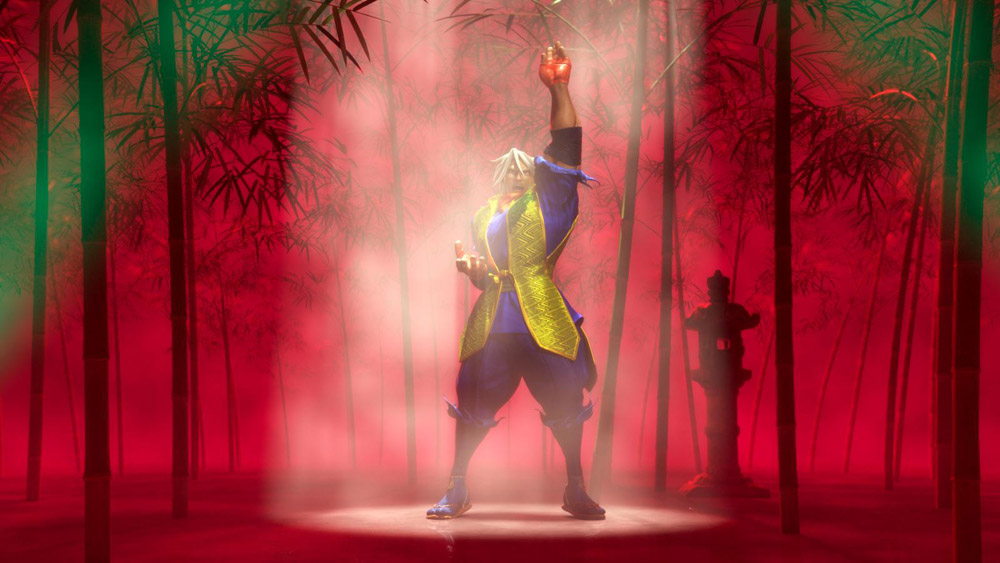
The use of Fog and Smoke was important in order to convey a sense of Stage Direction. VRayEnvironmentFog was adopted as the means of achieving this as it filled the 3DCG space with a 'burning' type fog effect akin to that which can be seen during an actual stage production. Mr. Ueno said: "Although there are plugins that can be used to create a fog effect in lighted areas, these were not used as it made the cinematic feel too 2 dimensional. As we wanted to use a lot of cross-cutting, with the camera moving in front of and behind the action, we needed to be sure that our fog had 3 dimensions. Besides, 'Fog' is defined as a 'fine grained mist covering a whole scene where as 'Smoke' has 'detail and motion'. It was important for the team to understand, and be clear on, the distinct differences between these definitions."
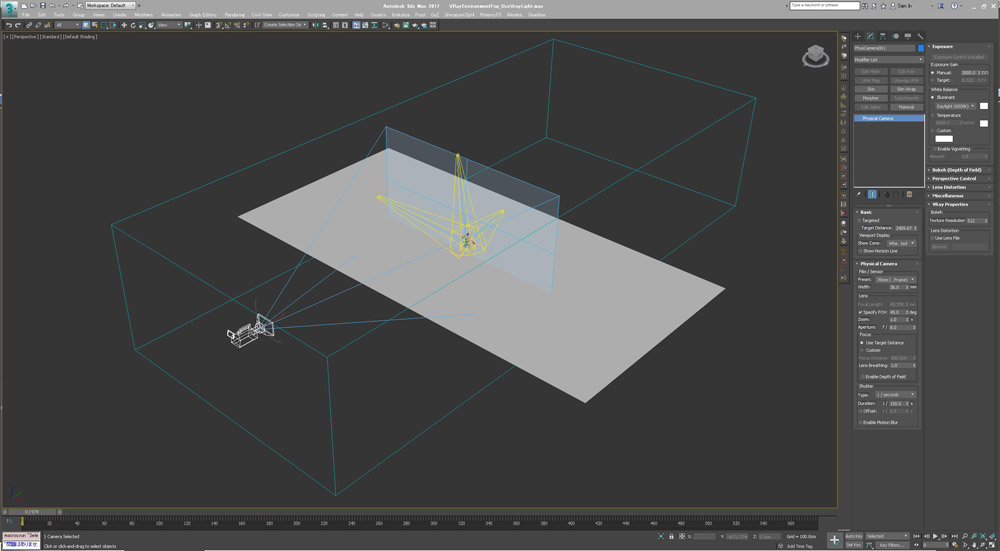

VRayLight was used for the lighting of this cinematic due to the 'directing style' that was required. However, there were two main problems when using this in conjunction with VRayEnvironmentFog. "The first reason was that, dependent on the scene, the cost of rendering the environment was high. Another was a flicker 'bug' which we discovered which we couldn't resolve even when raising it with the company that developed V-Ray. In those instances where V-Ray was not viable, we used 3ds Max standard light" (Mr. Ueno). Due to this, light was chosen based on the best fit for the scene however it was important that the light used didn't appear inferior to that of VRayLight. To this end, two the sets of light textures were overlaid so as to create a solid spot-light beam.
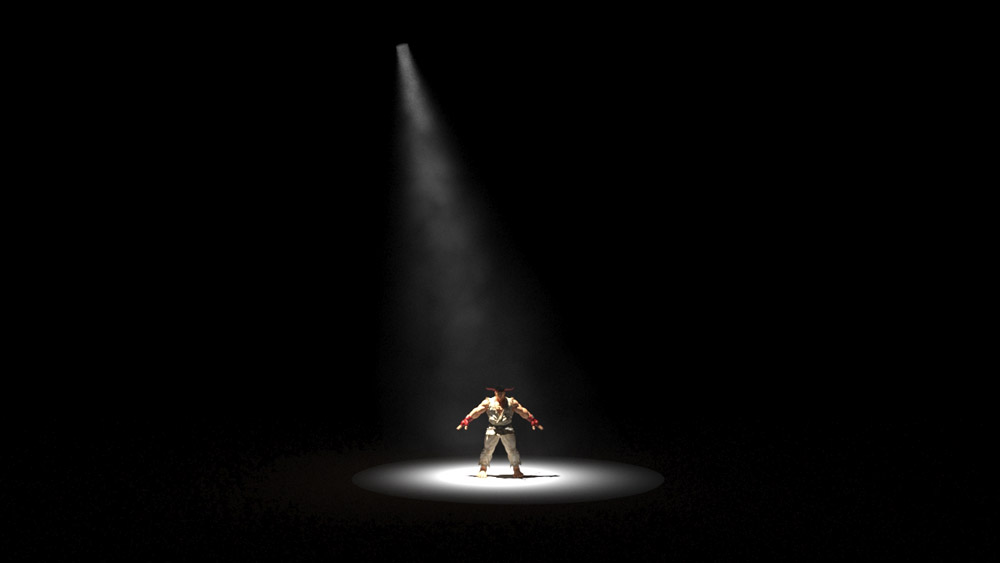
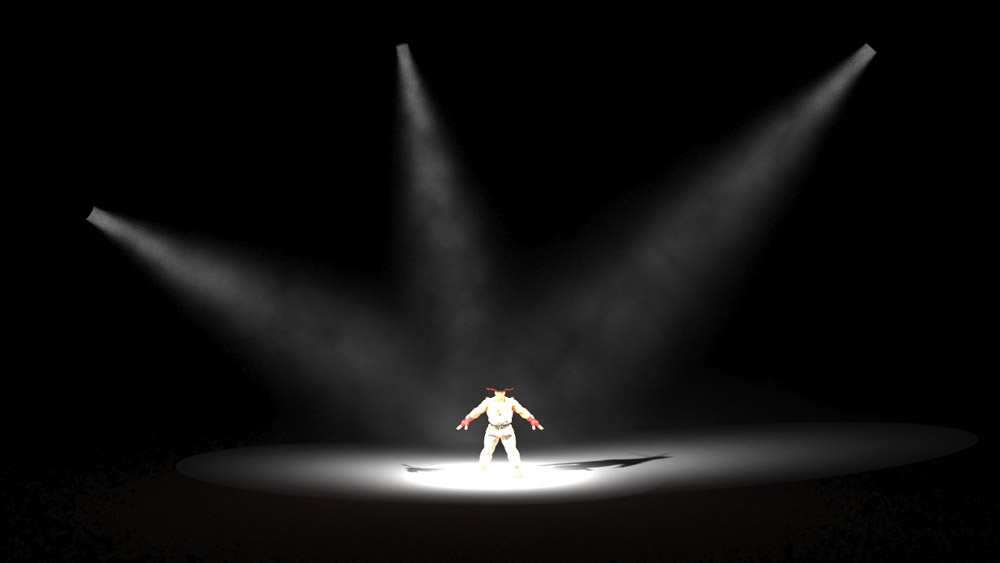
・Device to make the spotlight's core

Spotlight illuminating fog using VRayLight. A bright 'core' can be seen at the center of the light.

The techniques used for the floors, fog and light, as described above, then needed to be combined so as to elaborately build up each scene. The was done so as to adequately achieve the principle of 'as on stage so to in image' and that the cinematic would be akin to a real stage show. In order to get an understanding for the transitions between the component scenes, Mr. Komori designed a composition table and shared it with the team. This table summarized the flooring type, the fog/smoke effect and the lighting guidelines for each scene. "Based on this composition, I was able to discuss with Mr. Komori on how the images would develop and whether or not the lighting could be reproduced / could transition through the stages" (Mr. Ueno)
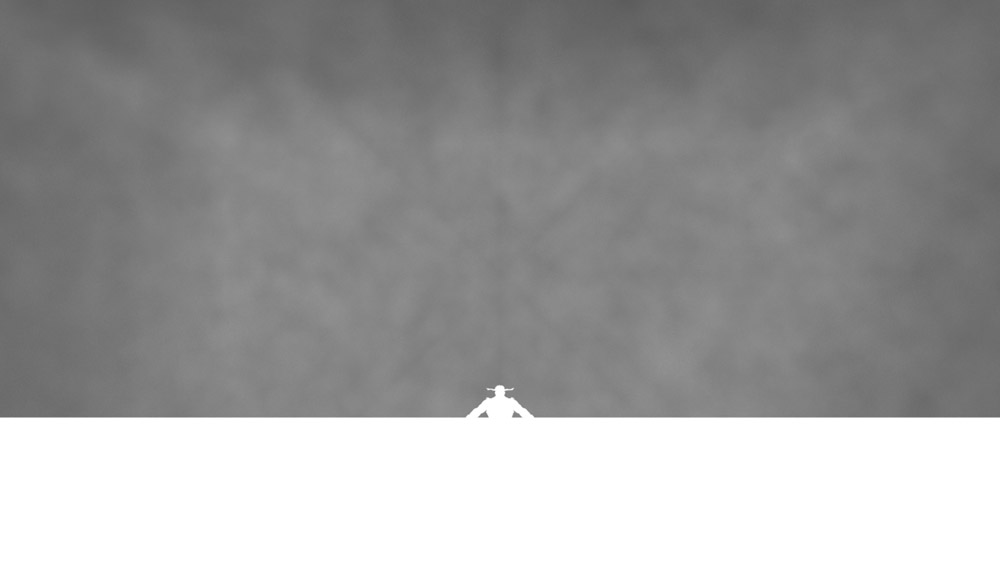
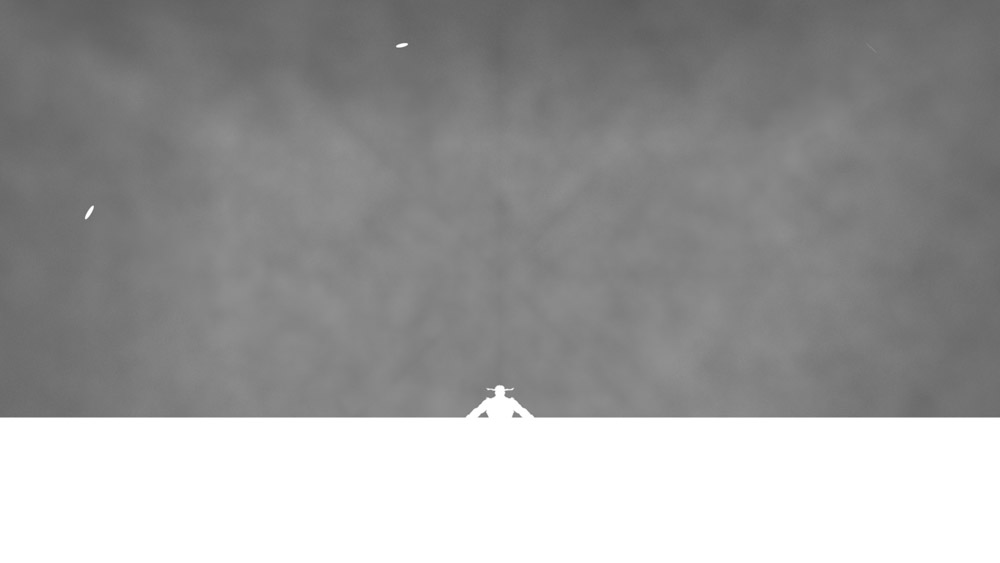
・Lighting designed as if it were on stageThe transition scene between the profile of Ryu's face and the appearance of Chun-Li. This scene was directed so that a silhouette of Chun-Li initially appears as an actor would from the side of a stage. The reflecting floor and use of back lighting where used to emphasis this effect.
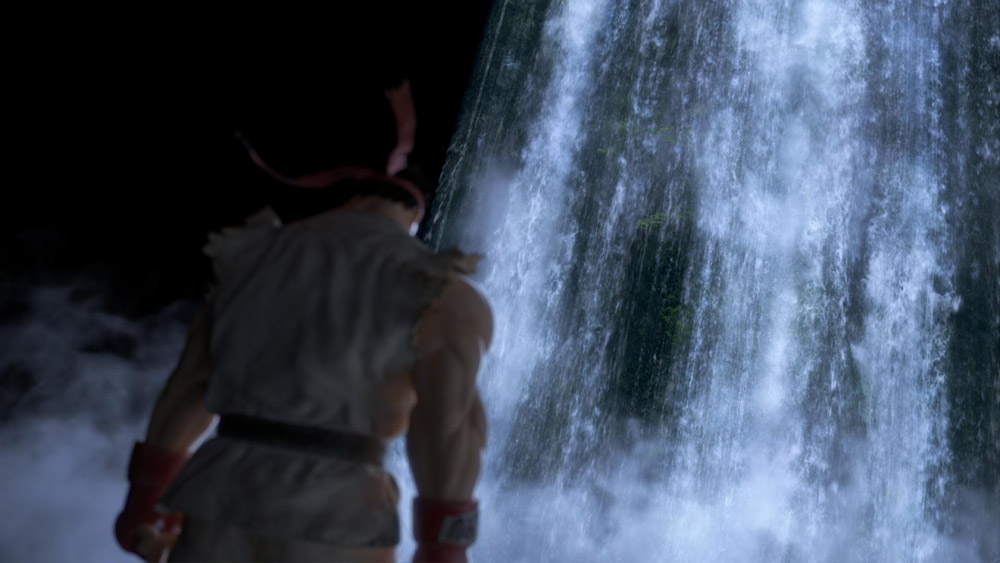
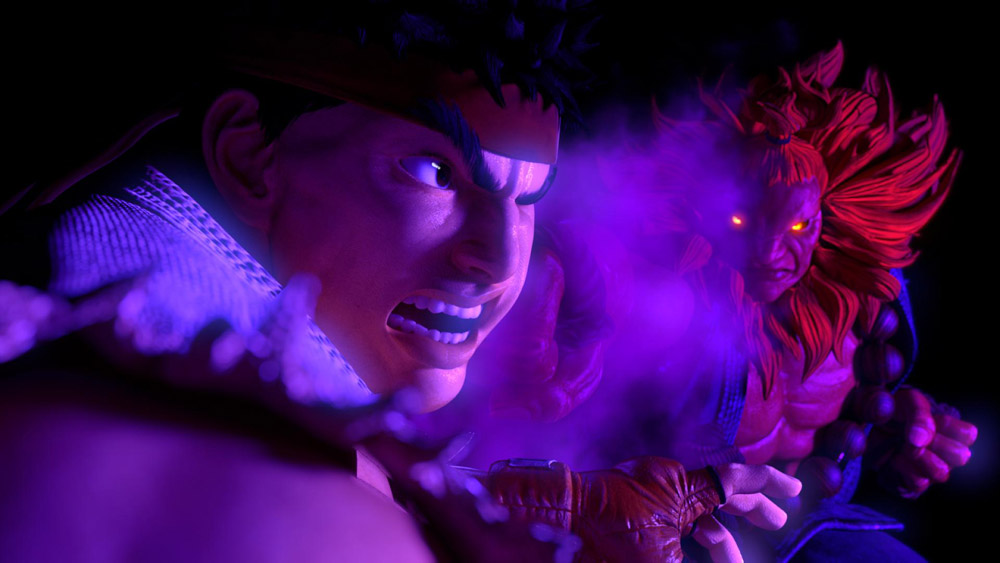
An example of the scene composition which is meant to give the illusion of a stage production. Left: This image shows a live action image of a waterfall, captured in high resolution, which has been projected on to a polygon plane which acts like a screen. / Right: "Shun Goku Satsu", Gouki's special move, is a representation of the character's in game move. The lighting effect is achieved by blinking the light source as a strobe.
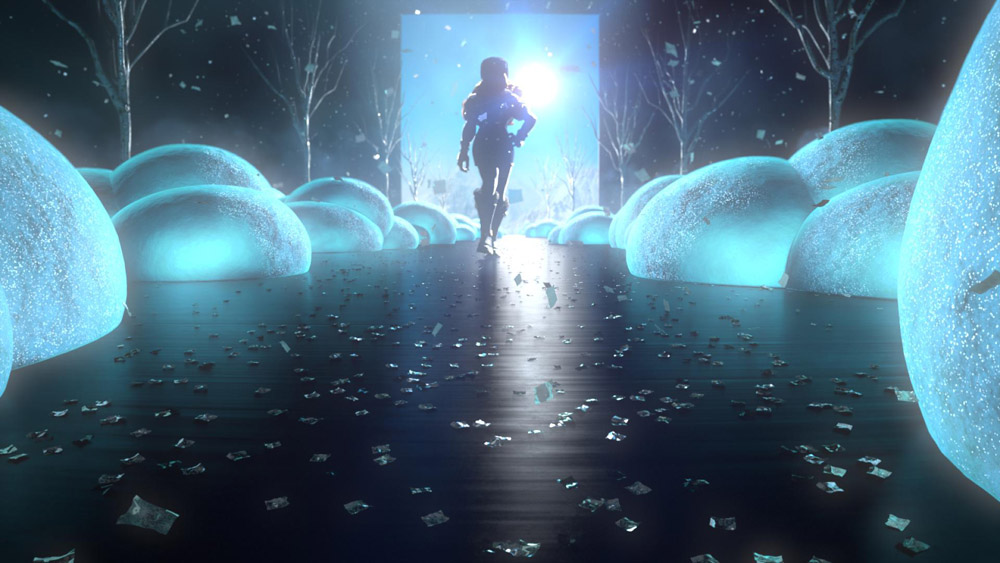
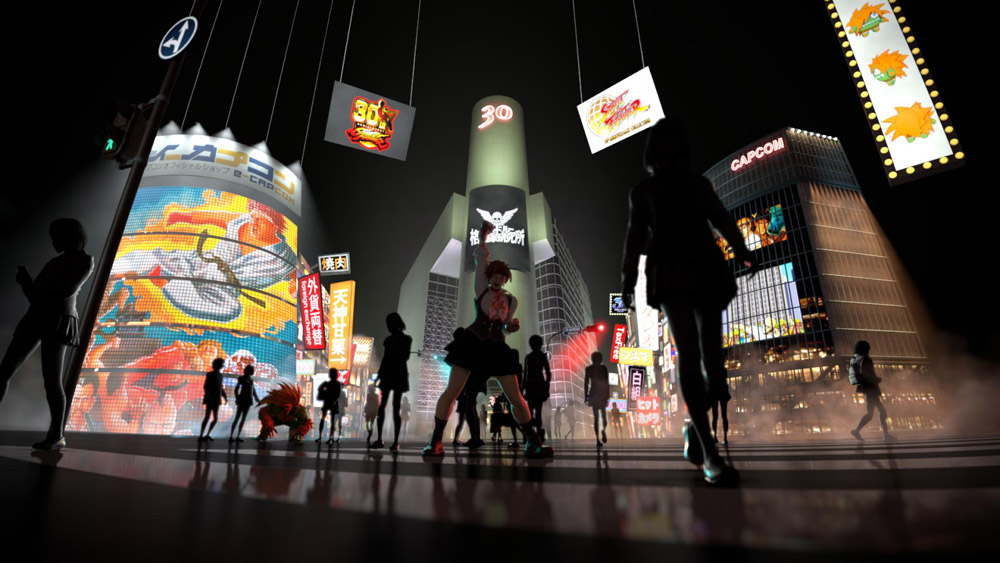
Left: The image shows the main light source for Kolin as appearing behind her. Snow shaped lighting objects run alongside here giving the appearance of a runway / Right: The Shibuya set highlighted behind Sakura's distinctive pose. This scene further gives rise to the illusion of a stage show through the use of sign boards hanging from piano wire.
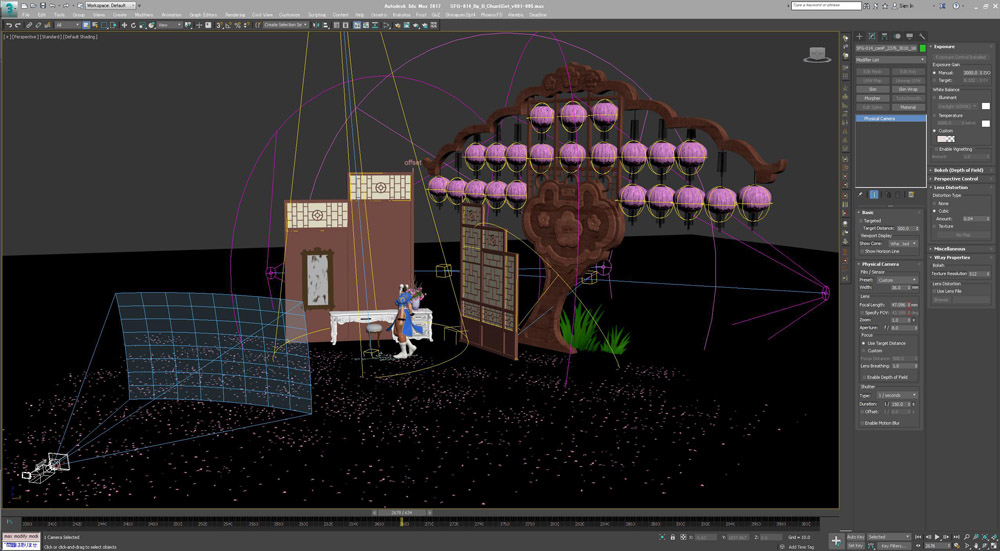
Due to the need to compile a large amount of data at the Look Development stage the team needed to prepare a system which allowed for independent work to be consolidated into a single file. "We prepared the 3ds Max lighting environment in advance, which acted as the base for each scene, and compiled the NUKE composite file. Even though there were many people working on the same scene, we could start from the same base platform. This meant that there is wasn't too many lighting issues or composite gaps and the files could be could be integrated smoothly." (Mr. Ueno) In addition to this, the team further organized their work by leaving explanatory, color coded, notes, so that new teams working on the project understood the contents easily.
・NUKE Software Composite
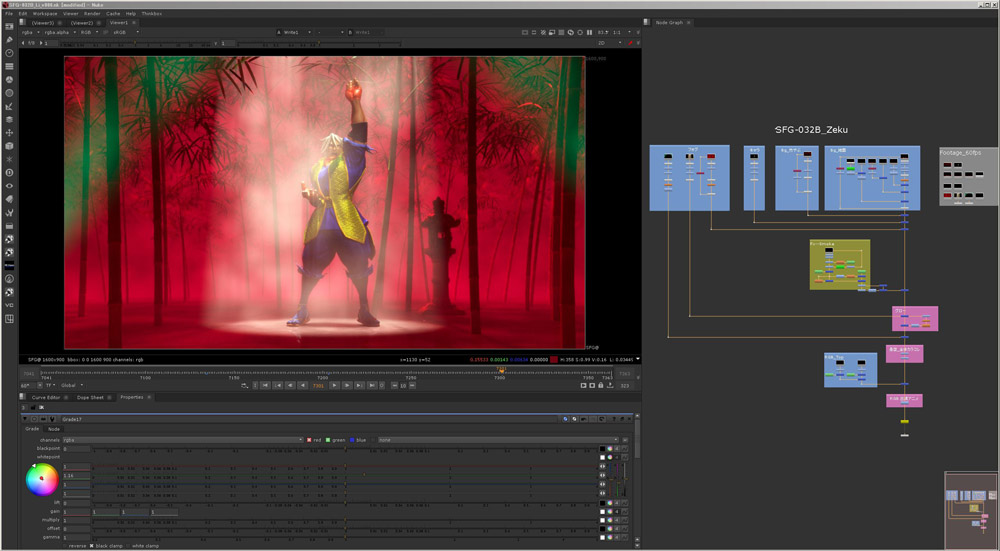
NUKE's Composite Screen

Left : Background material , Right : Character material
Left: Fog Material , Right : The Final Composite Image
・From RGB lighting to the Sun
The introduction of a series of stages with impressive directing work. The scene transitions from the introduction of the 3 'Final Fight' characters to the appearance for Sagat. The light from each character, Zeku (Red), Abigail (Green) and Codi (Blue) overlaps to form a shining white orb. As the camera pulls away, this light source changes to that of a sun lighting both Ryu and Sagat as they appear for their confrontation.
next page:
<3>Smooth Scheduling Progress Due To Defined Milestones.