'Street Fighter V Arcade Edition' was released as an updated version of 2016's 'Street Fighter V' on Thursday 18th January 2018. The beautiful opening cinematic garnered enthusiastic worldwide support and showed 18 characters showing off their unique traits in distinct locations. This time, we will be looking into the use of Look Development which enabled the stage like production of the animation. We will also look at production process which enabled the smooth running of the project.
TEXT_UNIKO
EDIT_Hitomi Komura(CGWORLD)
PHOTO_Mitsuru Hirota
TRANSLATION_Shirogumi Inc. / Atsuko Mihara / Edward Carson
the Japanese version is available from following link.
https://cgworld.jp/interview/201804-sfvae-op3.html
Related articles
・Fans Around the World Went Wild for the Opening Video of Street Fighter V Arcade Edition. How Did Shirogumi Respond to Capcom's Requirements?
・A Love of the Games and a Flexible Environment Made the Characters Shine - Character Development Workflow, Street Fighter V Arcade Edition Opening Movie
Street Fighter V: Arcade Edition - Cinematic Opening
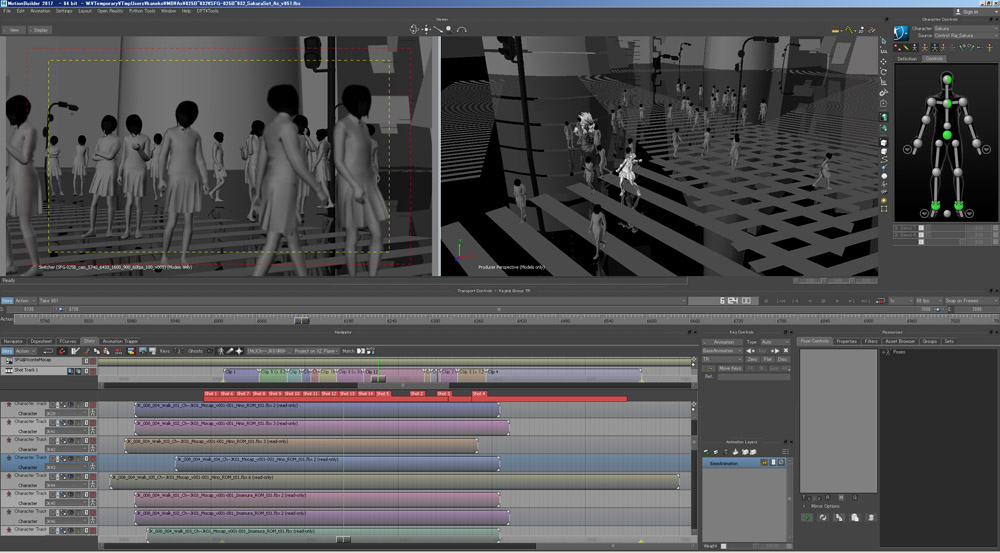
<1>MotionBuilder's Stress Free and Efficient Animation
As before, Motion Builder was used to layout the progress for this project. It was also used for the animation process when laying out the data assets and motion capture. Mr. TOMOAKI KANEKO, who was in charge of the Animation and visual effect designer in Shirogumi, explained: "MotionBuilder was used to build the animation and we tried not to use 3ds Max. Motion Capture was processed and revised so as to capture small details. We were also able brush up on the lay out and camerawork as well as add a sense of finesse to timings and poses. 3ds Max was used only for the facial animation and quivering effects.
-
-
Tomoaki Kaneko
Visual Effect Designer, Shirogumi Inc.
One of the biggest reasons for choosing MotionBuilder though was its real time ability to show floor reflections during work. This added to the efficiency of the project and a, director Mr. YOSHIHIRO KOMORI noted, "This was convenient because you can check the reflection at the same time as adjusting timing details. You can't get a sense for the layout until there is a floor reflection to work with."
-
-
Yoshihiro Komori
Director and CGI Supervisor, Shirogumi Inc.
The above layout shows the series of scenes which takes place between the distinctive cross-cut from Ryu and Laura's scene to Sakura and Blanka's. Layout ( Upper), Animatics( Middle), Animation (Bottom). At this stage of the design, you can see all the necessary elements for the transition sequence, these being ground reflections and splash effects, are included.
The sway effect of Blanka's hair was animated manually, as well as by using spring function, through 3ds Max. 'StreamDriver', an original tool of Shirogumi's, was used to animate the bunches of his hair. It also required manual adjustment when finetuning it according to the camera angle.
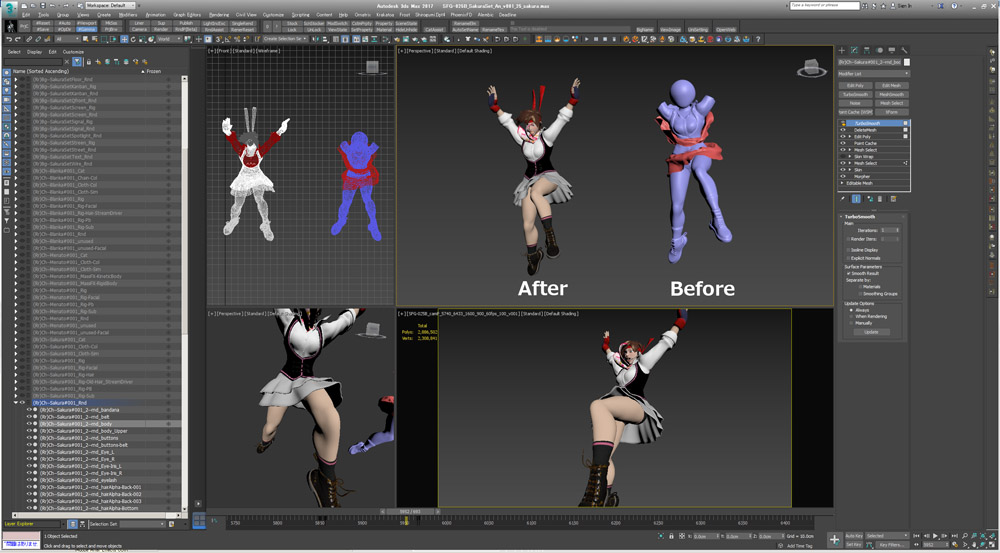
When simulating the sway effect of Sakura's skirt, a Skin Wrap modifier was used in order to calculate results against a simulated model. However, during the scene where Sakura does a super human jump into Shibuya the calculation originally failed. As such, the simulation for the calculation had to include a lower height restriction. With the point cached, it was then blended against the mesh of Sakura's skirt.
・Sway effect settings
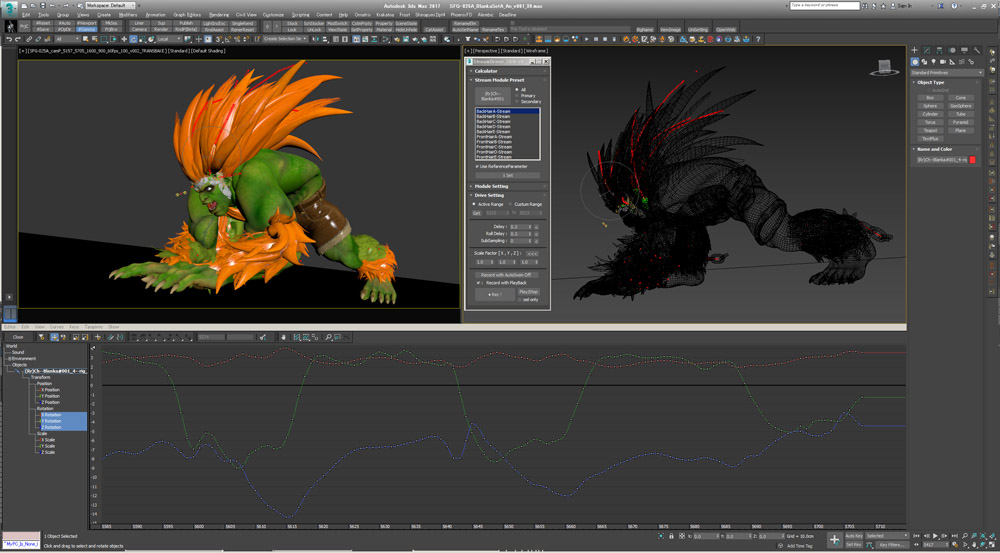
With reference to the spring motion animation effect for Blanka's hair, the above screenshot shows that this was done using Shirogumi's bespoke tool 'SteamDriver'. It was then adjusted manually depending on the camera's point of view.

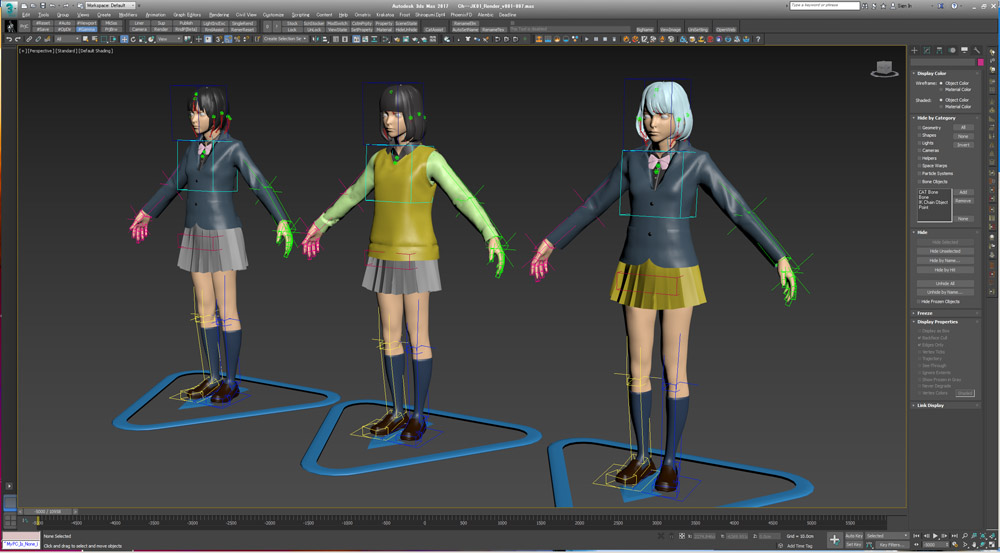
Further to the 'Shibuya Jump' scene, Mr. Kaneko was said that he was deeply attached to this scene which shows a mob of high-school girls at Shibuya Junction in Sakura's background. He stated, "[i]t is hard to see in the finished cinematic, as the models appear as silhouettes, but 3 types of templates were prepared with visual variation increased using different clothing, hair-styles and props: such as handbags, smart-phones and headphones. This was actually the hardest part of the scene as it required loading temporary models into the motion clip one by one: with standing positions, and motion timings, adjusted individually so that the similarities were unnoticeable."
・Mob animation for the High school girls in Shibuya
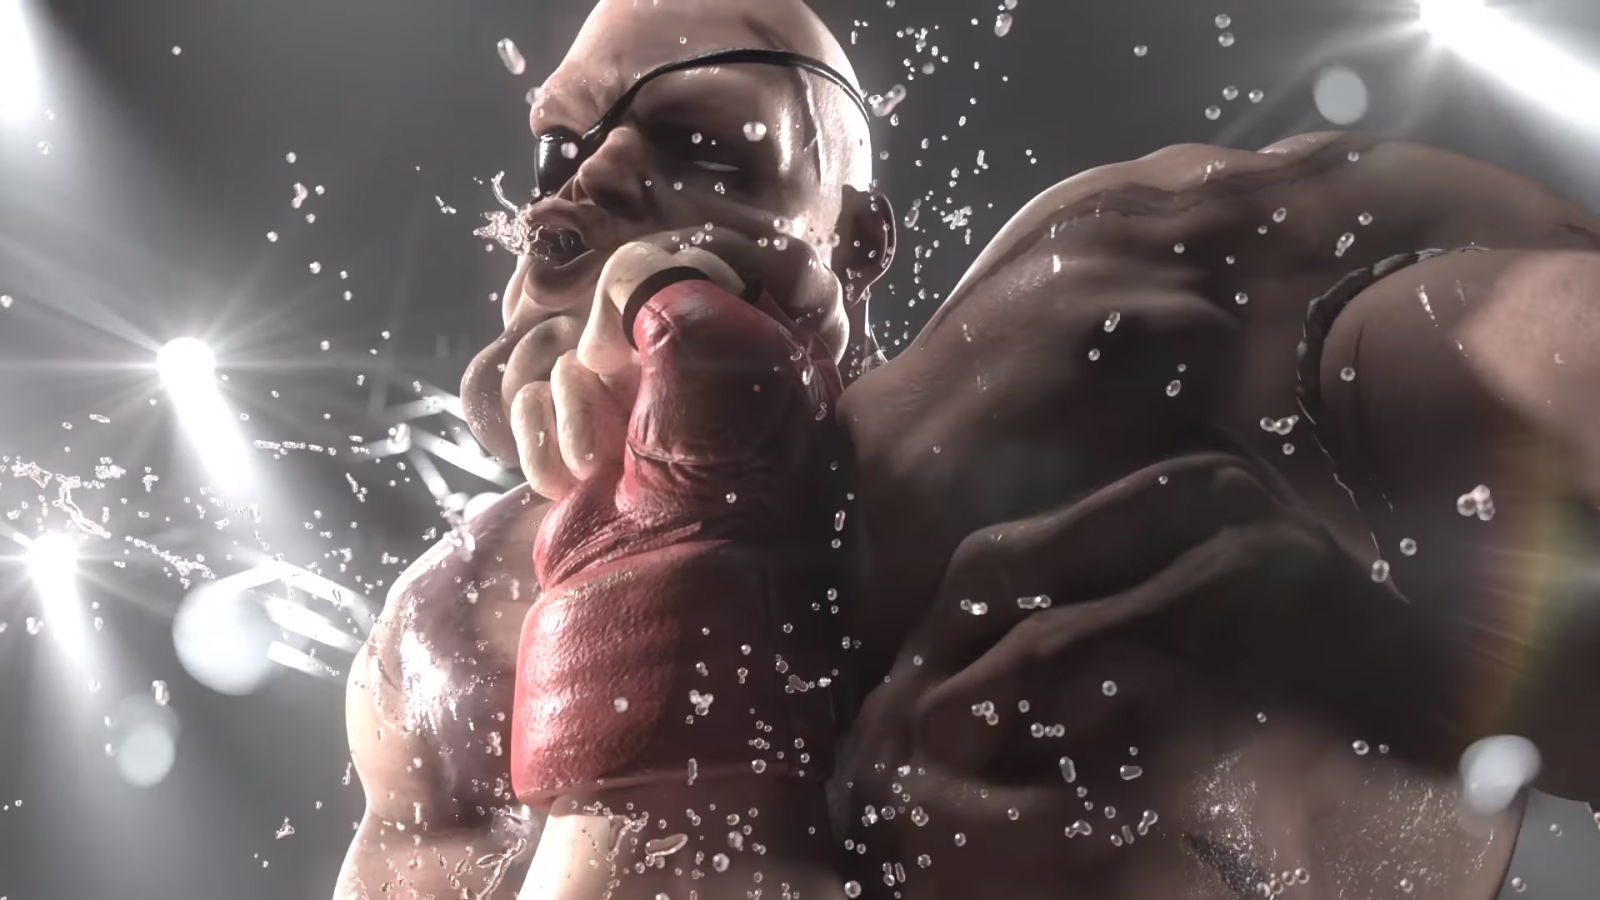
During the cinematic's climax fight between Ryu and Sagat, an impressive amount of work was put into animating Ryu's fist sinking into Sagat's torso. Mr. Hikaru Nirasawa was in charge of Character making and created the animation which detailed the muscle wave effect.
-
-
Hikaru Nirasawa
Visual Effect Designer, Shirogumi Inc.
In order to achieve this effect, the muscles of Sagat's body were prepared as distinct morph targets, separated by muscle type, movement and skin change, before being pulled together. Starting from the upper left picture, the sequence shows the movement of each major muscle (eg: pectorals), the whole body moving due to the initial impact and the sag of the skin. From the bottom left, the pictures show the rough moving of the rig for the SHORYUKEN shot, the caused by the punch and the second impact when Ryu's fist impacts Sagat's breast. The sequence was made using MassFX and Flex with the exception of the lower left image which was made with rig.

The above targets were created using Morpher. By converting Morph targets into cached objects, it was possible to control the usage and timing of each element. The ripple effect of the skin, due to the shockwave caused by the impact of Ryu's fist, was then added in order to corollate with the depth his punch.


next page:
<2>Look Development to Stick to the way of Stage Direction