17-BIT, an indie game studio founded in San Francisco and now based in Kyoto, Japan. Their VR title "Song in the Smoke" released last year is an ambitious work that was released simultaneously on PSVR and Oculus Quest. We would like to introduce their technical challenge.

Information
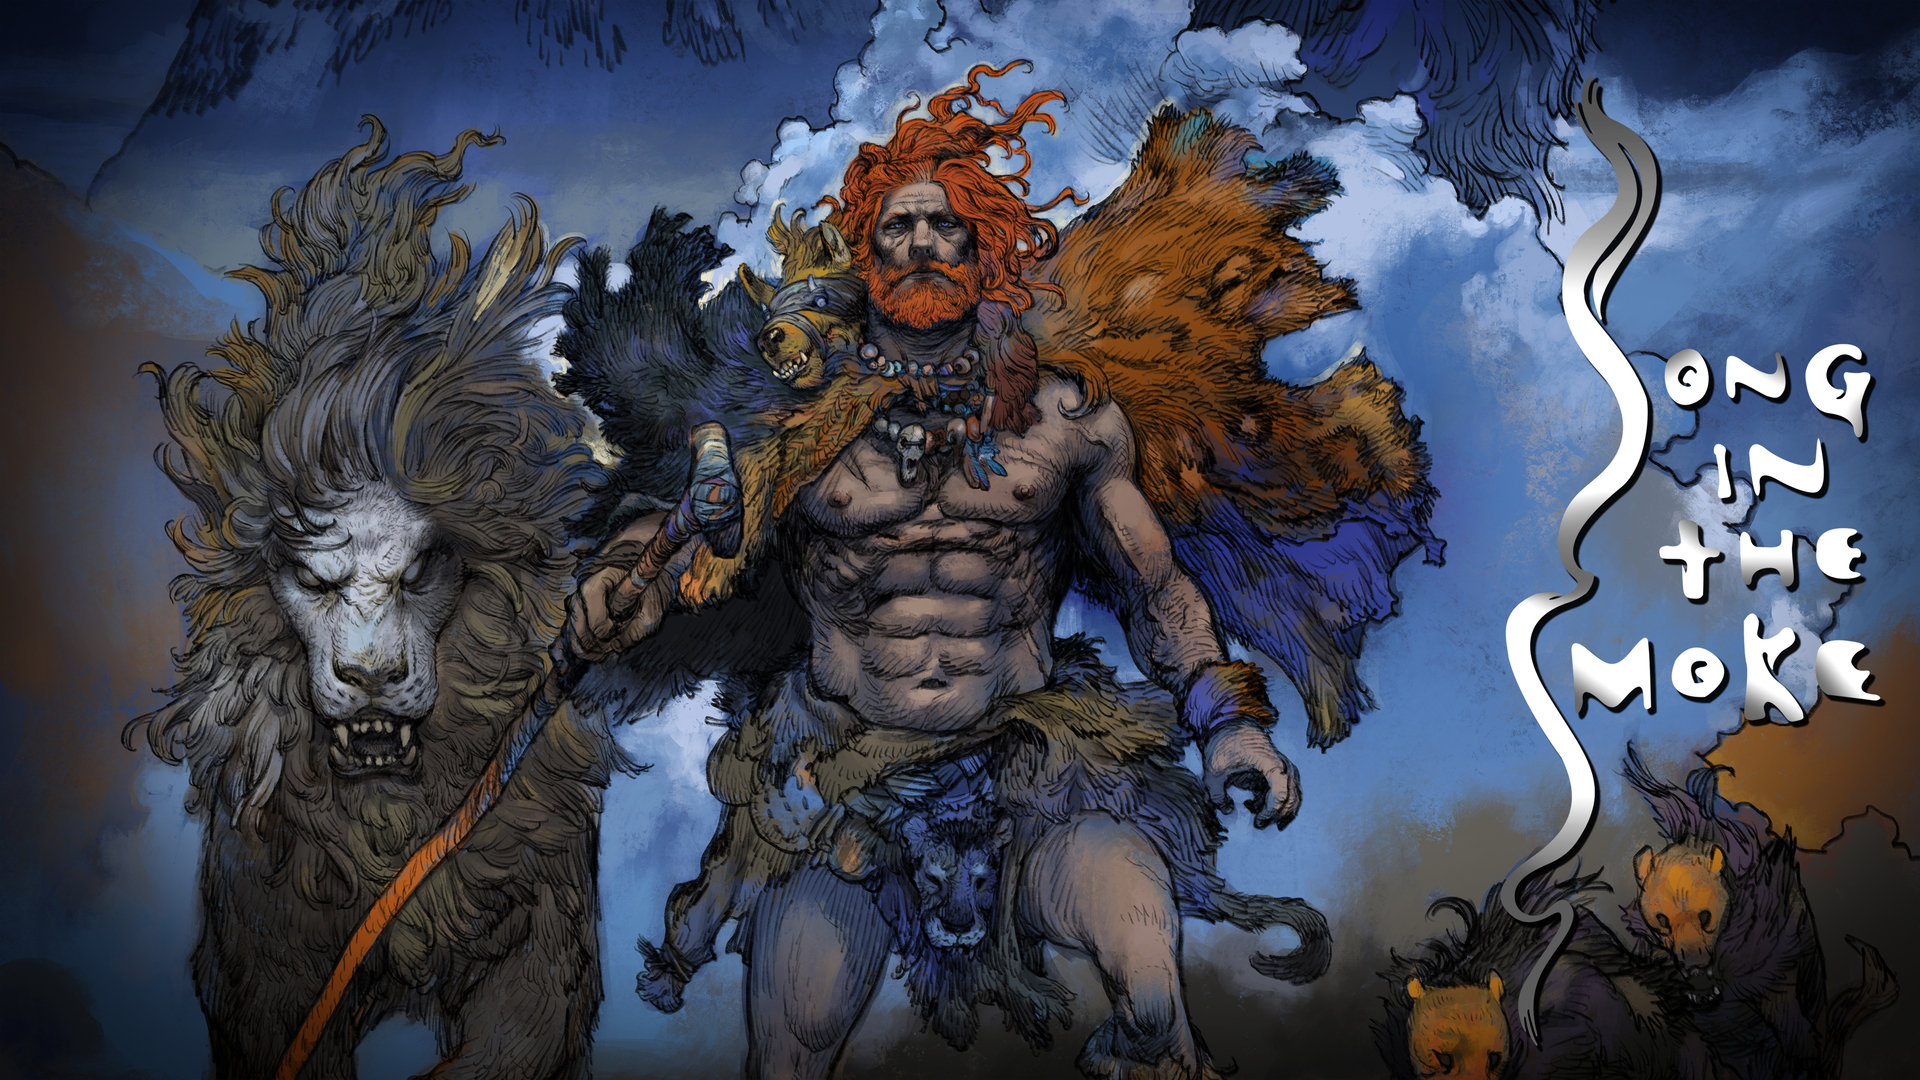
Song in the Smoke
Sales and development: 17-BIT
Price: 2,990 yen
Release: Now on sale
Platform: Oculus Quest, Oculus Rift, PlayStation VR
Genre: Action Adventure
www.songinthesmoke.com
Staff

Colin Williamson
Lead Technical Artist
17-BIT

Koichi Yamagishi
3D Artist
17-BIT

Alex Miyamoto
Lead Engineer
17-BIT
High-spec version and mobile version developed in the same UE4 project
Song in the Smoke is a VR survival game made by 17-BIT in Kyoto, made in Unreal Engine 4 by a team of 13 full-time developers. At the start of the project, the target platform was PlayStation 4 and PC, but halfway through development we also added Oculus Quest as a target platform, and were required to simultaneously release on both platforms.
Our challenge was to take a high-spec game, remake all of its visual assets for low-spec mobile VR, keep all of the data inside the same Unreal Project without the need for another branch, and ship 3 versions on the same day! Many teams will complete their high-spec version and then move on to mobile VR ports later, but this article is here to help teams who are trying to ship high-spec and low-spec UE4 games at the same time.
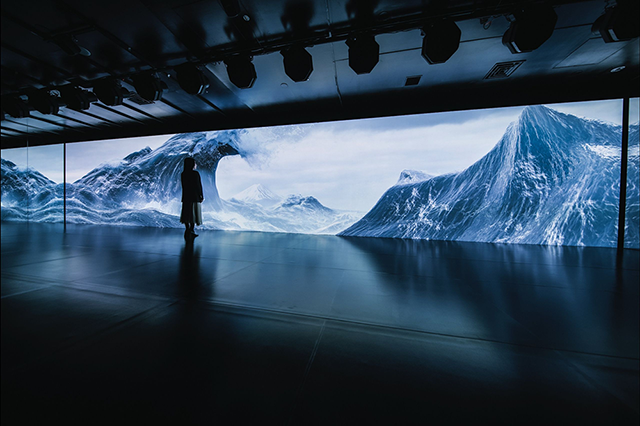
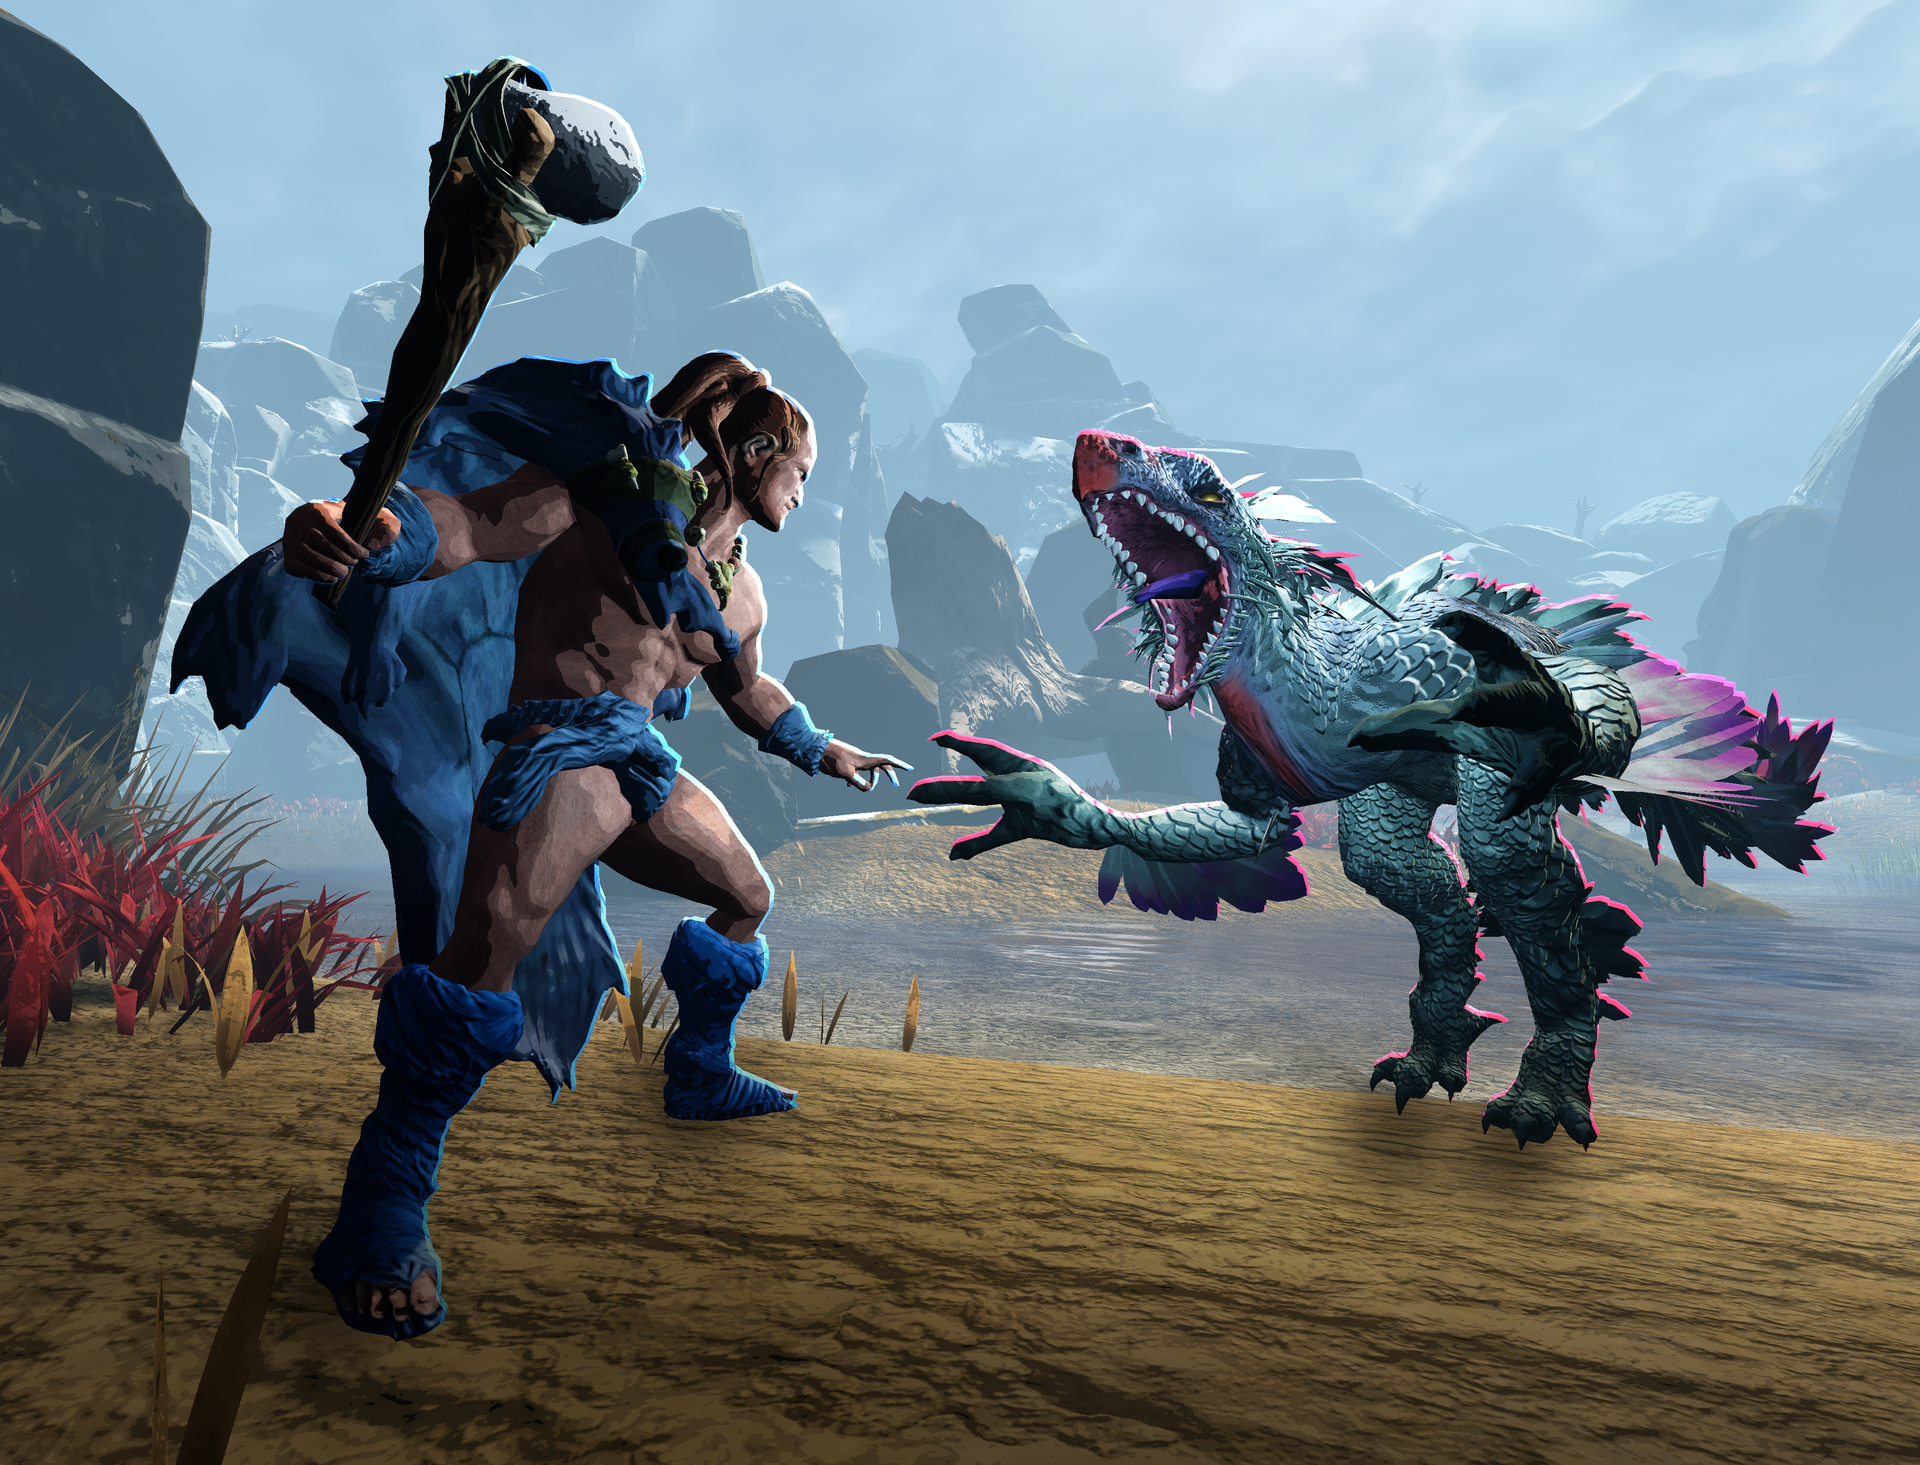
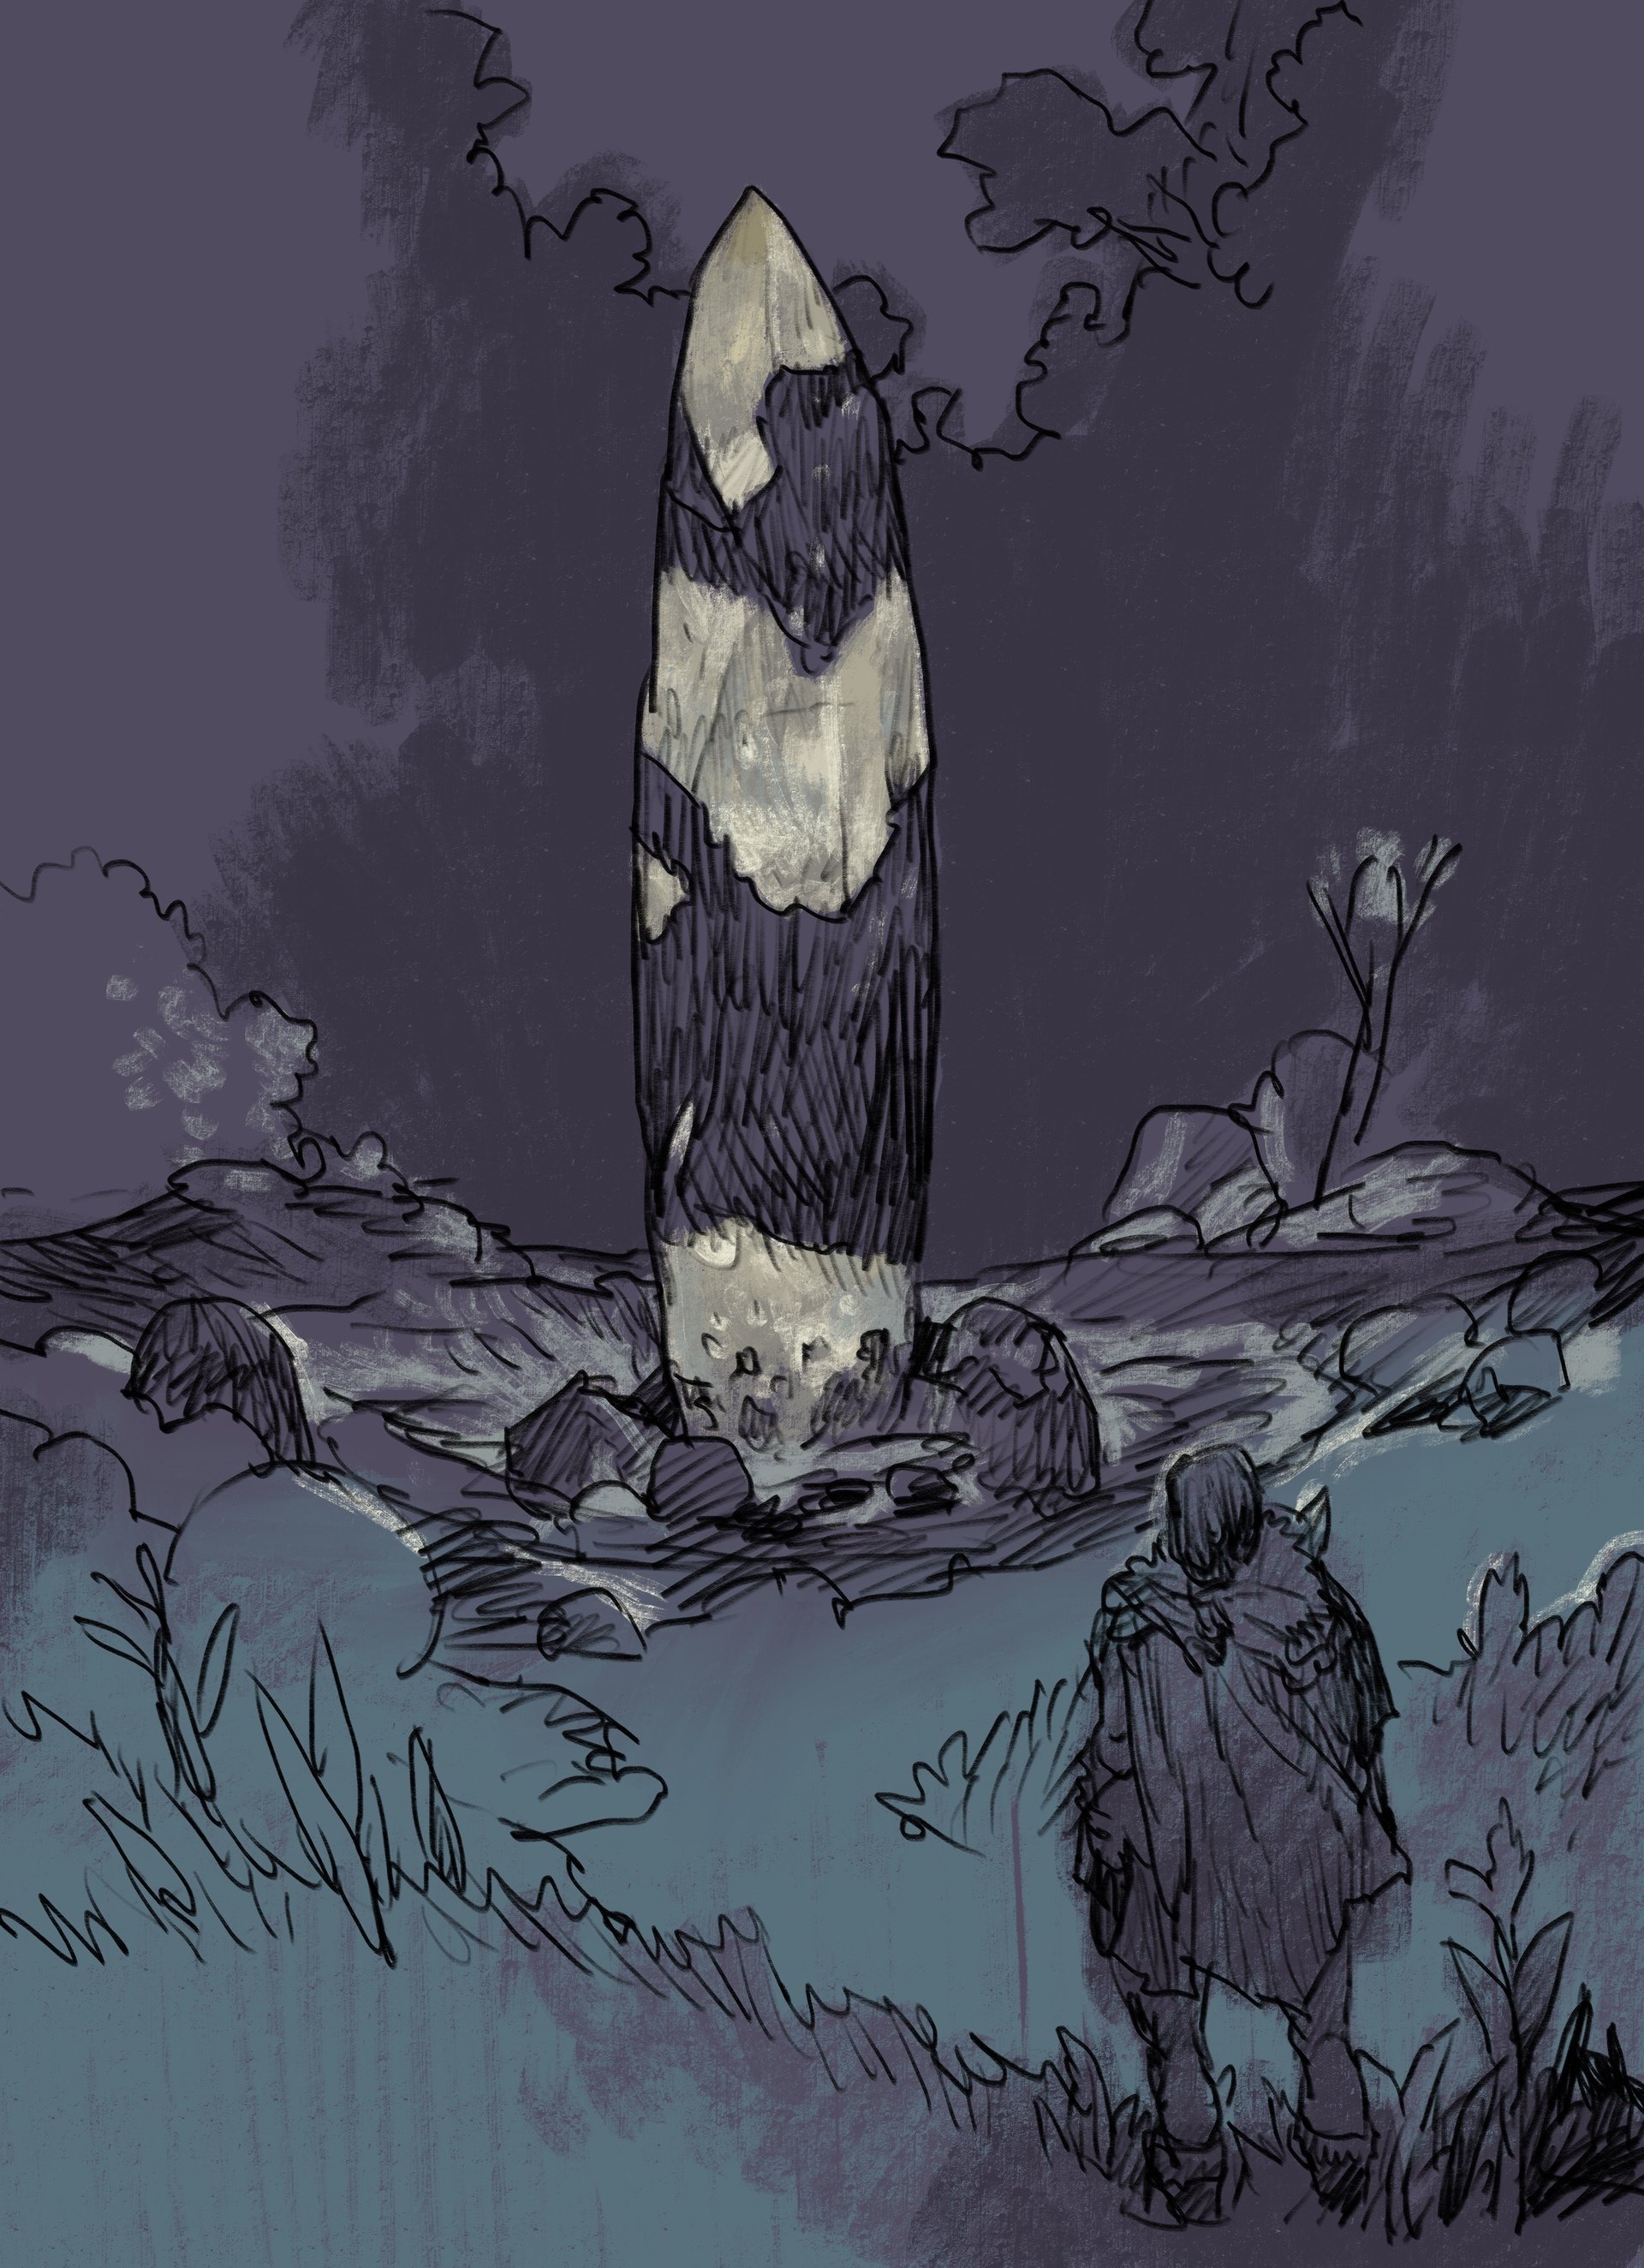
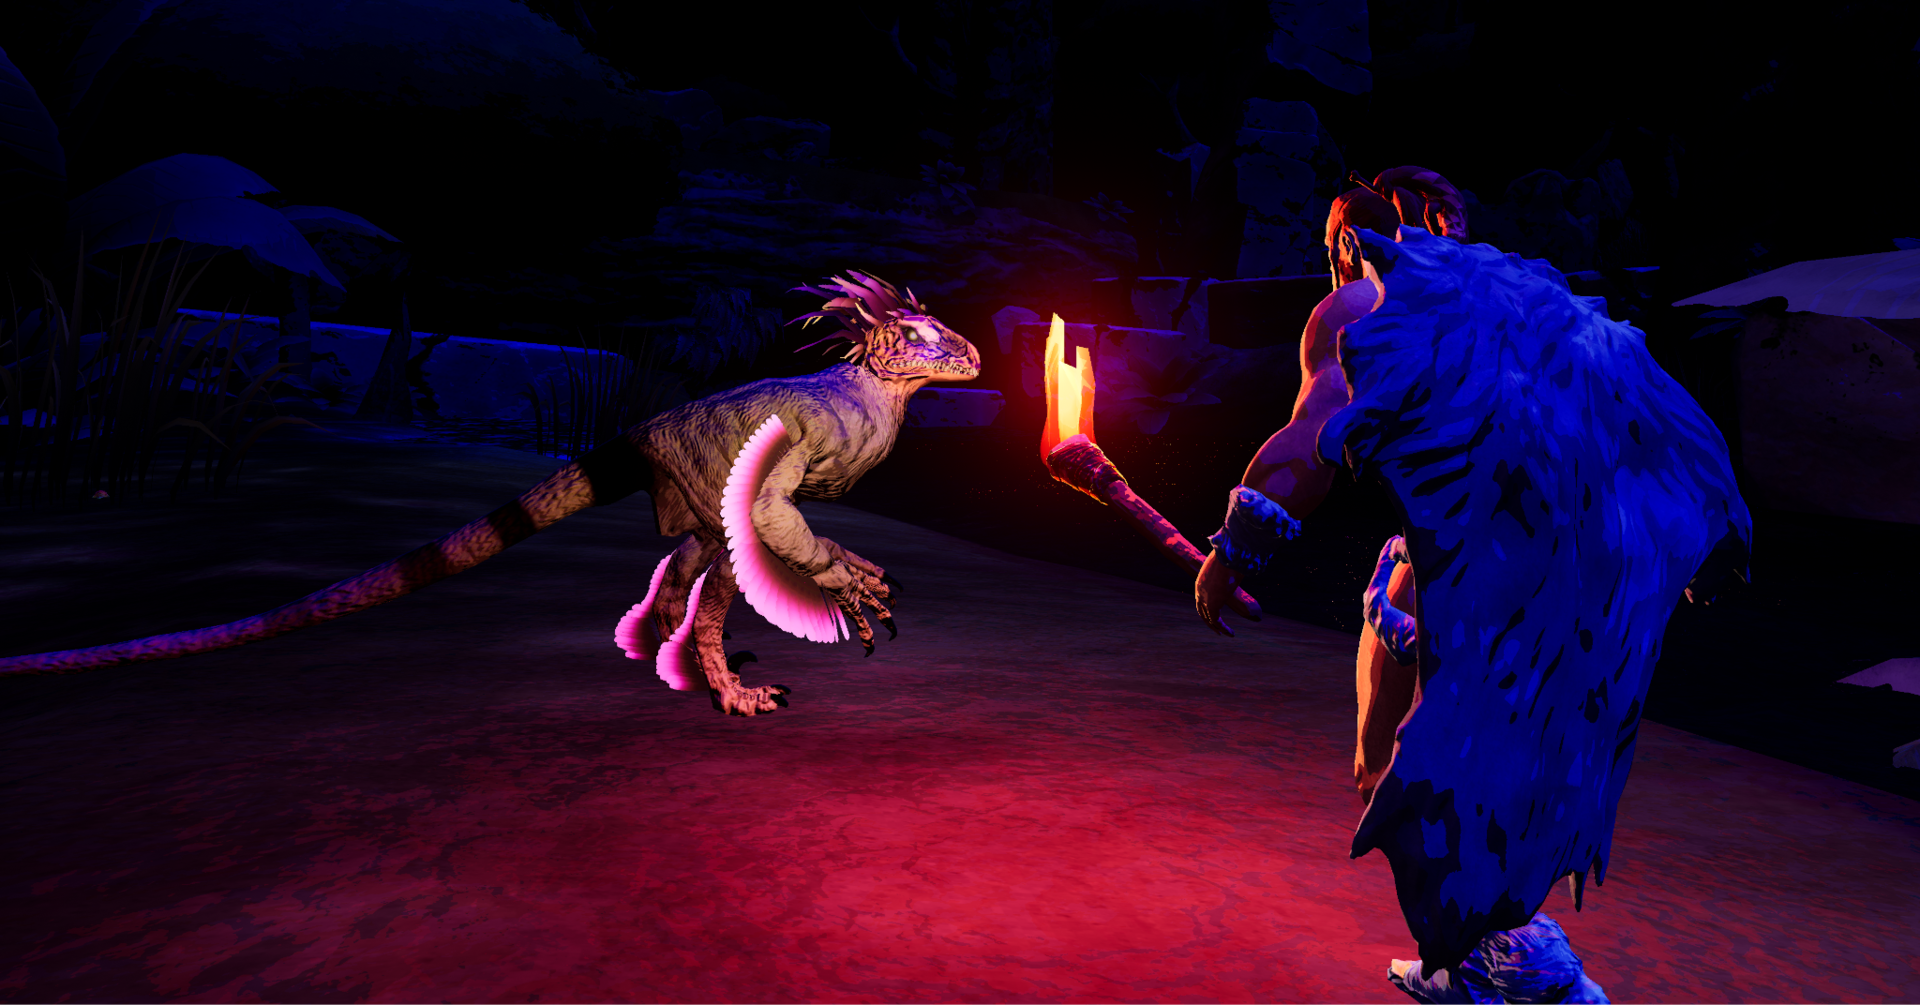
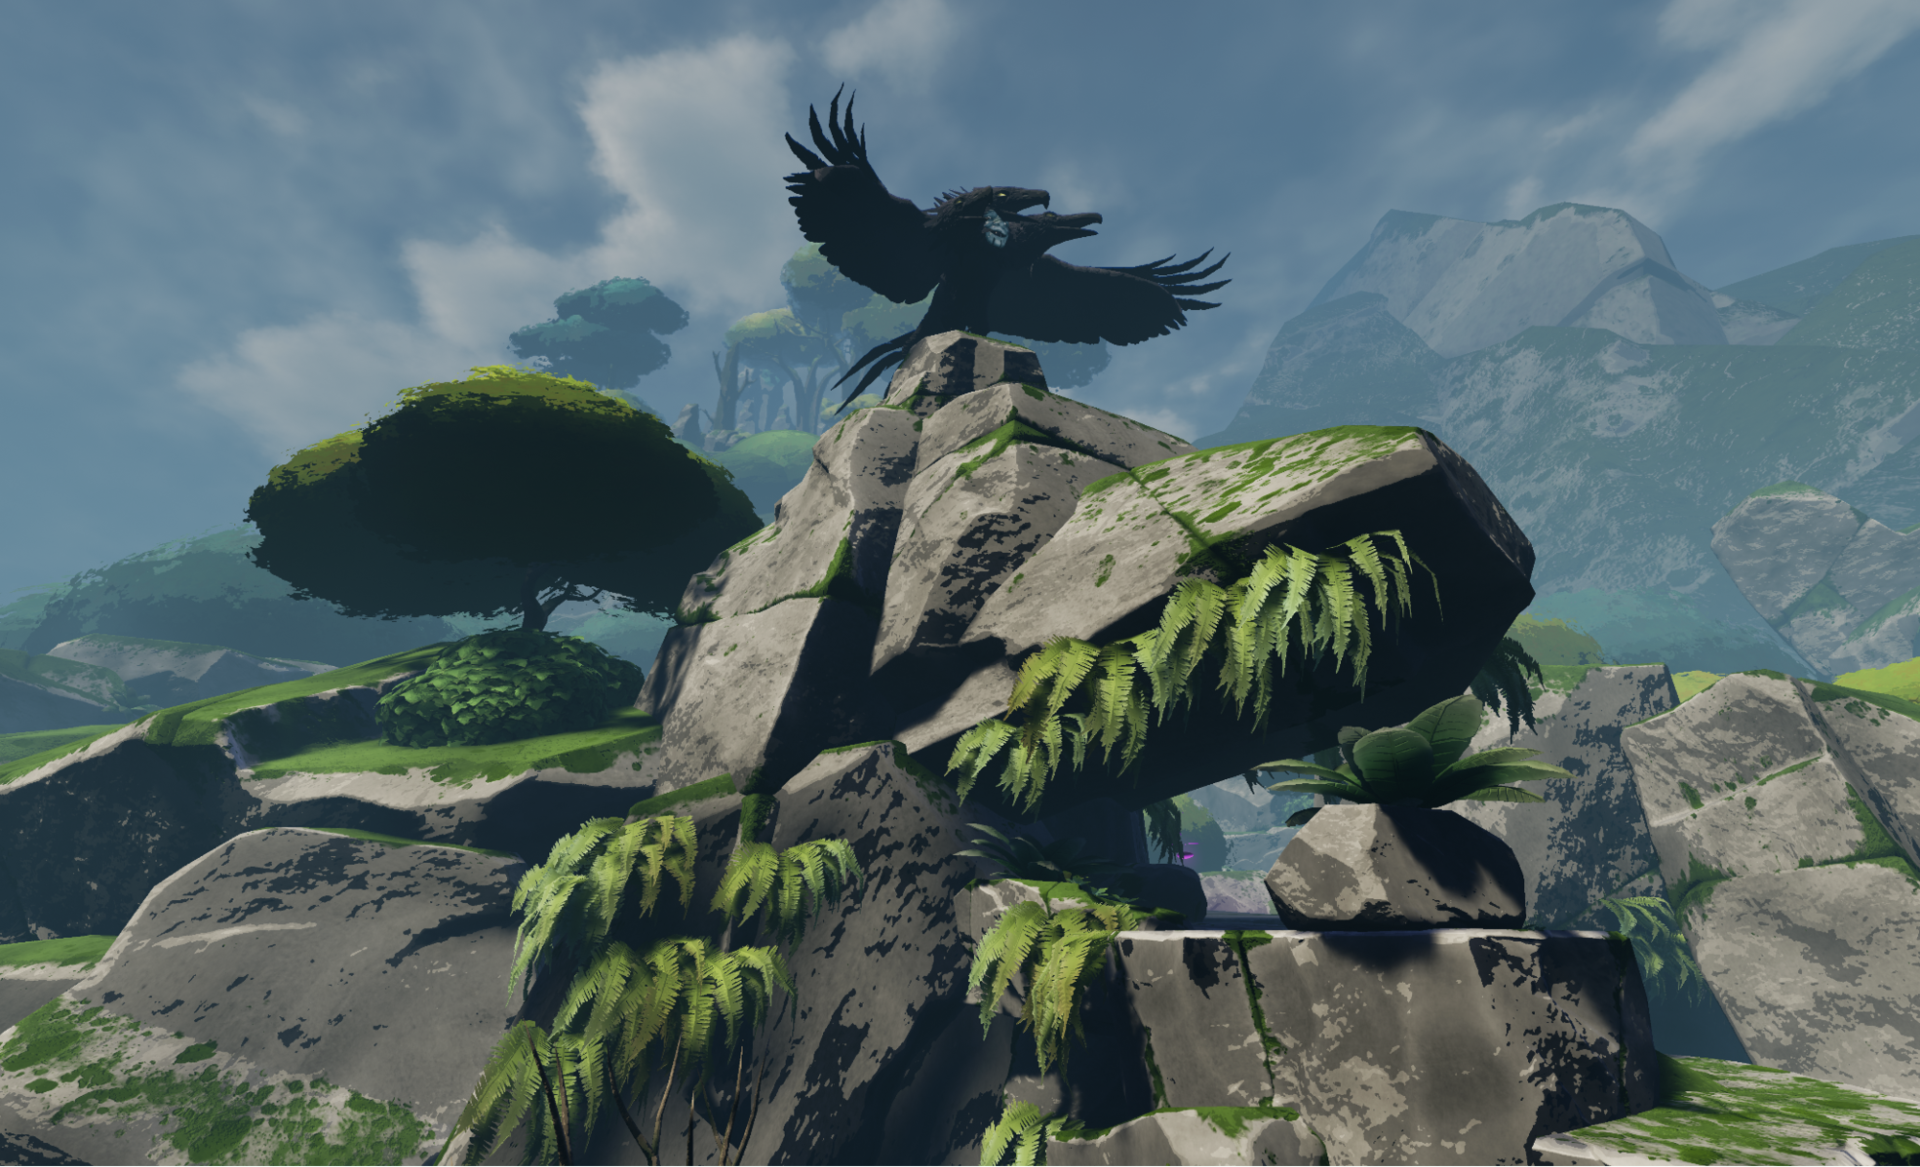
What is Song in the Smoke?
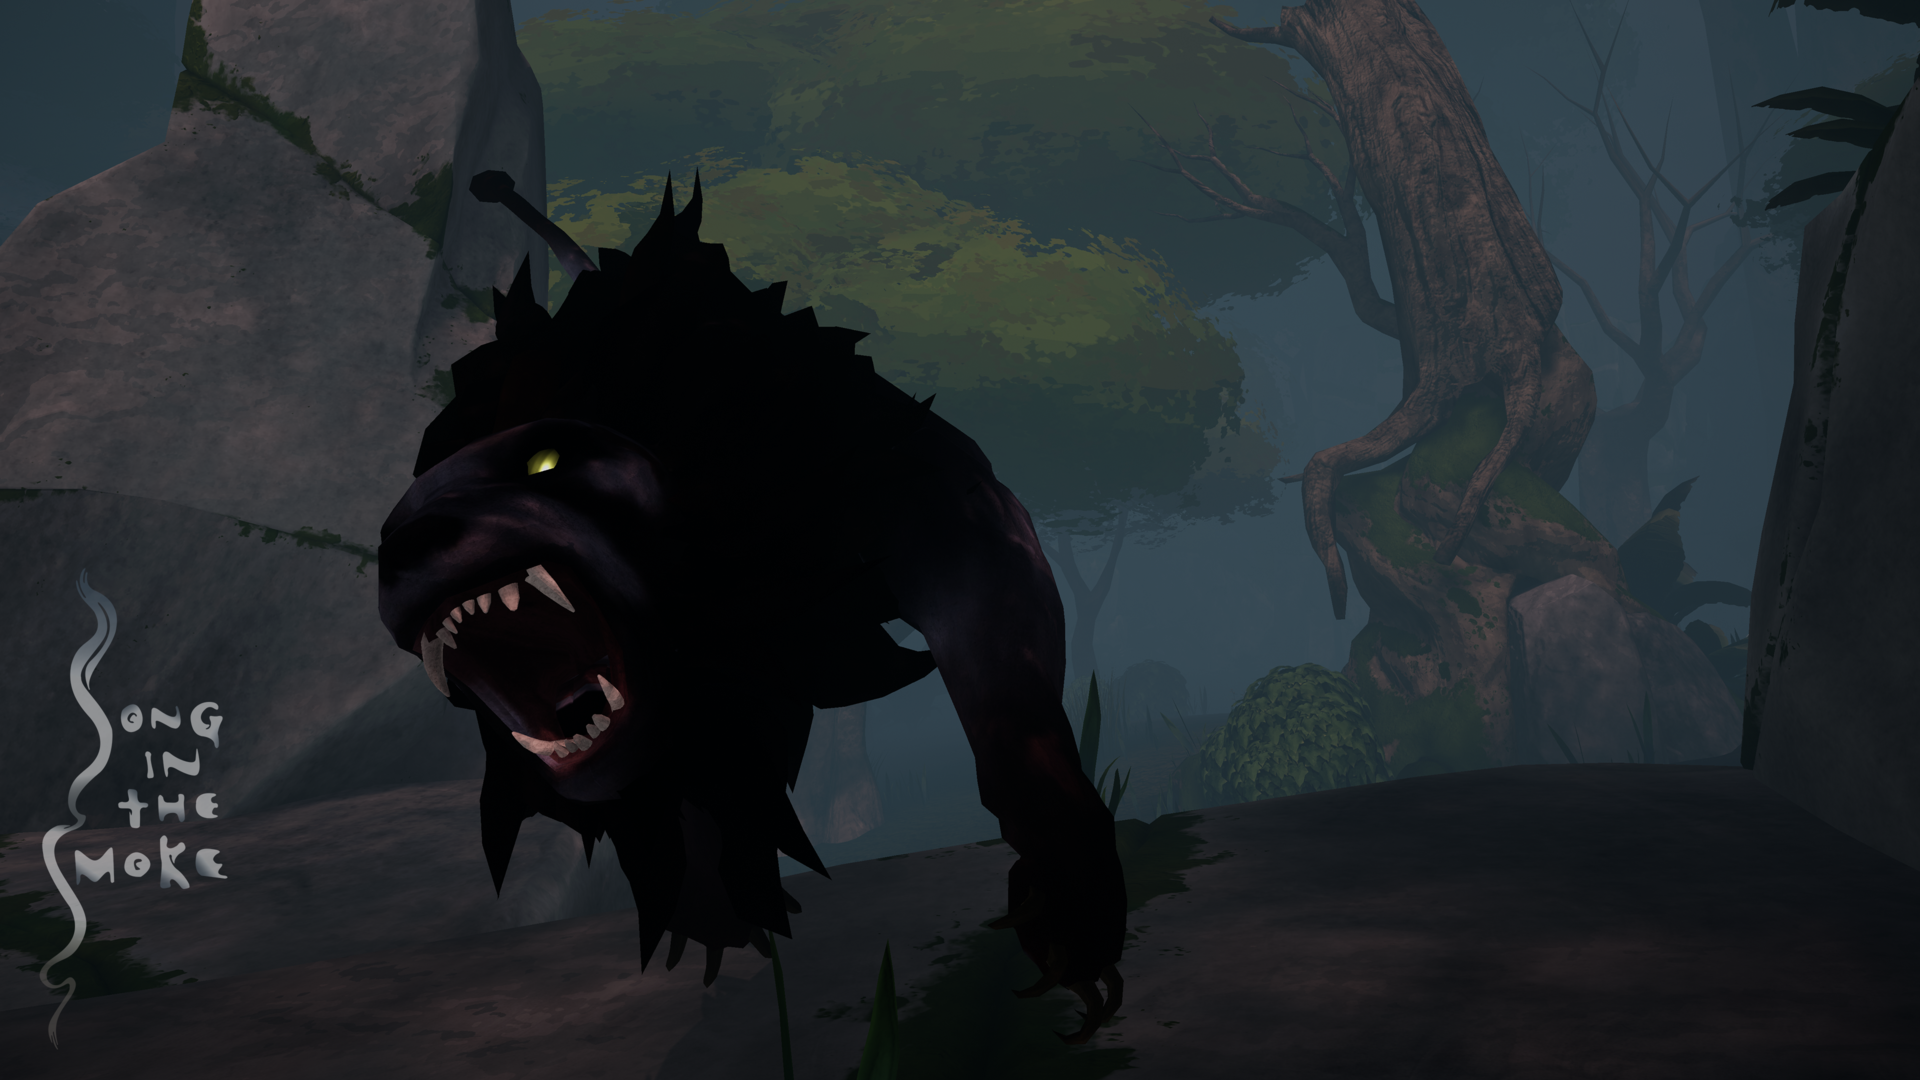
Song in the Smoke is a survival game that takes place in streaming outdoor environments. The player harvests items, hunts creatures, and sets up camps, trying to kill each level’s Animal Lord boss and continue to the next zone. Being a VR game, we concentrate on physical interaction; the player uses harvested items to craft tools, weapons, and clothing.
Graphical Features

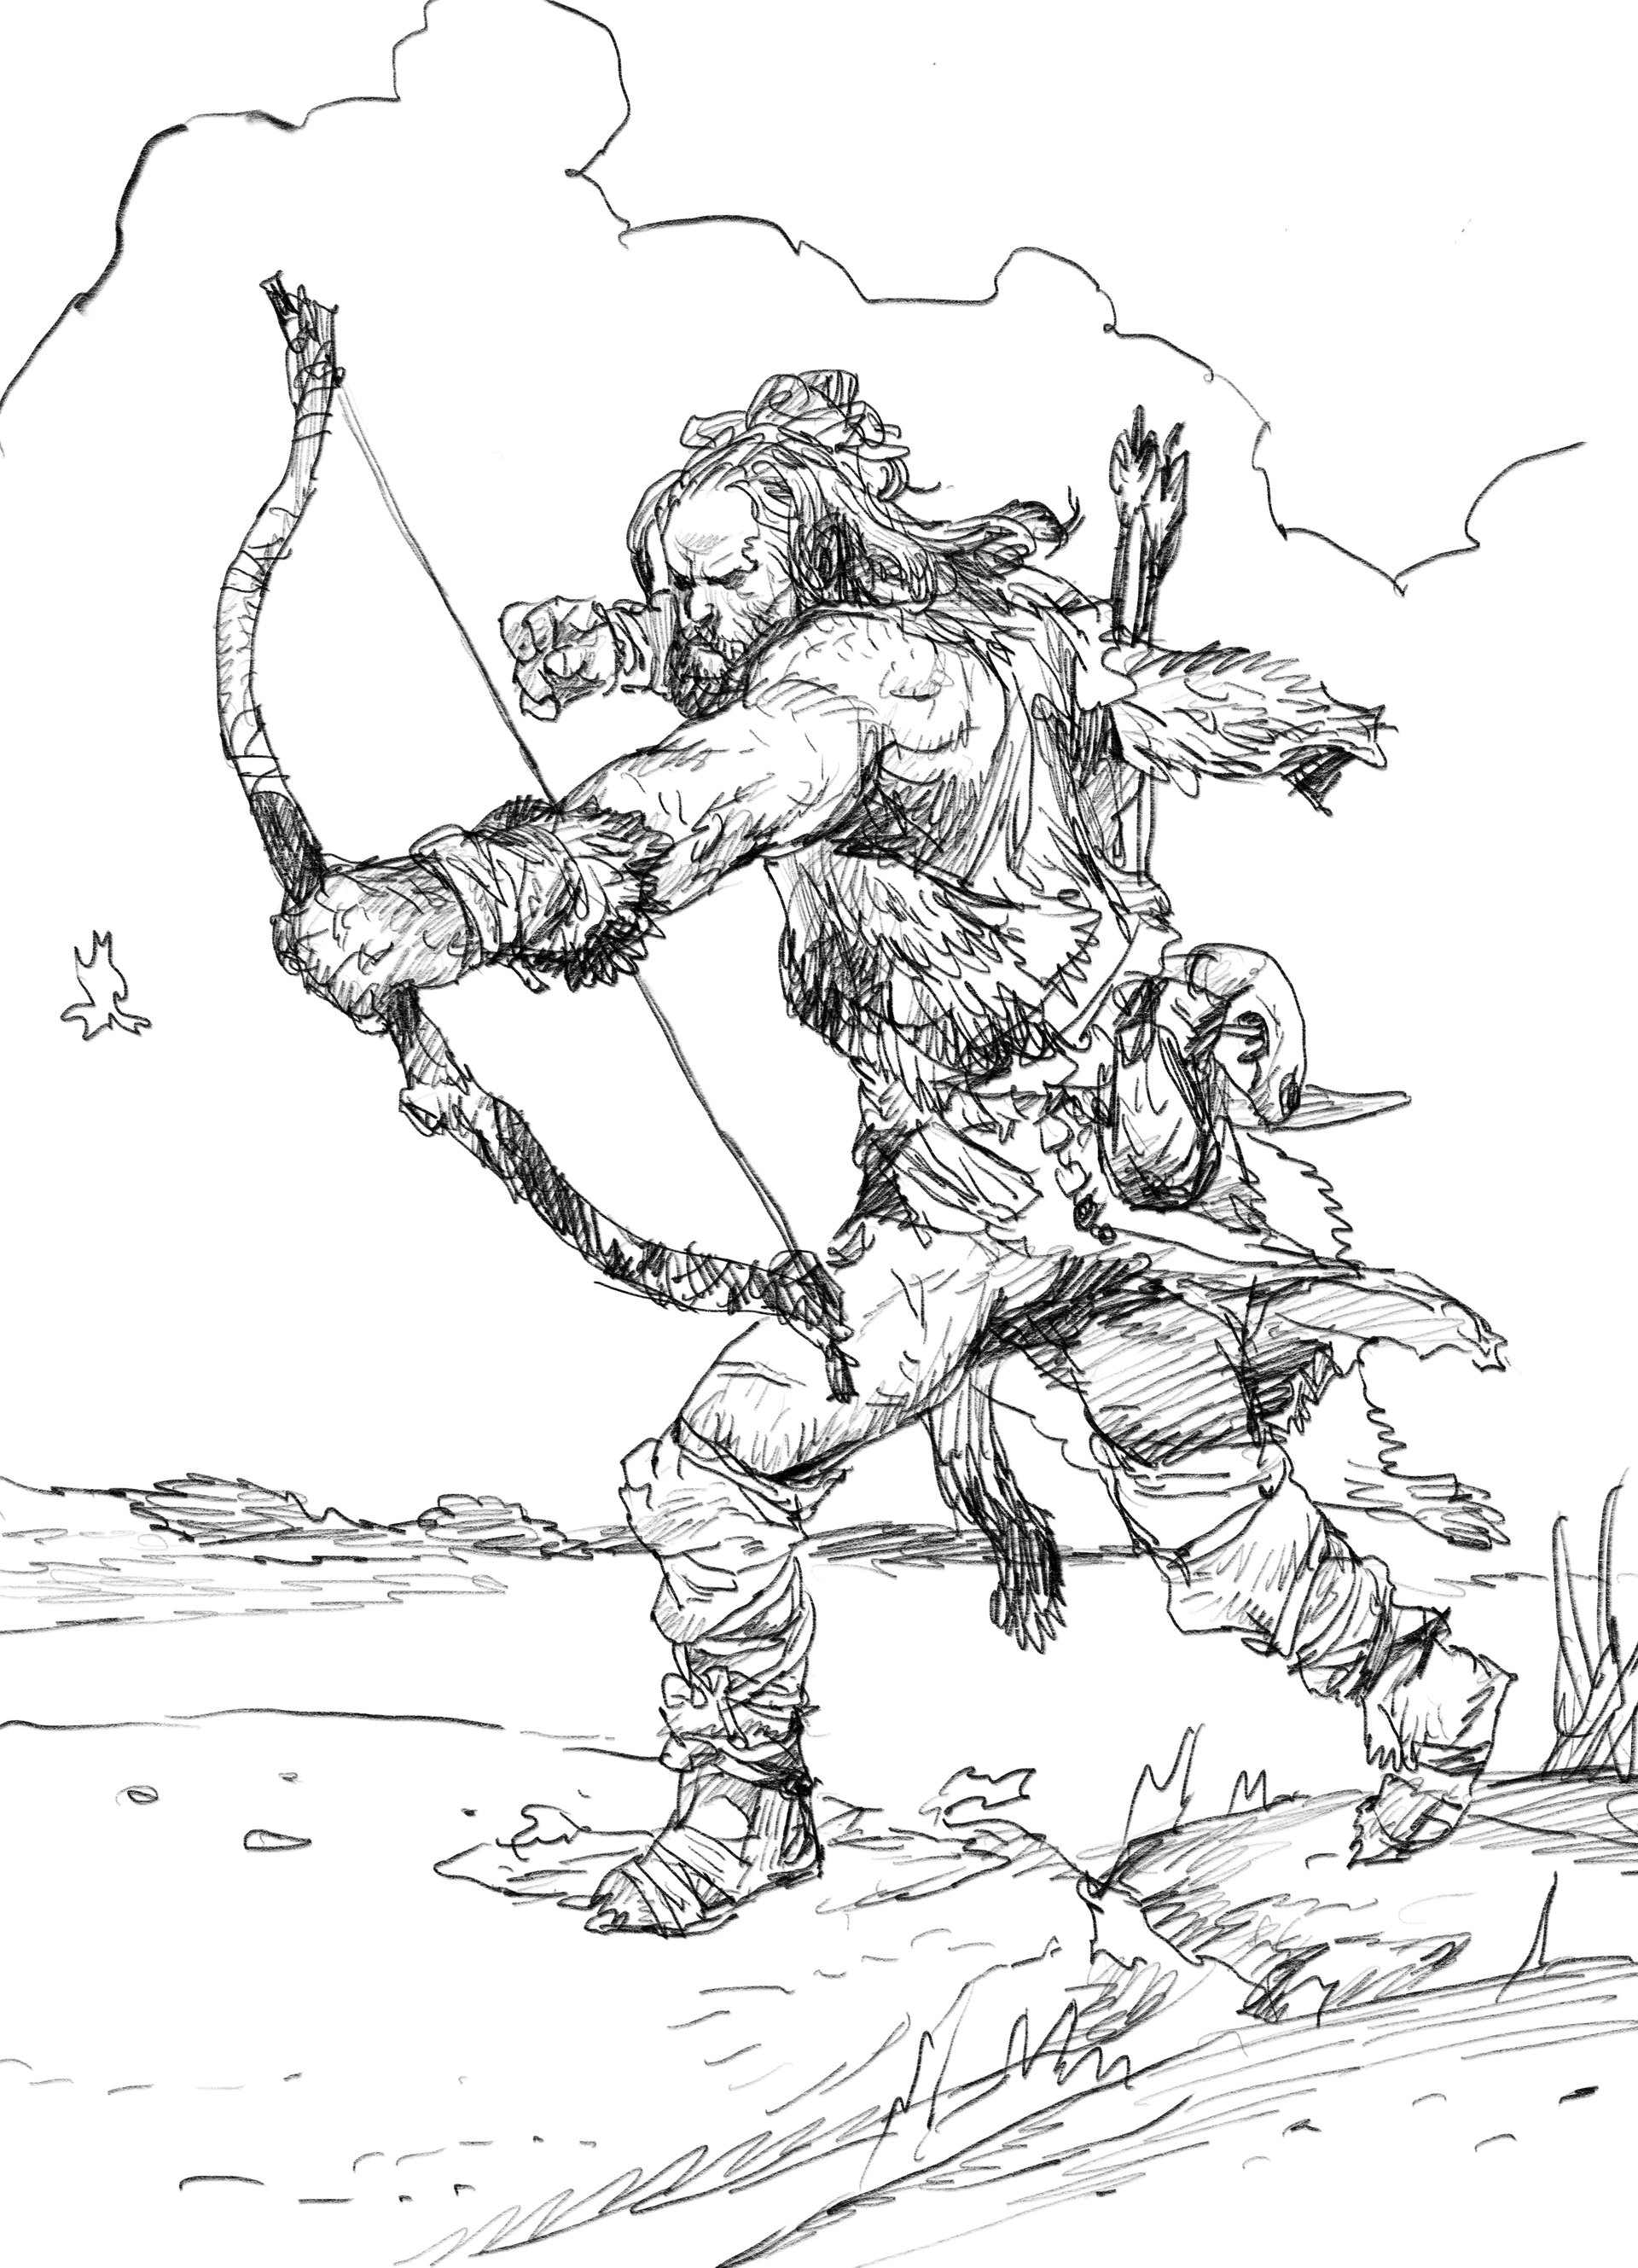
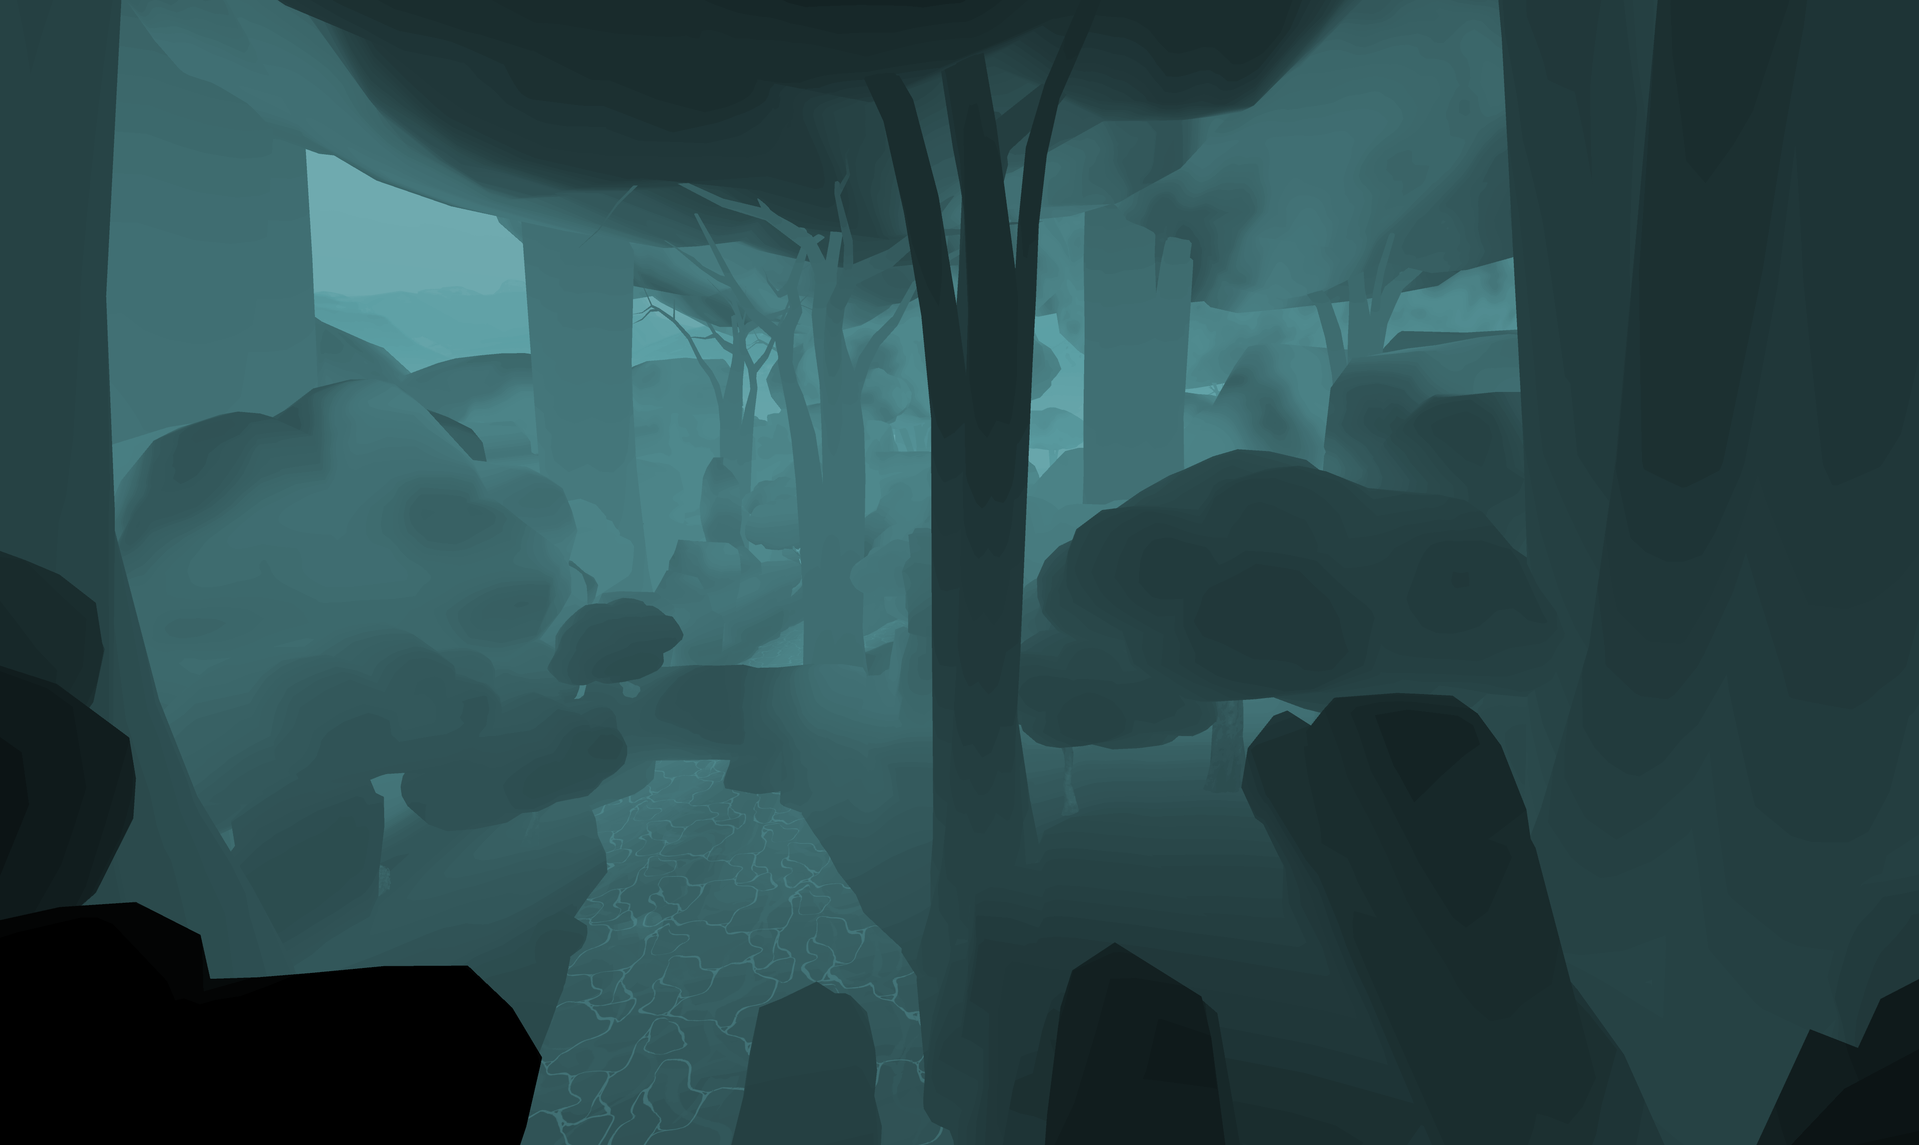
Song in the Smoke features a toon shader designed to match the works of our concept artist, Mr. Katsuya Terada, and a color look-up table that changes the color of fog over distance. There’s also an animated fog system that creates dynamic, moving fog shapes in the distance. There’s a real-time time-of-day system, and different types of weather. The creatures you encounter are mostly quadrupeds, and use the DragonIK middleware for realistic foot placement.
On all platforms, Song in the Smoke uses Forward Rendering due to its speed, MSAA (Multi-sample Antialiasing) support, and overall image quality on VR headsets. The downside to Forward rendering is that multiple dynamic lights are extremely expensive.
Almost every graphic element of the game was remade for the Oculus Quest, so let’s look at the challenges we faced.

High Spec vs. Mobile Rendering
The Oculus Quest device is a standalone VR headset that does not require a PC, and contains its own mobile-spec SOC CPU and GPU. But while Quest has quite impressive vertex throughput, it requires artists to be extremely thoughtful when creating content due to a number of strict limitations. Even more challenging, the minimum frame rate is 72fps compared to PS4’s 60fps.
We decided to use Vulkan Mobile on the Quest, as it required much less CPU overhead than OpenGL. The downside to Vulkan is that it requires a one-time PSO (Pipeline State Object) caching process that the player must complete before playing, that can take over a minute on the first playthrough. Without the PSO cache generation, the game can hitch when new materials are introduced to the scene.
We also made use of Mobile Multiview, a feature that can bring down CPU overhead by instancing all meshes viewed in the left eye, then quickly rendering them in the right eye. Lastly, we used Dynamic Foveated Rendering, to concentrate pixel detail in the center of the frame.
For the sake of performance, we had to deactivate several features as well: we turned off Mobile HDR and Mobile Depth Prepass, which were too expensive to use on our particular game.
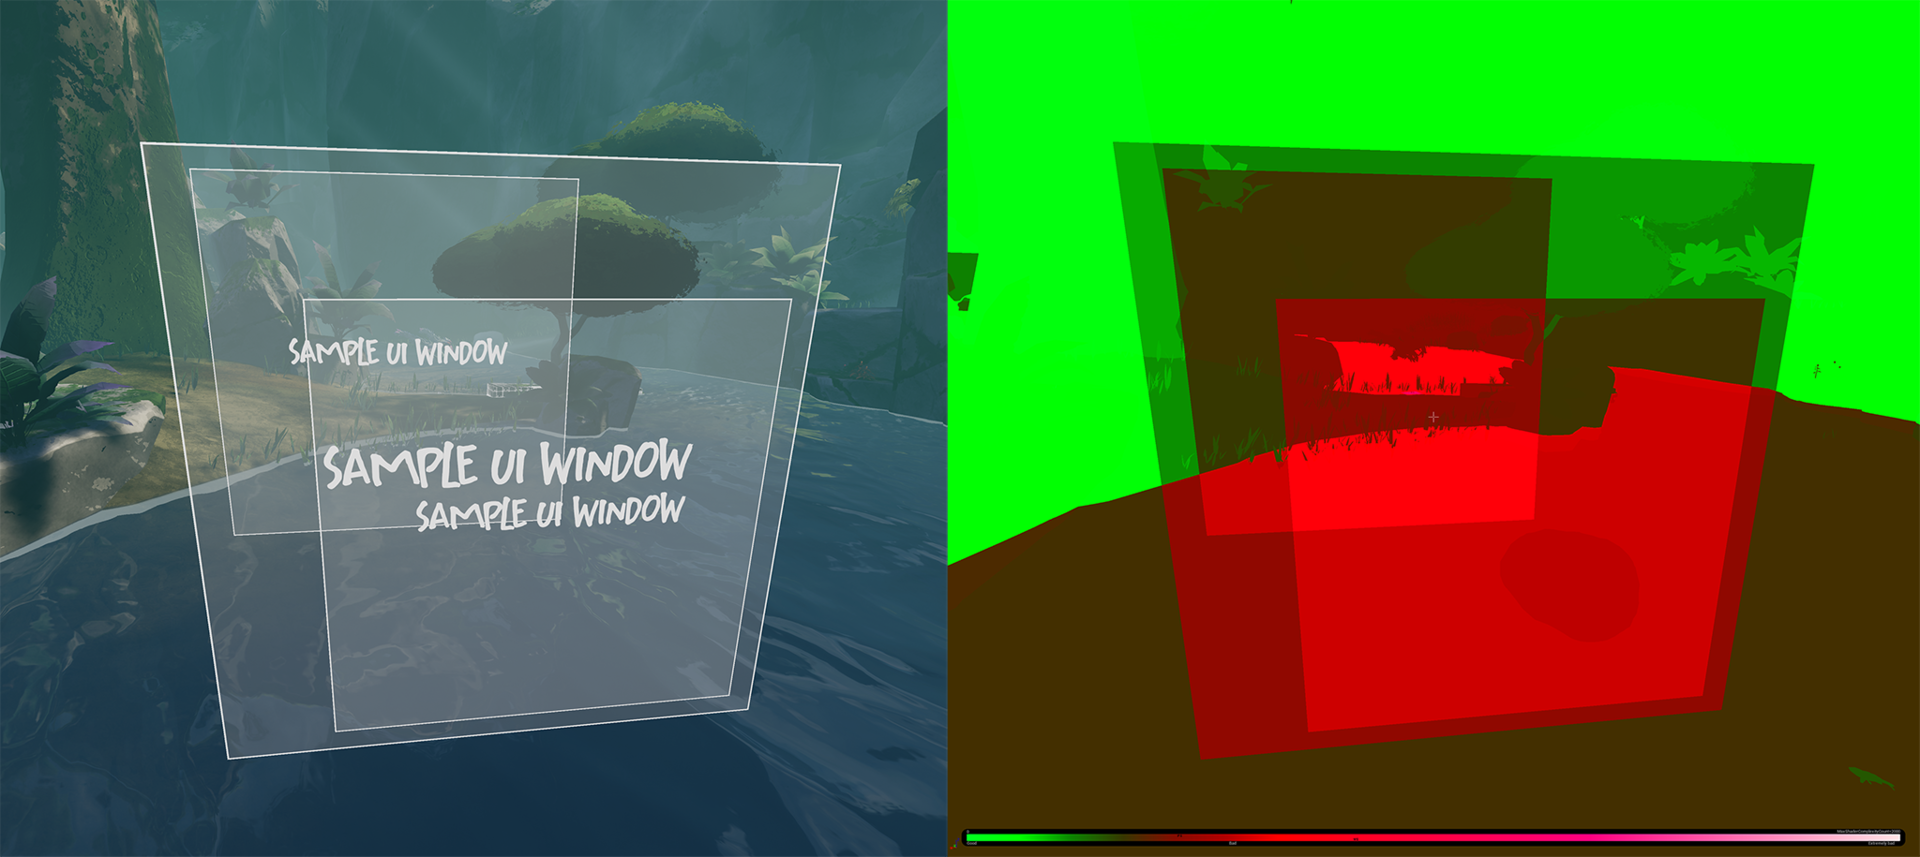
Challenge 1: Transparency
Minimizing transparency is true for all VR, but especially mobile VR, which uses deferred rendering, and transparency must go through a much slower rendering path. In VR, pixels should not be drawn more than once whenever possible. This means that any transparency that takes up a large percentage of the screen can massively slow down rendering. If multiple large transparent effects overlap -- for example, multiple UI windows in front of a transparent water mesh -- this can reduce the frame rate to below the minimum.
Our solution was to avoid using transparency whenever possible. We got around this by converting a number of alpha-channel elements into cutout billboarding geometry, and even baking the texture’s colors into the mesh’s vertex colors, so we didn’t need a texture read. Most of the particle effects in the game are also opaque cut-out geometry. The increased vertex count did not pose an issue, so we recommend replacing anything you can with solid geo!

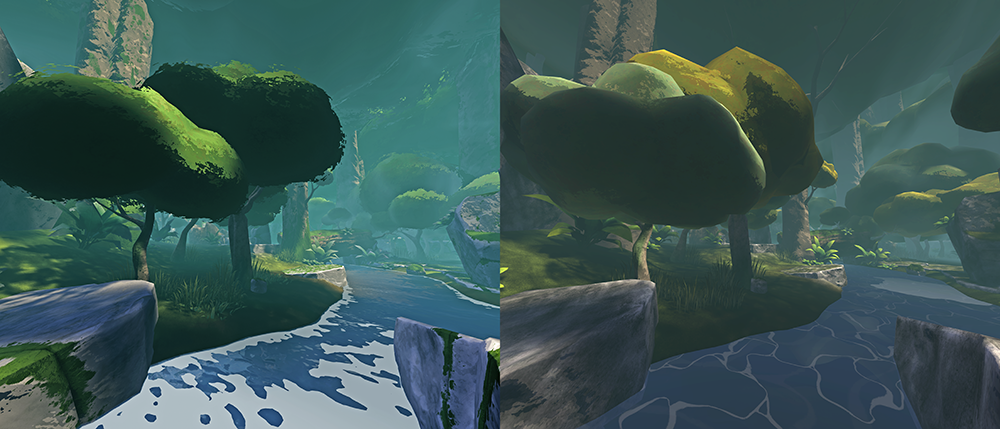
Challenge 2: Simplified Materials
Many of our PS4 materials are quite complex, with multiple textures and complex layer blending that was not designed to run on a mobile GPU. One of our first tasks was to create a system that would allow for multiple material versions inside the same shader, that would switch automatically depending on what platform it used. This is easily accomplished via a MaterialFunction that sends two inputs down a Shading Path Switch.
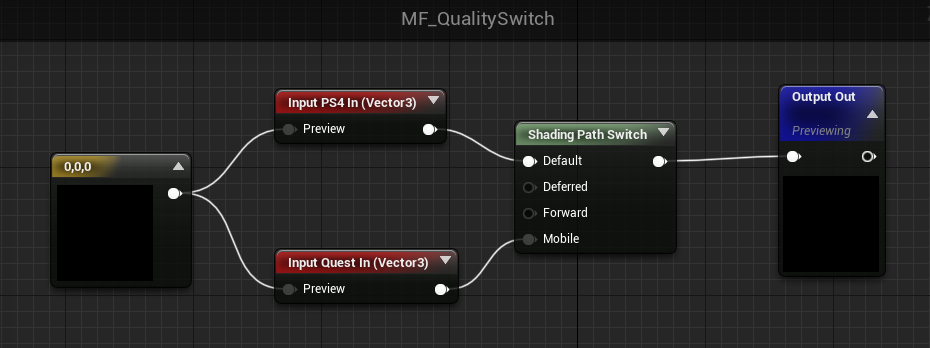
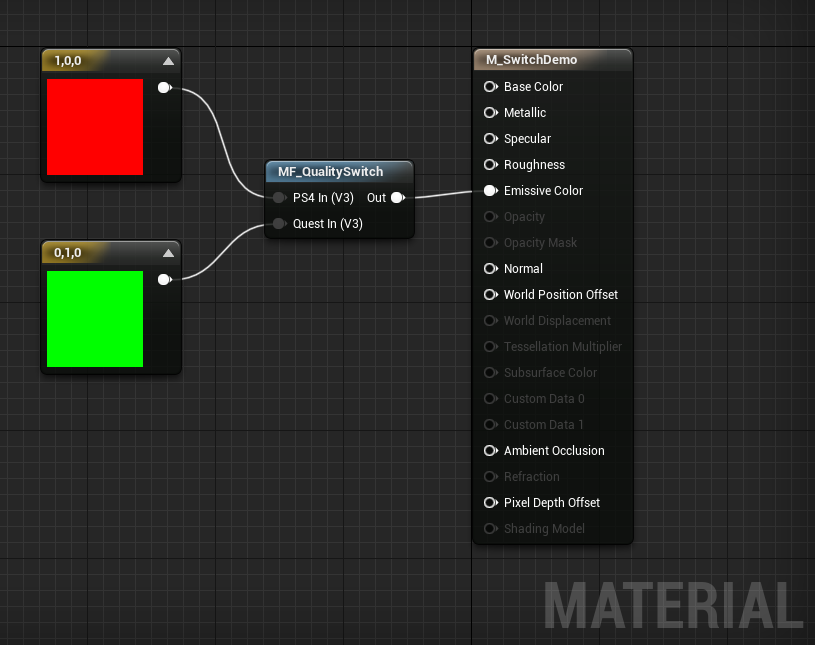
Thanks to this simple MaterialFunction, we were able to tailor material complexity to each platform. On high-spec platforms, we were able to use splat maps, heightmap blending, and multiple detail textures on terrain layers; on low-spec, we simply used mesh vertex colors to control the blend with simple tinting of a single texture.
Note that when Unreal cooks content into the final packages, it will exclude all data not relevant to the current platform, so there’s no risk of data bloat from other platforms driving up the package size.
Challenge 3: Per-Platform LOD
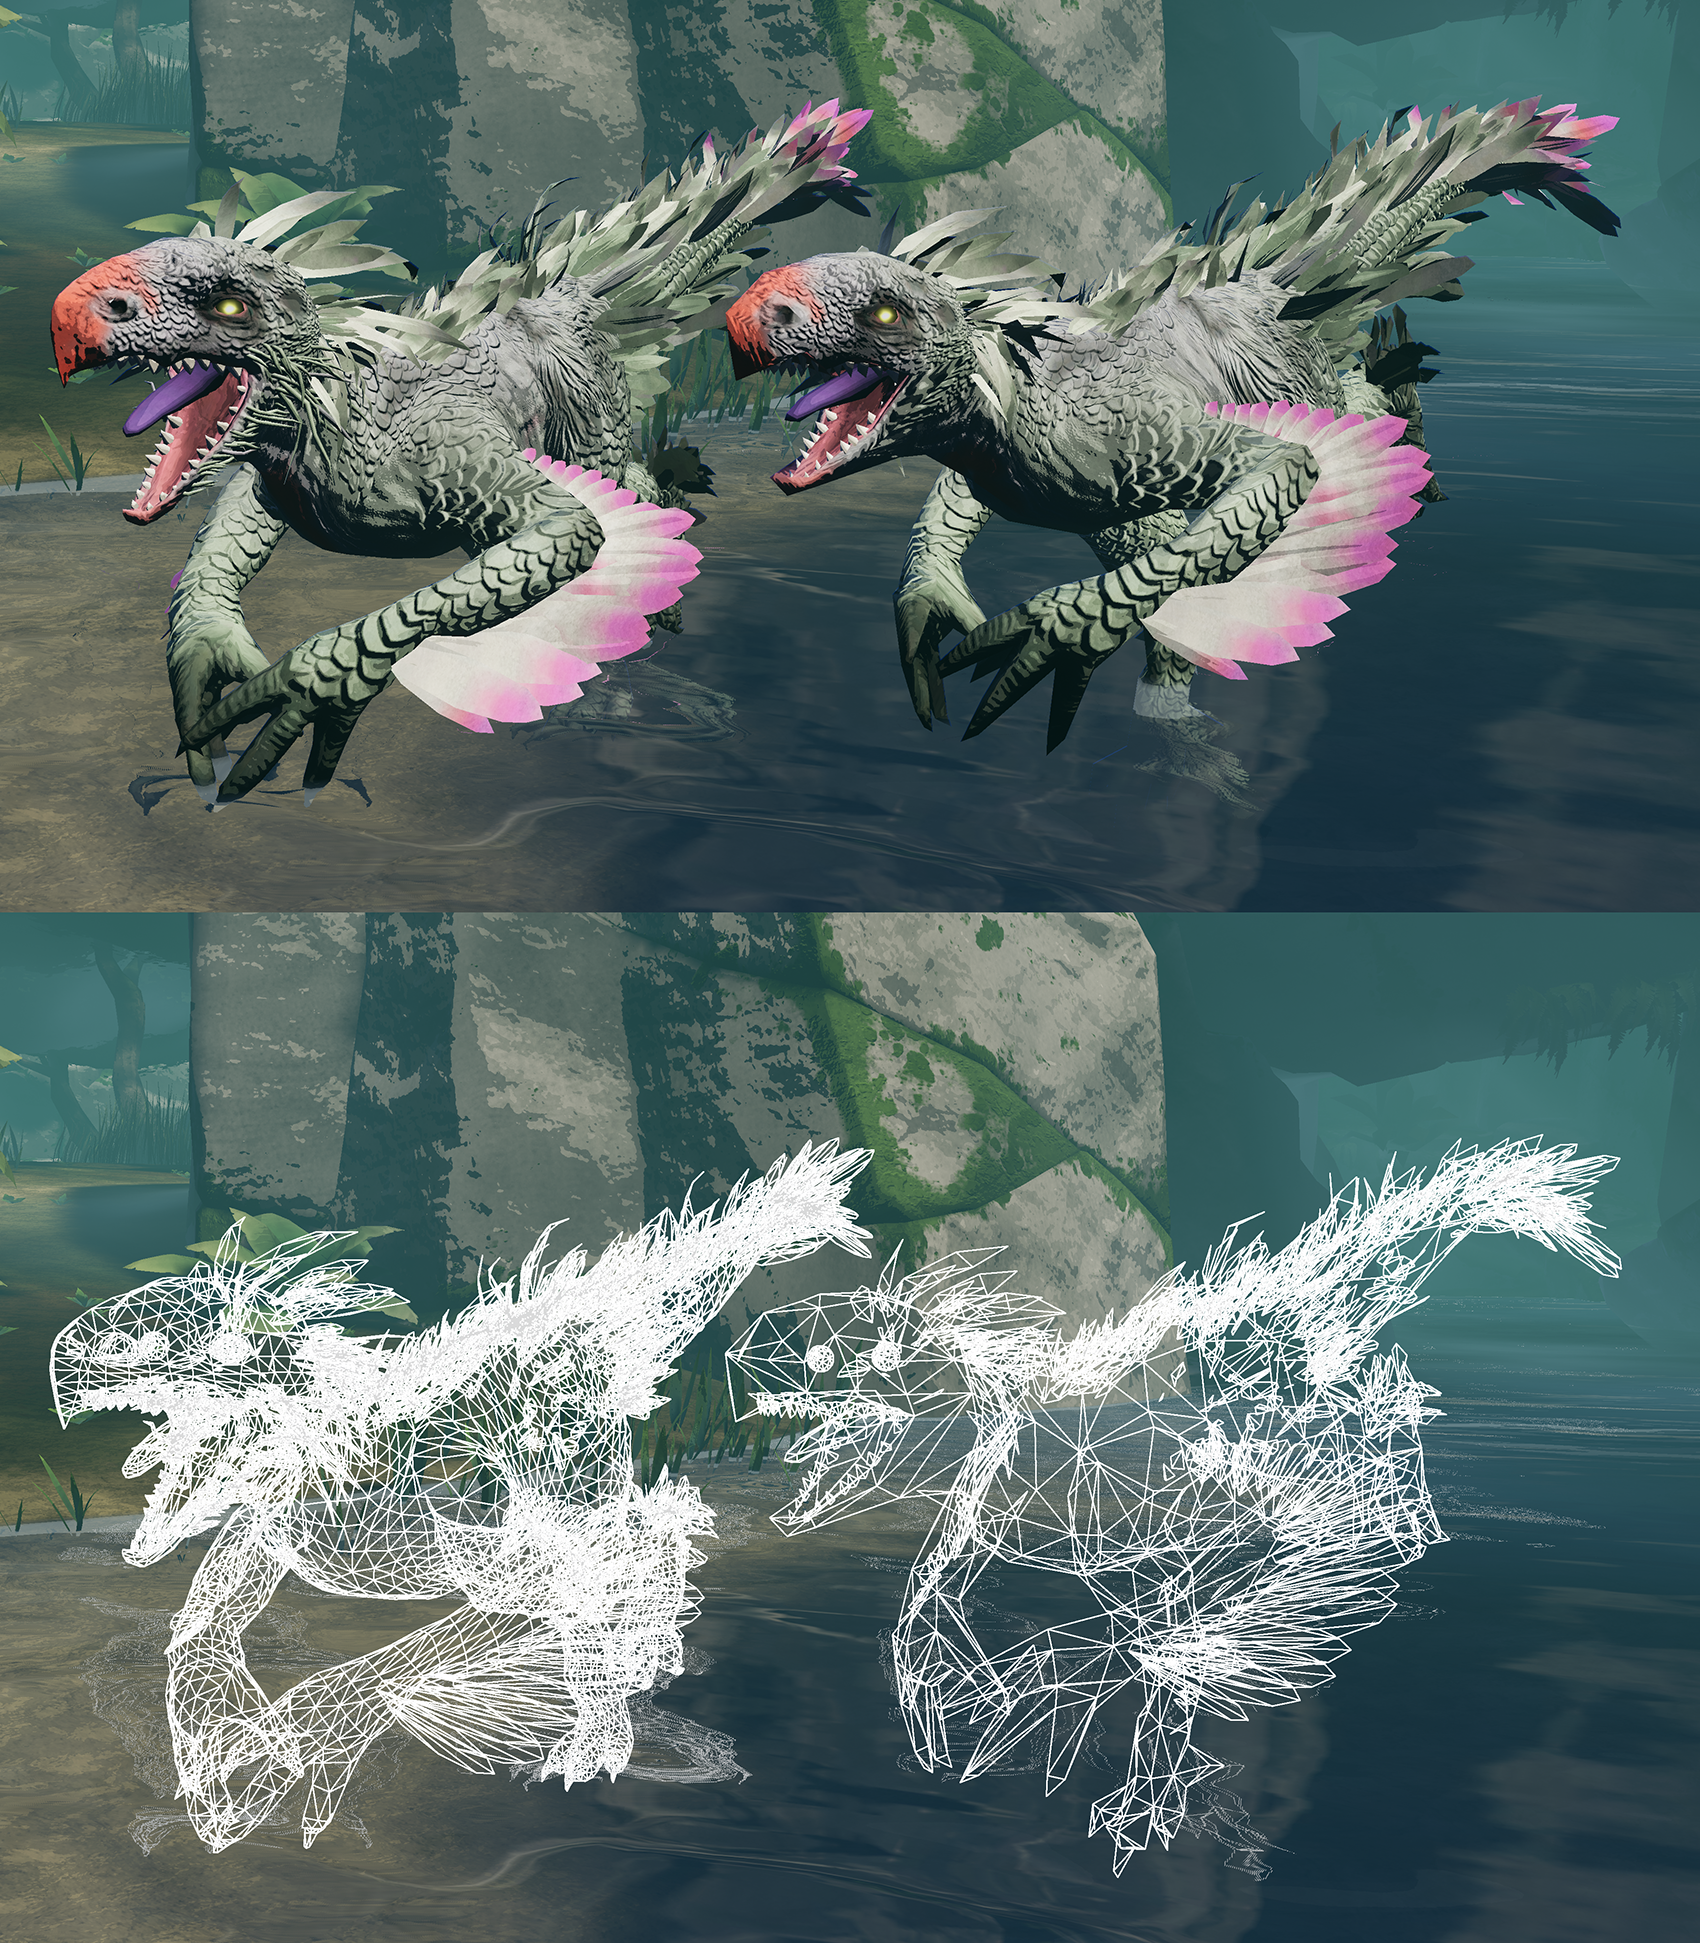
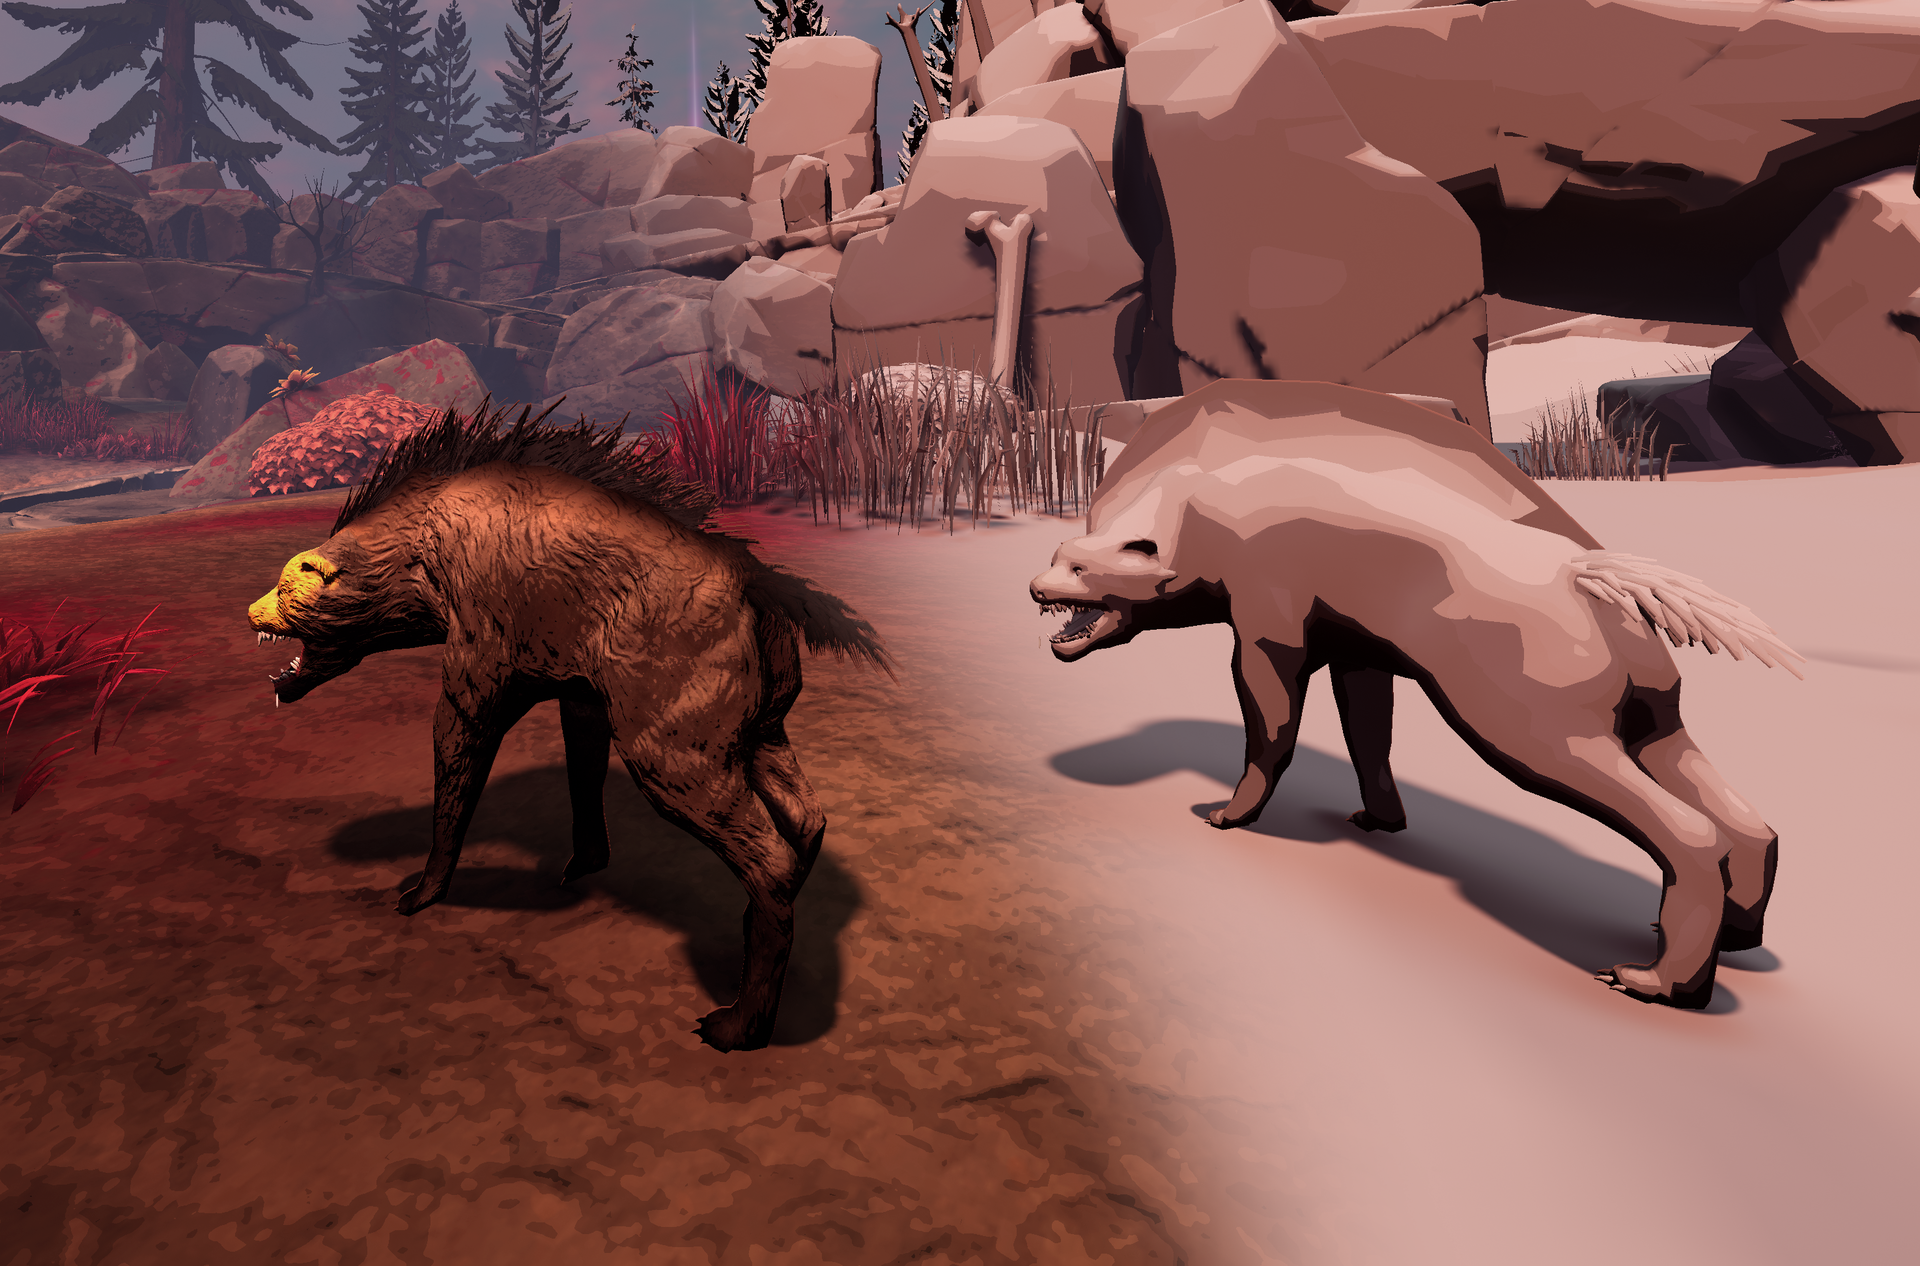
Most of the creatures in our game are about 15-20,000 polygons in their highest-detail LOD0 models, and have elements that use masked transparency, and therefore wouldn’t be performant on mobile VR.
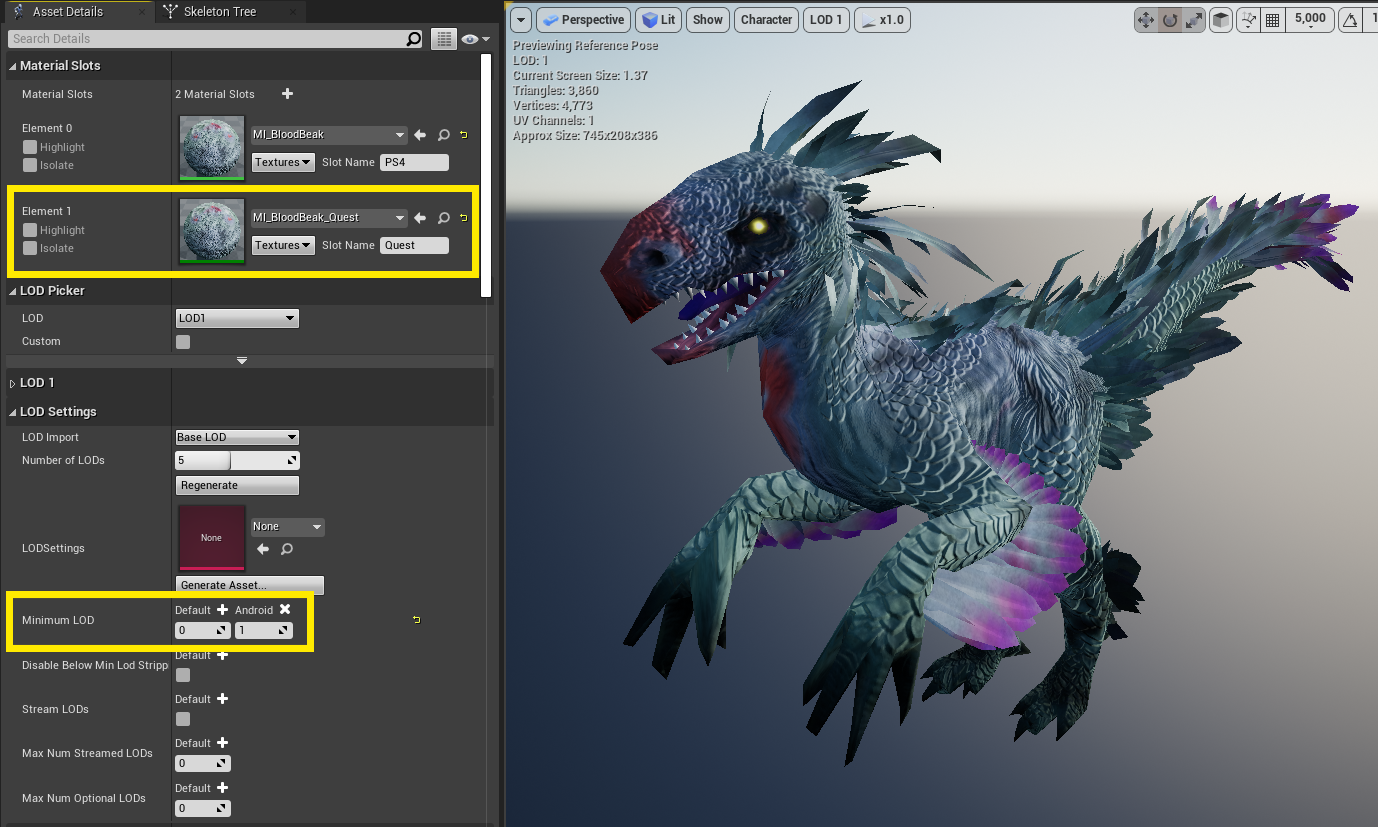
To solve this, our character artist created 3,000-polygon variants of each creature, and an alternate, opaque material. We then manually imported these versions into the LOD1 slot of the creature’s skeletal mesh, overriding the LOD1 material to use the opaque material. Finally, we set the Minimum Lod under Android to 1, forcing the Quest to skip the LOD0 and go straight to LOD1.
We were also able to use this method of LOD packing on static meshes as well, when a lower-polygon, opaque-material override was required; a general rule of thumb would be to use LOD0 as the PS4 version, and LOD1 as the Quest version.
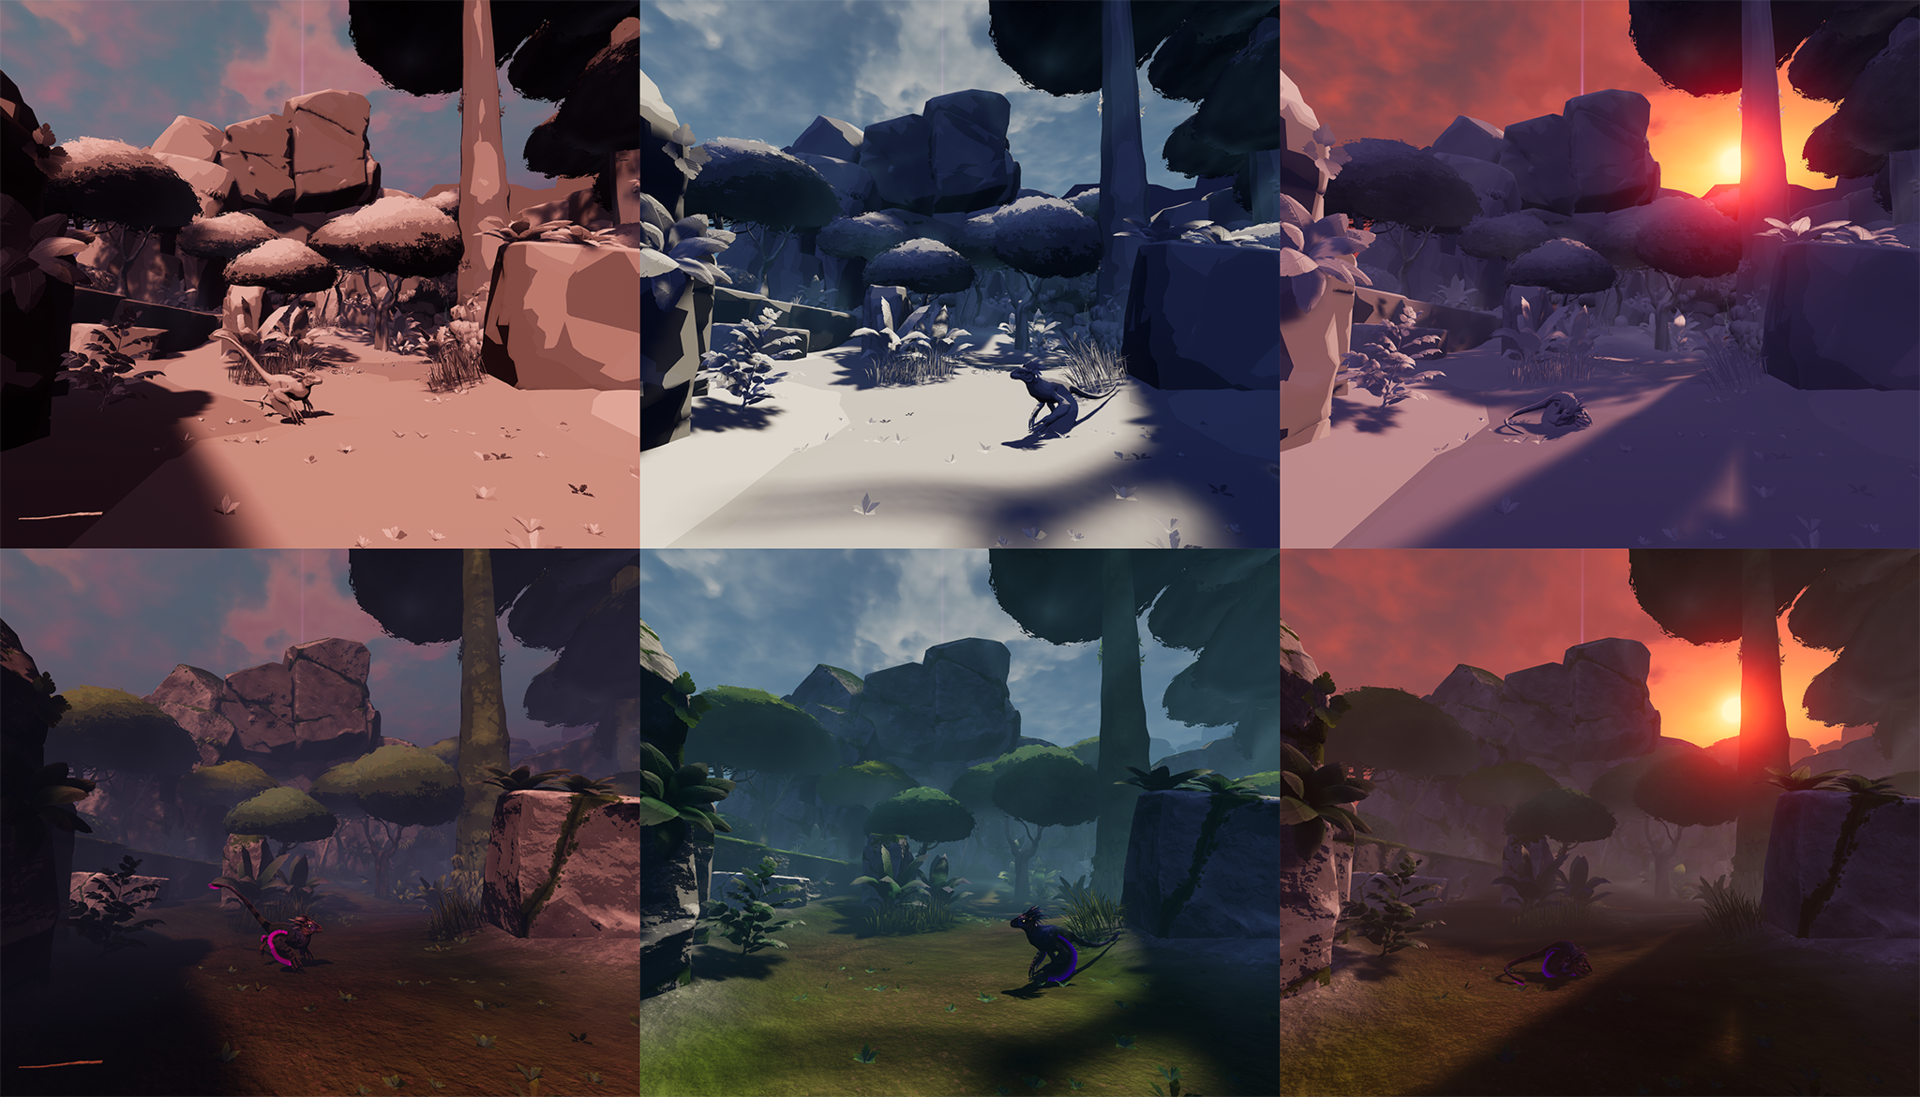
Challenge 4: Lighting & Cinematic Lighting
The decision to use Forward Rendering dramatically affected how our game handled lighting. Our game features a time of day system with three lights:
Directional light 1: Sun (Casts static shadows)
Directional light 2: Fill light, no shadows. This is meant to create a stronger read on the normals in the toon shader.
Sky light: Simple ambient, no shadows. Keeps shadows from going to full black.
Intensity and color are controlled by a table, with the values being smoothly lerped.
We also have three sets of precomputed lightmaps; morning, midday, and sunset (for night, we re-use the midday shadows with a different light color). These lightmaps smoothly fade between each other at certain times of day.
Rendering multiple directional lights on the Quest was too slow, so we had to implement a low-level hack where one point light projects multiple shadows.
Because of the prohibitive cost of rendering moving light sources in Forward Rendering, we limit the game to one dynamic light at a time, and keep the Attenuation Radius low. Dynamic lights can only exist as campfires, torches, or glowing club heads.
Another problem we encountered was that dynamic objects that took up large amounts of the screen, when hit with a dynamic light, would be very very slow to render. We solved this problem by baking lighting and setting the materials to unlit.
Unfortunately, we were very limited in dynamic shadow rendering. Characters use UE4’s Capsule Shadow feature, which is extremely fast, but those are the only dynamic shadows in the game. And Quest simply has no shadows, as there was no GPU time left!
Our in-game cinematics consist of dreams, experienced from a bed inside a mysterious hut. These visions bring a supernatural feel to the game and provide hints to the player about what to do next. For these scenes, we were able to rely on LOD packing to easily swap models on the target platform, but we ran into a major problem with lighting. Our PS4 lighting rigs looked incorrect when rendered in Vulkan, and certain light types were simply unsupported on the mobile hardware as well.
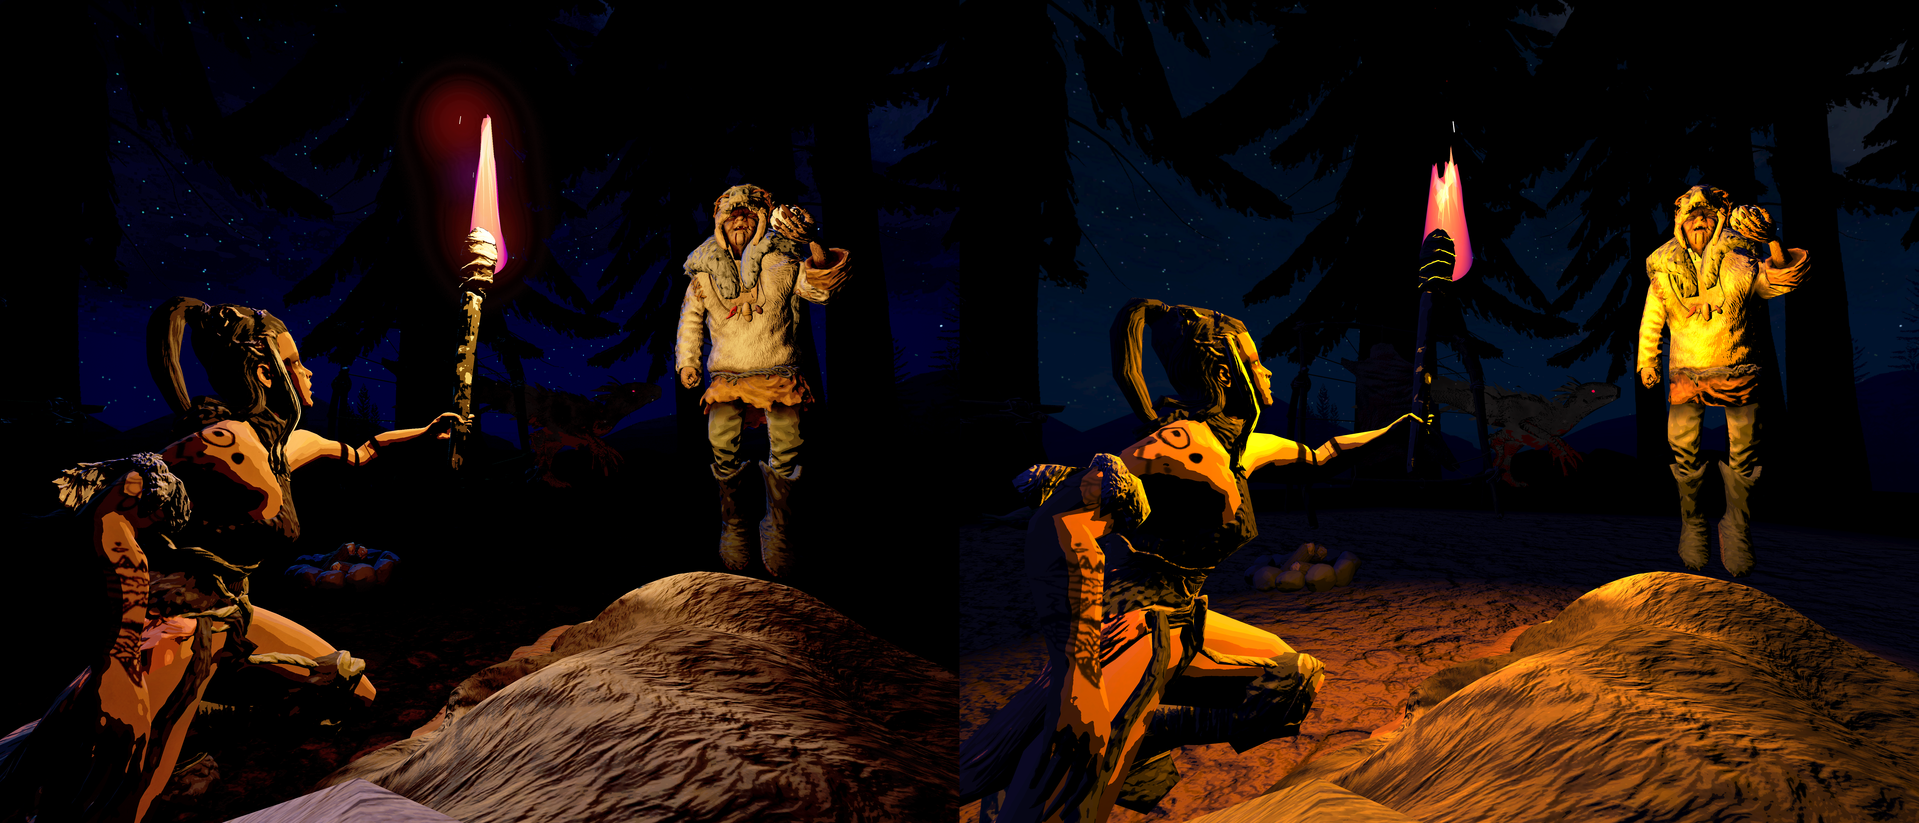
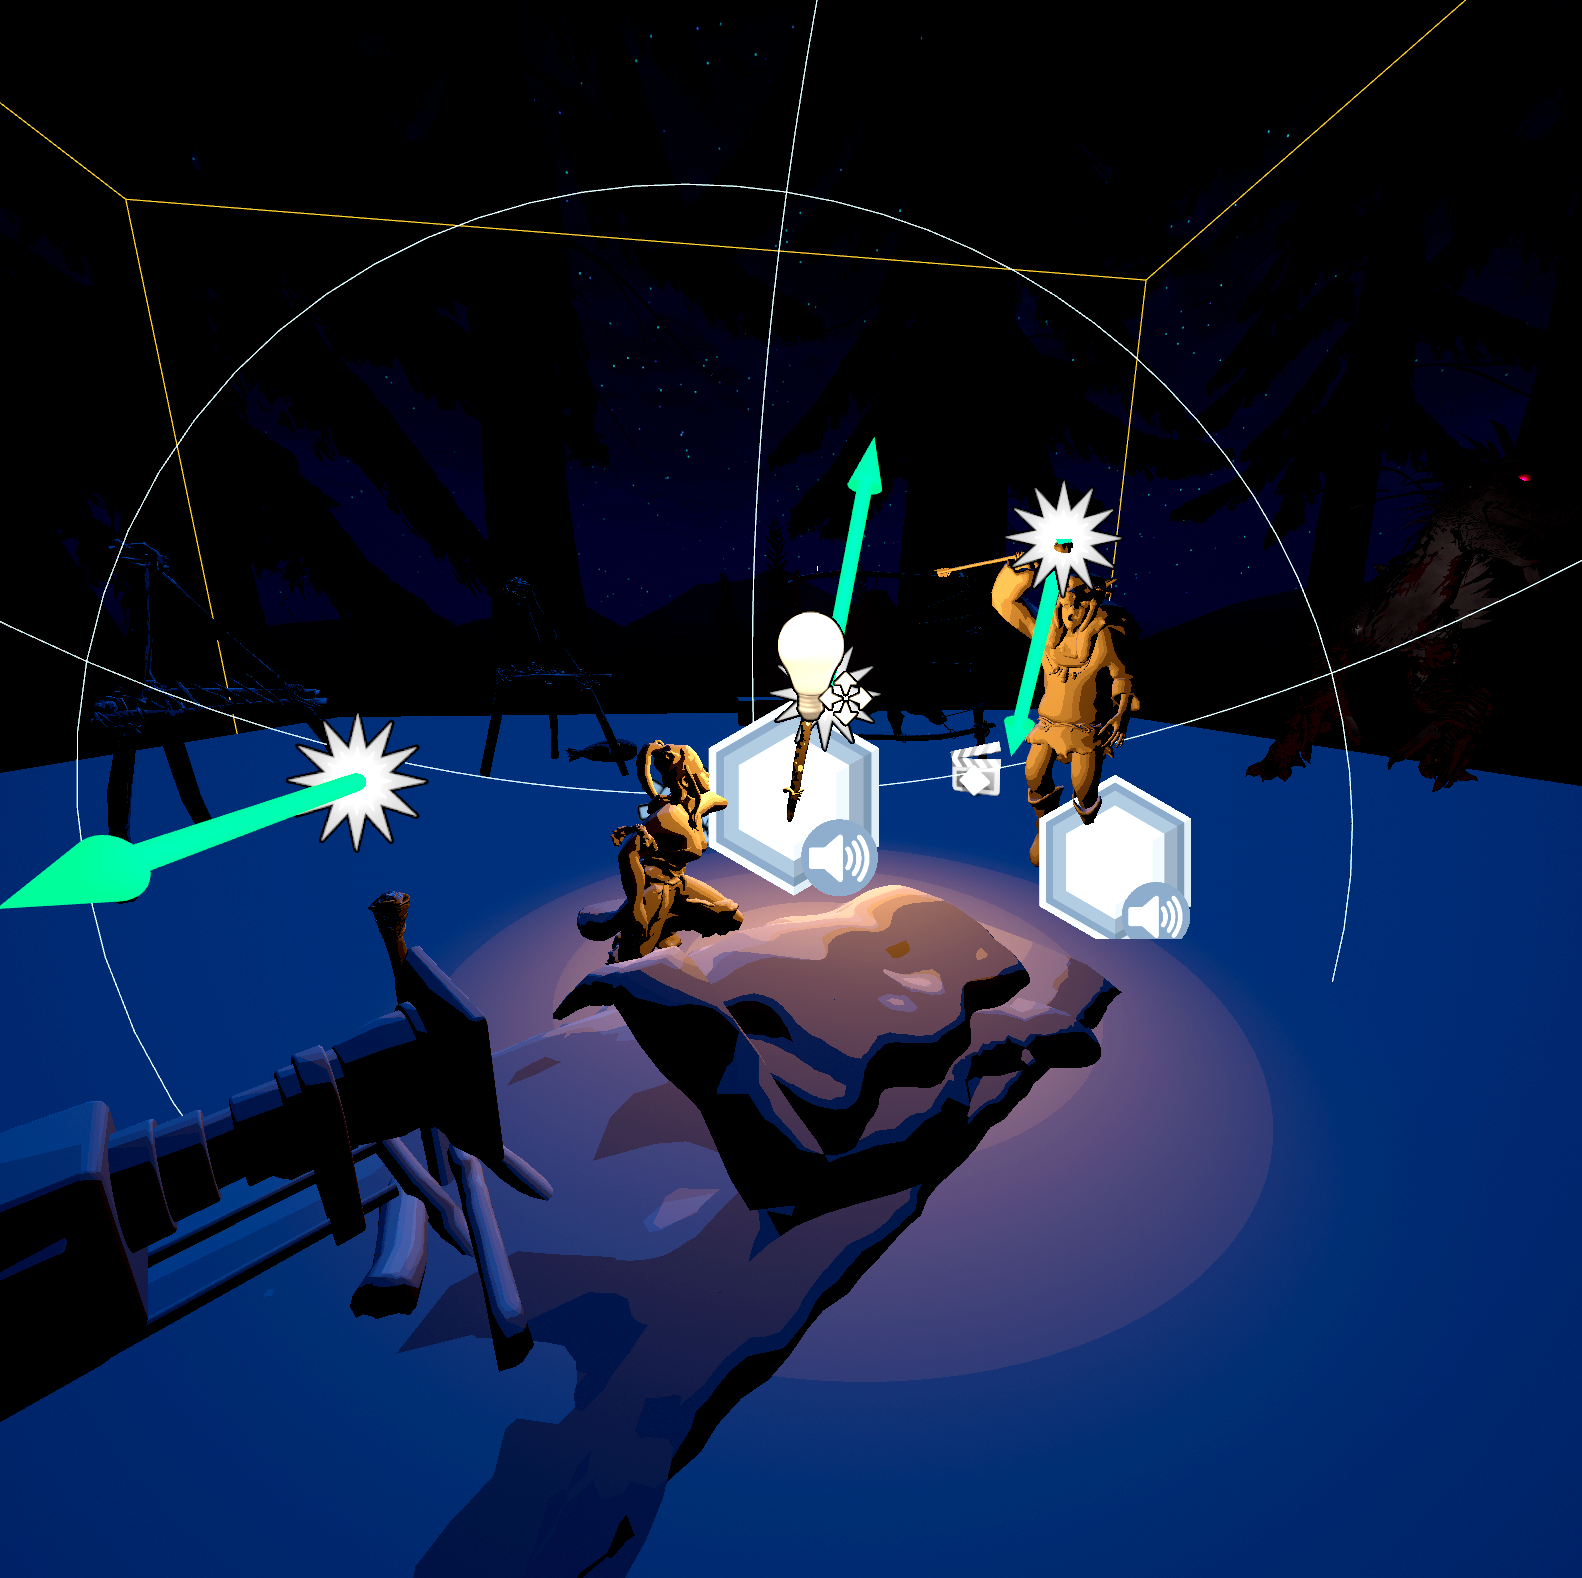
Our solution was to separate lights into separate subscenes (HQ and LQ), and then introduce code into the Sequence player that would play the correct, platform-specific subscene depending if it was running on PS4 or Quest. Note that all lights should default to Deactivated in these scenes until required, as the threat of overlapping lights can kill VR performance! This feature lets us maintain high-quality lighting on PS4, while concentrating on performant lighting for mobile VR.

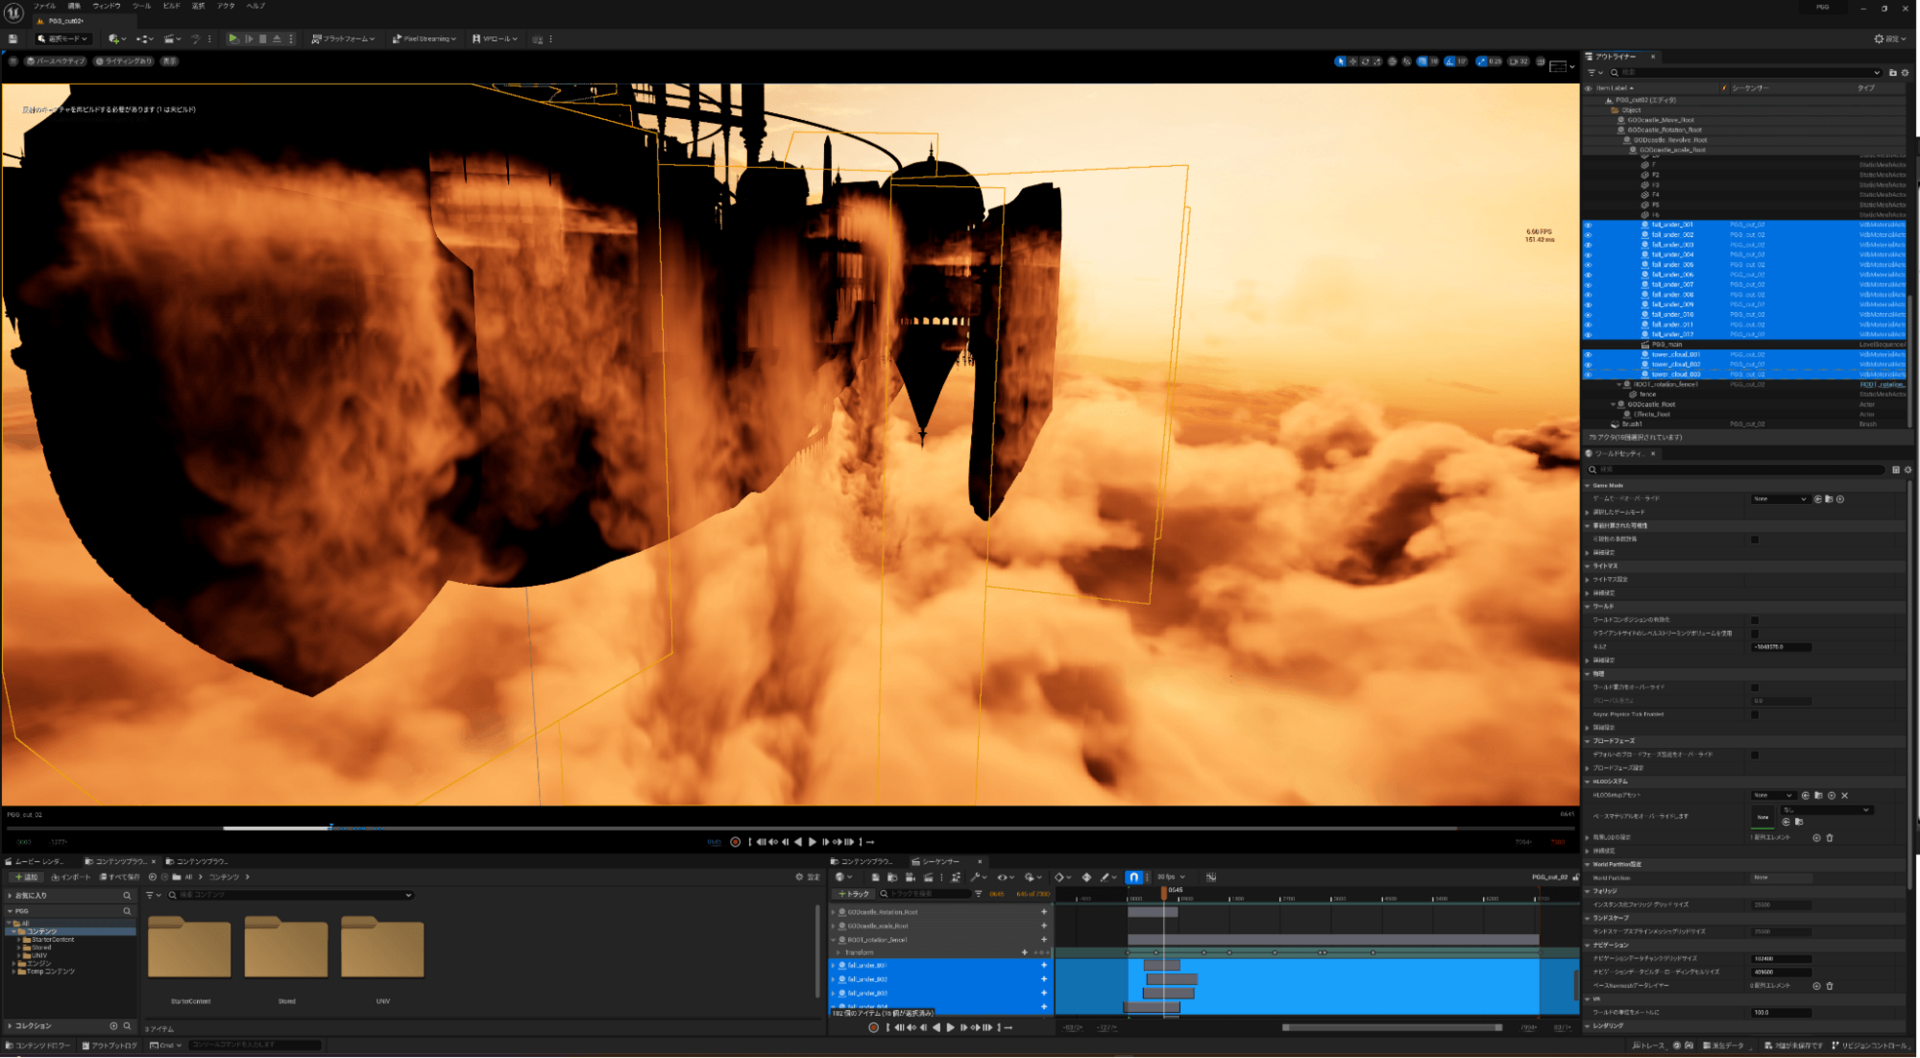
Challenge 5: Draw Calls and Environments
Converting levels would be a much, much more difficult process than swapping out individual meshes with LOD packing, because of a strict limitation on draw calls.

On PS4, UE4 is quite adept at automatically instancing repeated meshes, so we had no issues with the number of draw calls; the game averages about 250-450 draw calls per frame while drawing thousands of individual environment meshes. However, on Quest, mesh auto-instancing was unavailable, and we had set a hard limit of 150 draw calls per frame, so we had two goals:
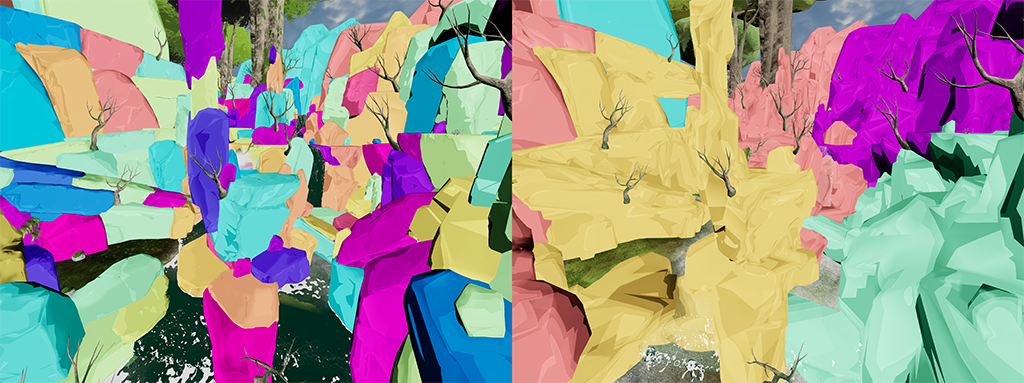
1.Dramatically reduce the number of meshes in the environment by merging & manually instancing meshes
2.Reduce the overall polygon count
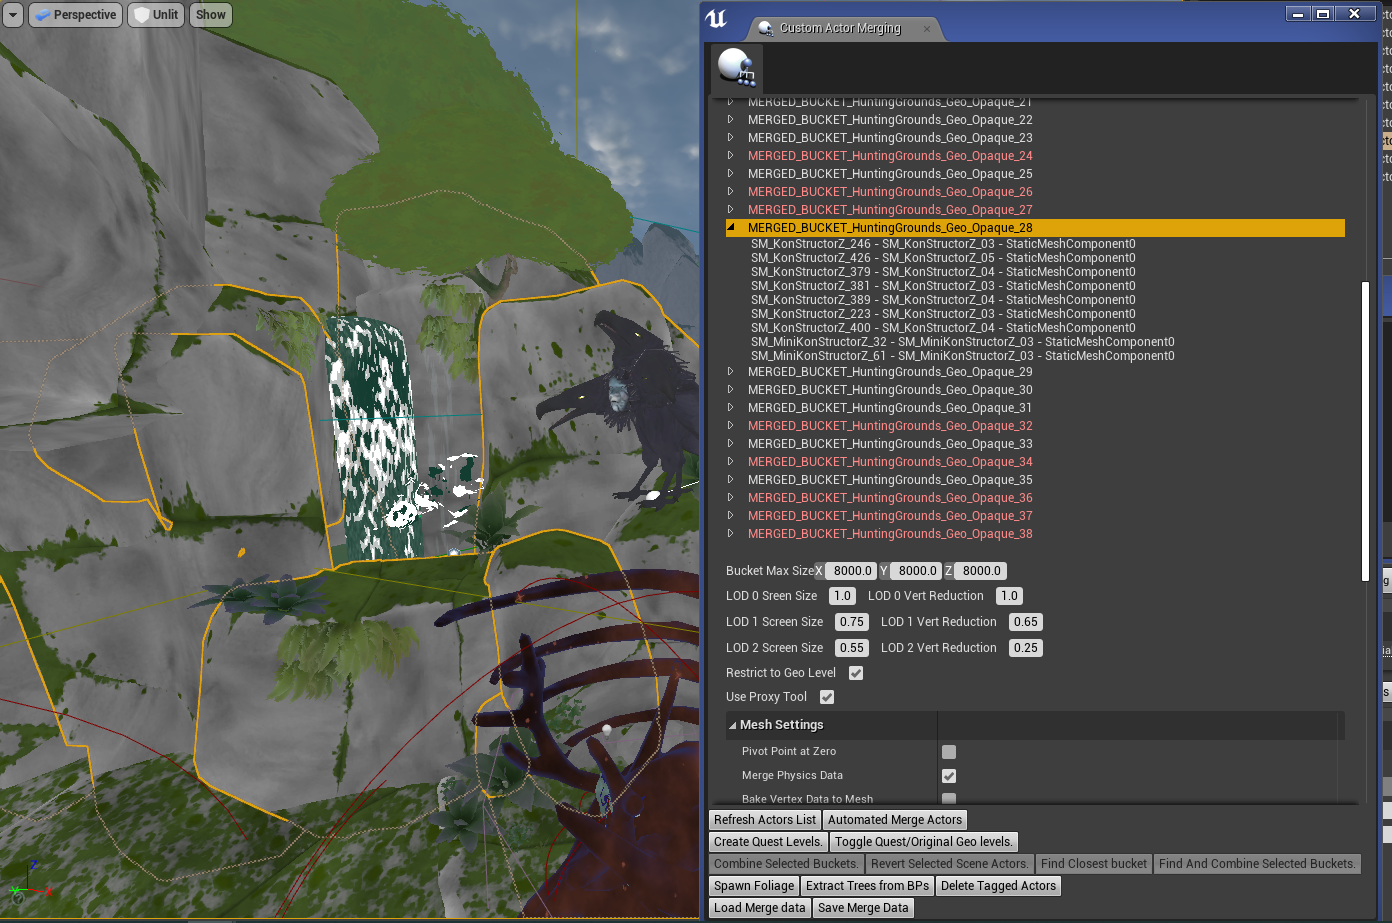
Standard UE4 has excellent mesh-merging features, such as Actor Merge and HLOD, but we needed more granular control when creating merged geometry. We worked with a partner studio called The Forge to create a tool that would allow us to intelligently group meshes together, exclude certain meshes via tags, and easily create “buckets” of meshes.
Most importantly, The Forge’s tool could extract the original collision meshes before merging. This allowed our Quest levels to have identical player collision with the PS4 version, leading to less bugs with AI and navigation.

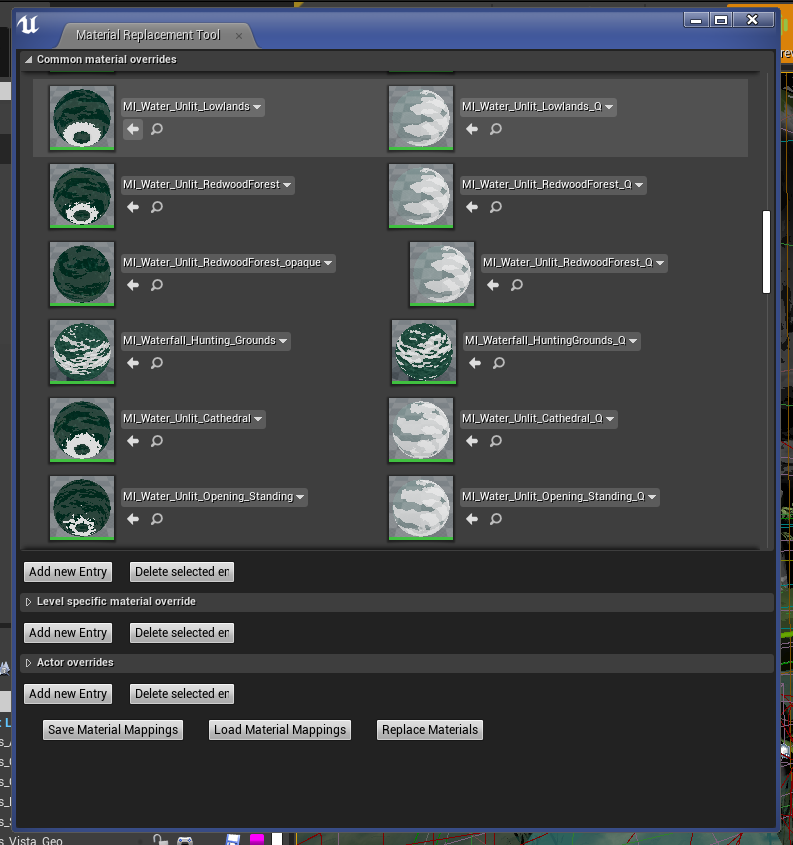
Lastly, we had The Forge create a Material Replacement tool, that would go through a level and replace all materials of one type with another. This was useful for when we had to change transparent materials to opaque materials -- such as on water or tree canopies -- which can’t be done via the per-platform material method written above.
Unfortunately, we couldn’t store level geometry data for the PS4 and Quest versions inside the same master level. We had to create a Quest version of the master level, where we replaced the Level Geometry sublevel with the Quest Level Geometry sublevel.

Challenge 6: Instancing
As mentioned in the previous section, auto-instancing is one of the most helpful rendering features of UE4; duplicated meshes in the scene are automatically combined into an instance, and rendered in a single draw call. This feature was simply unavailable to us in the mobile version.
Instancing is still supported in Vulkan, but it must be done manually. This resulted in the engineering team spending a considerable amount of time writing code to automatically instance player inventory meshes together; this also required us to merge meshes together with our crafting system behind the scenes.
Next, we created a tool to automatically instance repeating meshes, like tree trunks and tree canopies. This reduced hundreds of draw calls into the single digits. (We also had to make sure we didn’t use too many LODs, since each extra LOD can add an extra draw call to your scene in certain situations.)
Fortunately, UE4’S foliage tool intelligently instanced its meshes together and did not require any modifications from us.
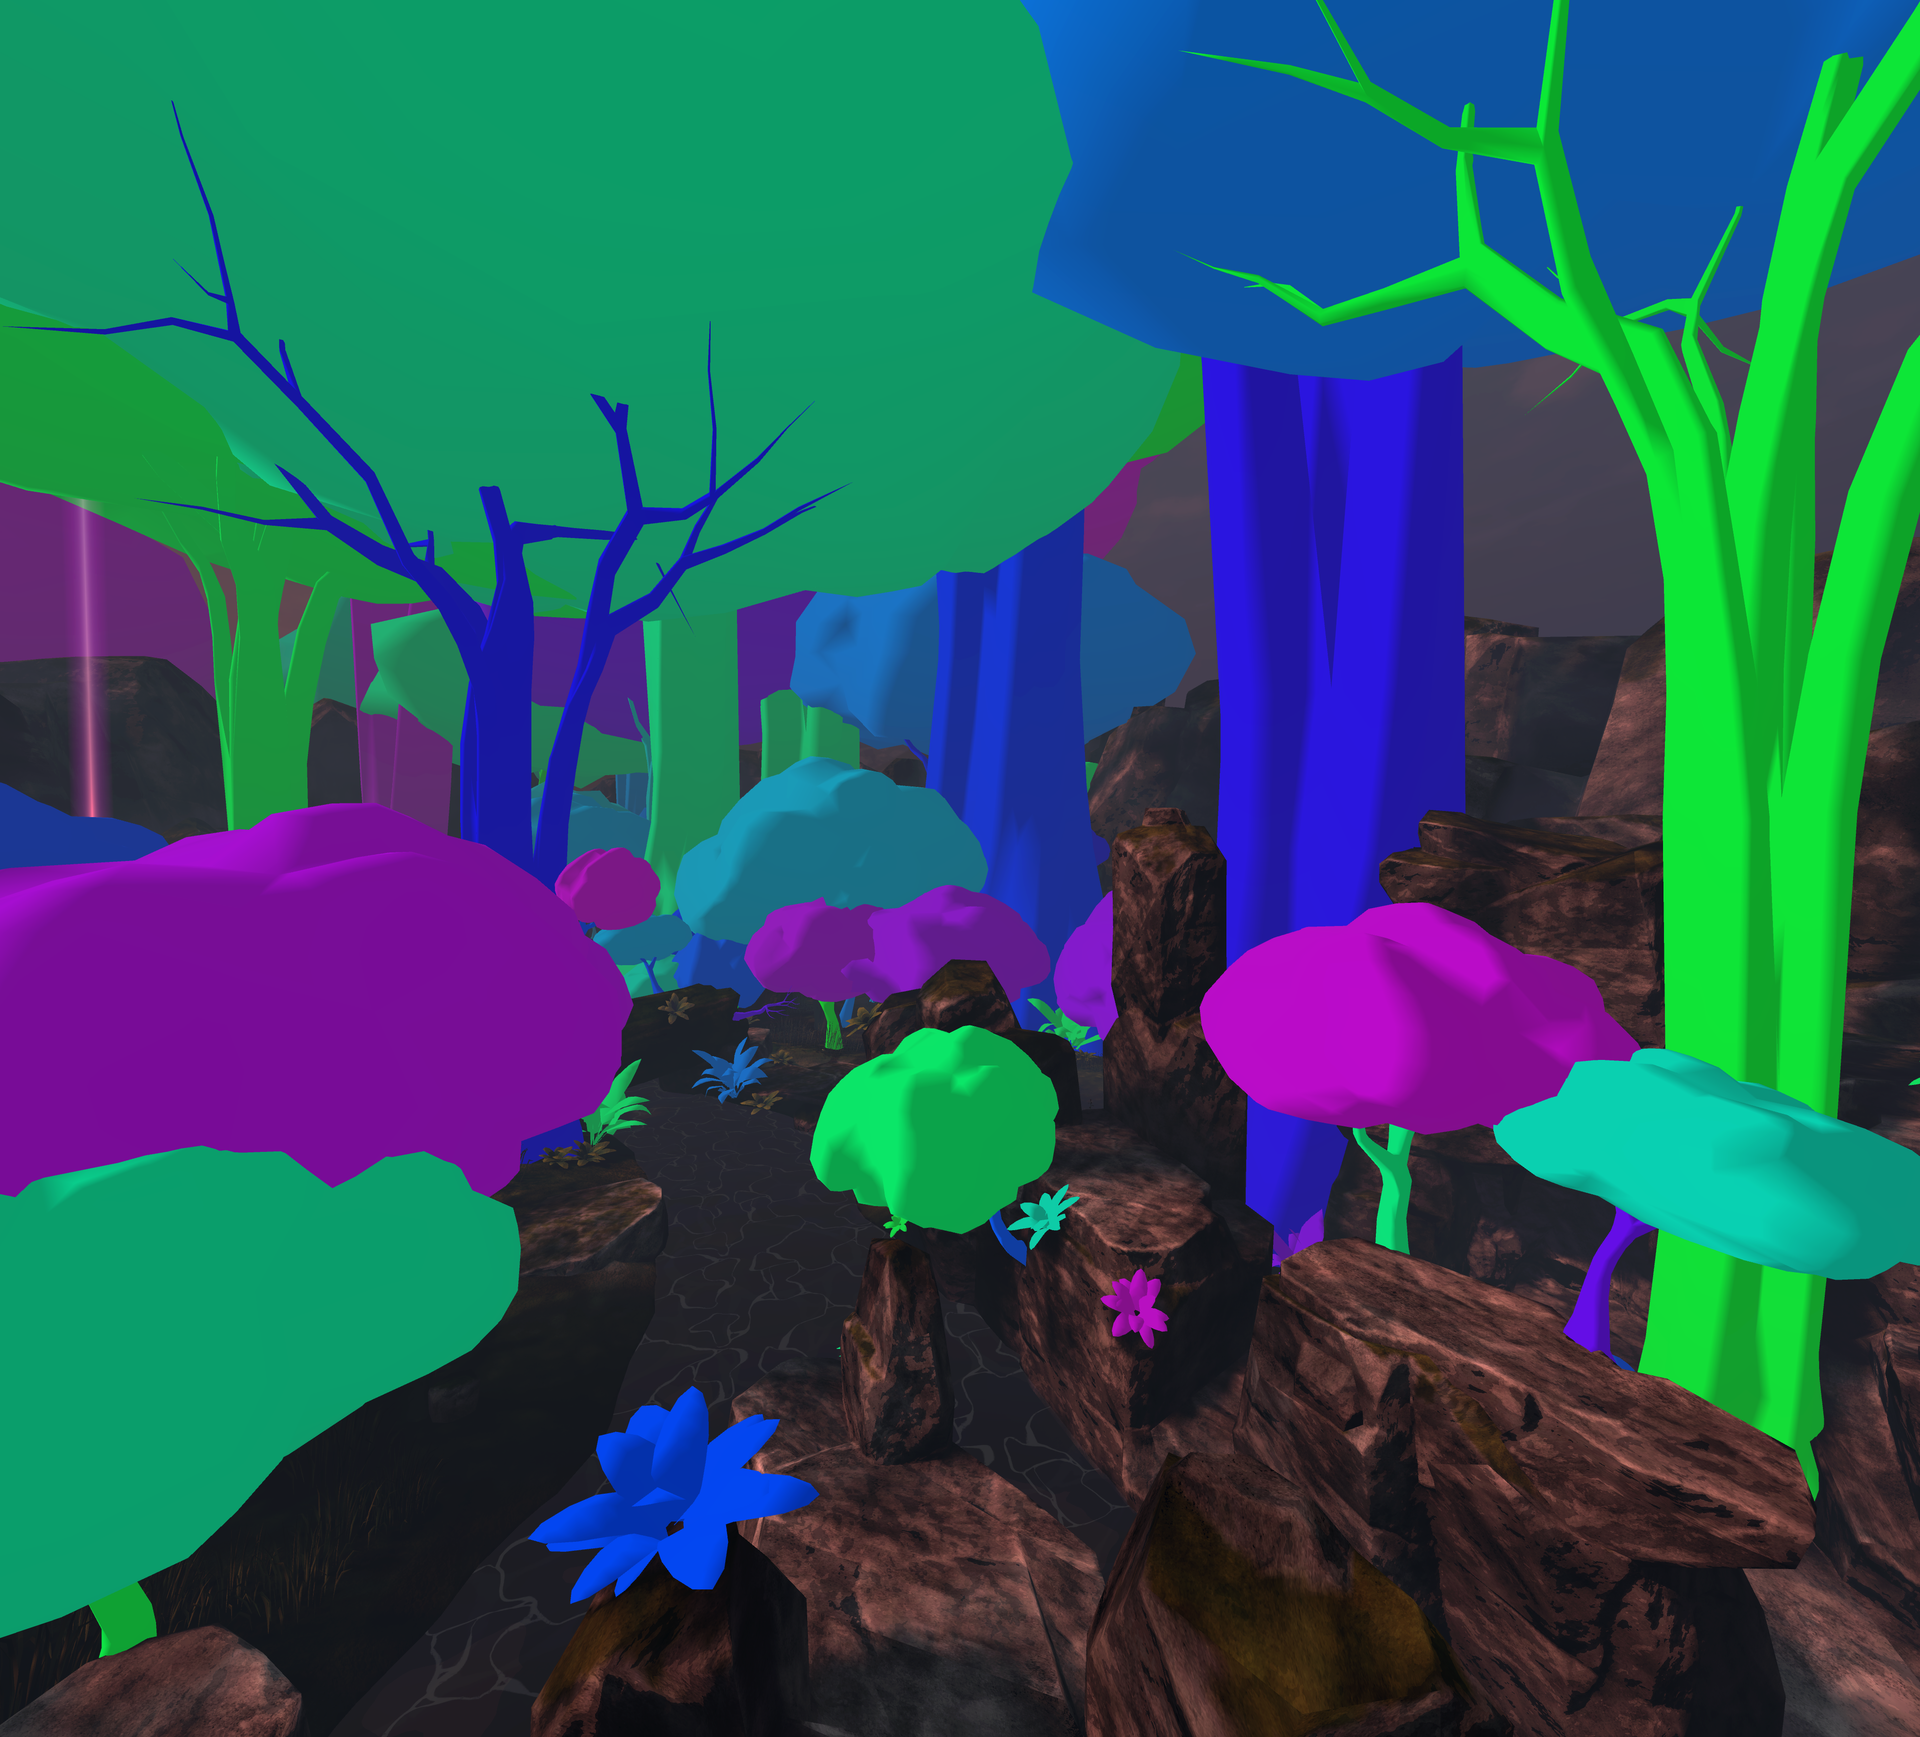
Challenge 7: Occlusion
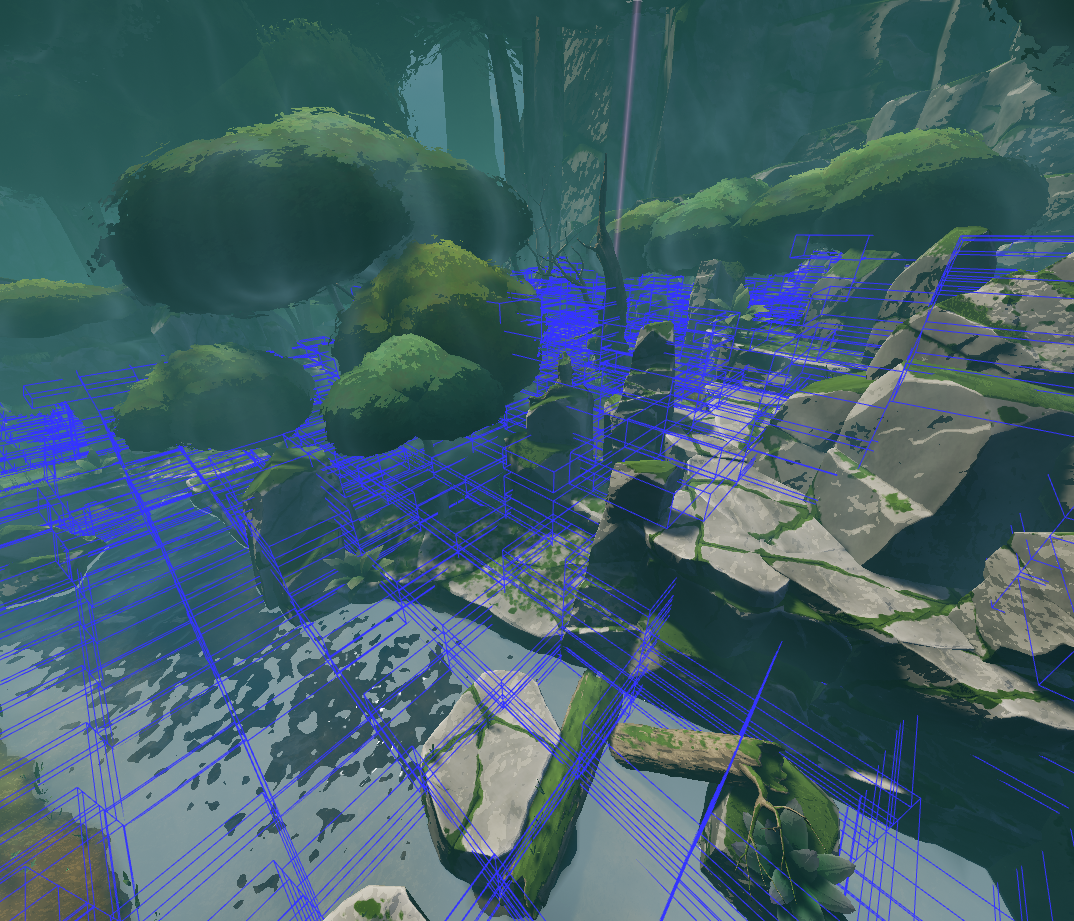
With our strict limit of 120-150 draw calls per frame, we had to be certain that absolutely nothing would draw that we didn't have to. Any opportunity to remove just a single draw call is always important, and obsessing over occlusion/visibility is a major part of that. Fortunately, Unreal offers a variety of occlusion methods that hide meshes that are out of sight, and we used almost all of them. If an object isn’t on the screen, or is behind something else, we don’t want to draw it!
To start, we placed Precomputed Visibility Volumes inside the level in any area where the player could go. Under each level’s World Settings, we made sure that Precomputed Visibility Aggressiveness was set to Most Aggressive, which resulted in less accuracy (leading to some popping) but a massive reduction in draw calls.
Next, we discovered that instanced meshes (such as trees and canopies) don’t occlude other objects, so we had to add a second set of meshes, set to Hidden In Game, inside each tree!
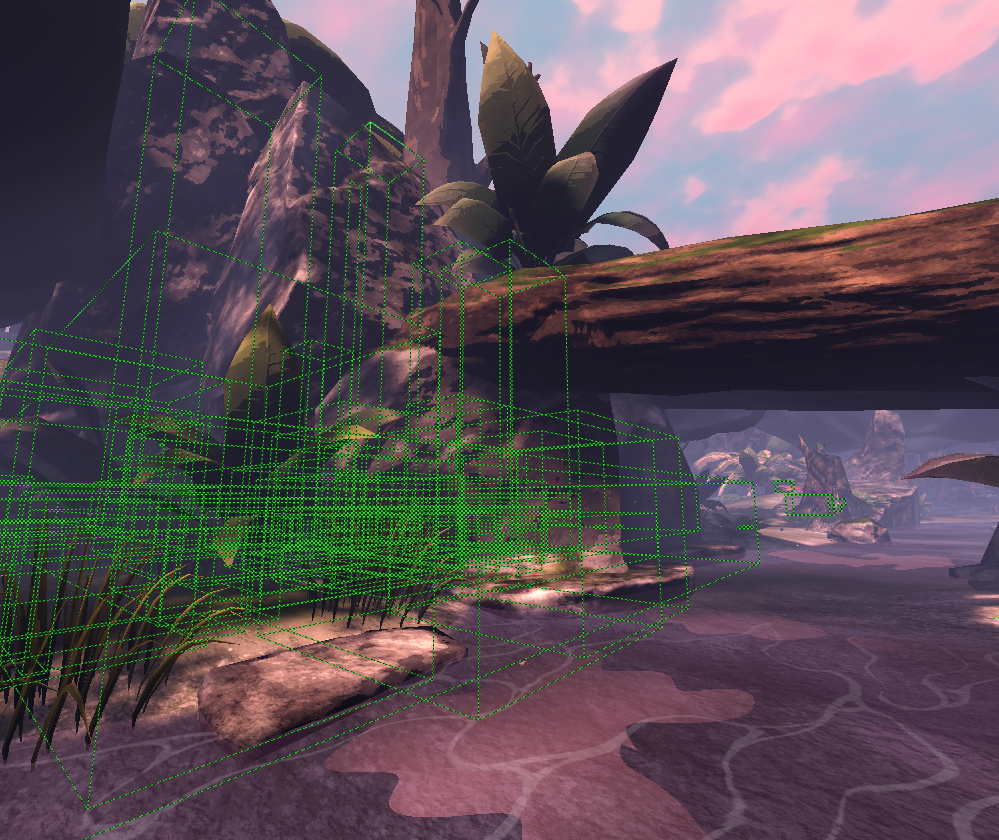
Next, we made sure that meshes inside blueprints had their Desired Max Draw Distance set to about 200 meters; dynamic objects in the world aren’t affected by precomputed occlusion, and so you should manually enter a value to keep them from drawing when far away. Particles should also receive a maximum draw distance, as they default to render to infinity. GPU particles include extra overhead and should not be used on mobile.
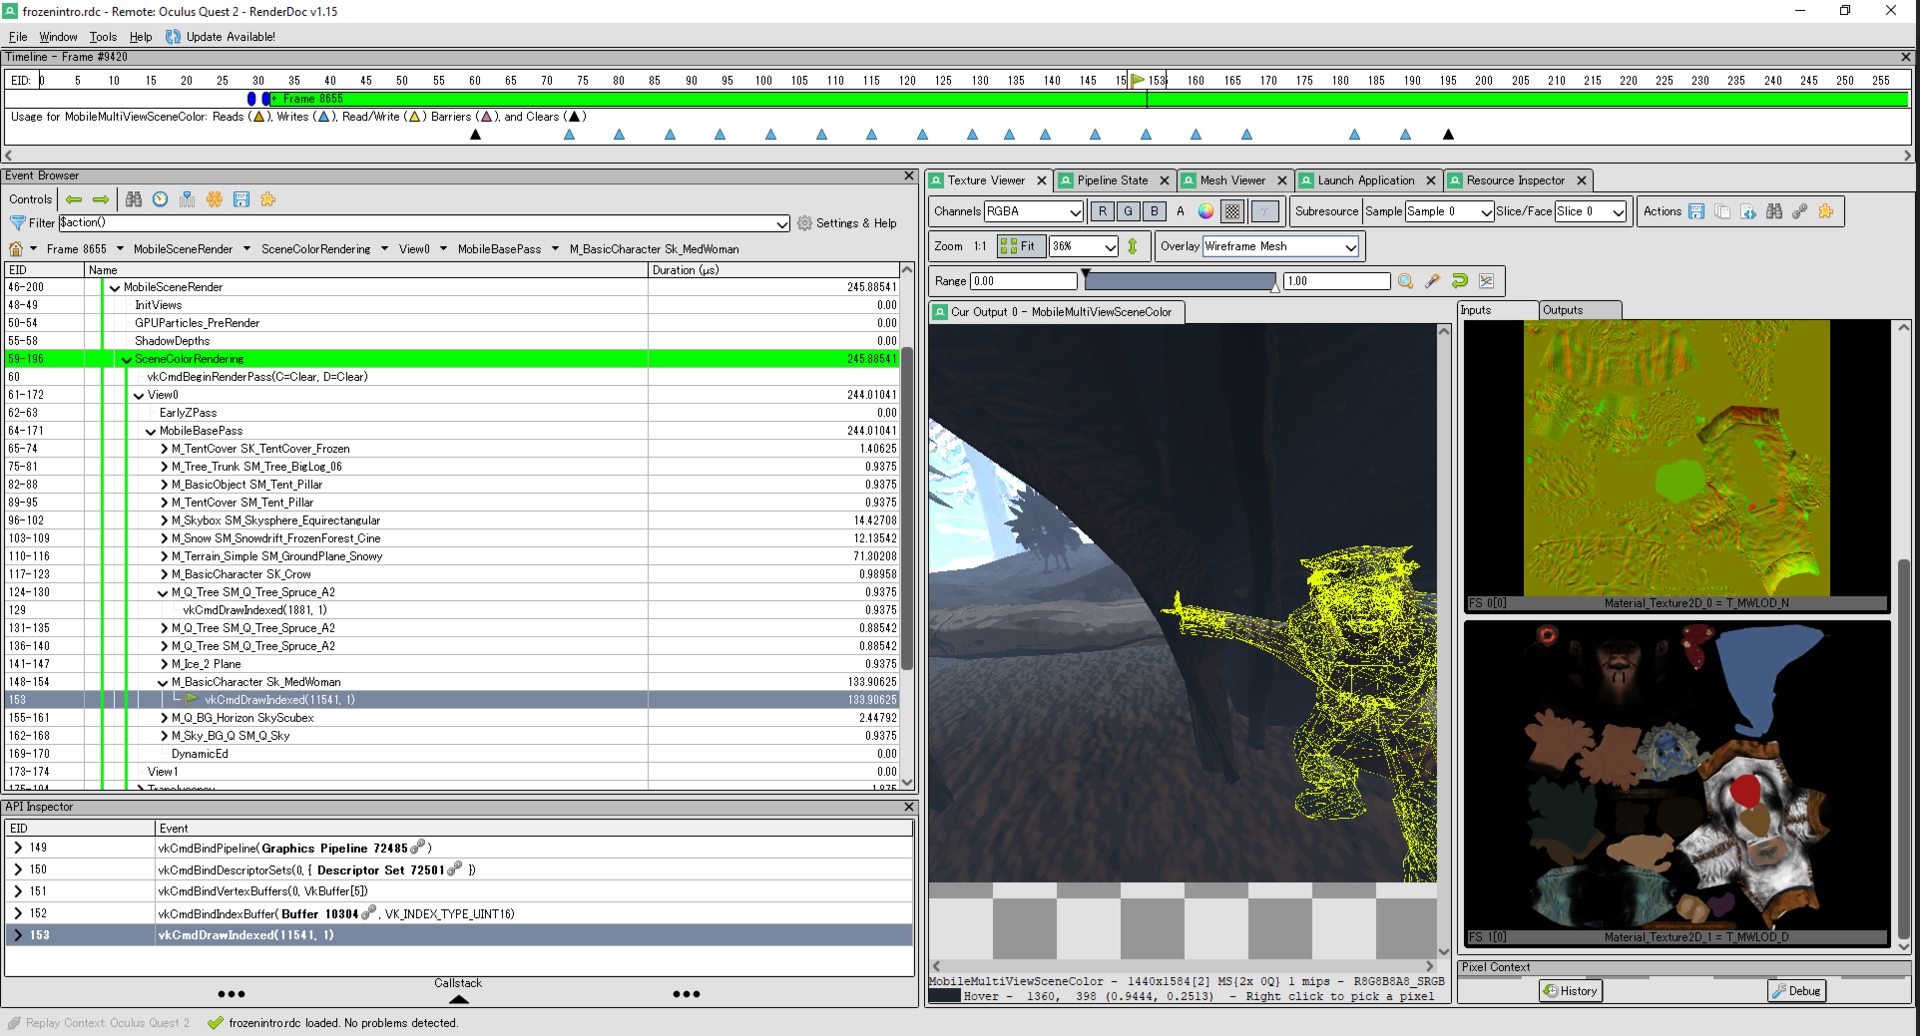
The best way to check your list of draw calls and profile your game is to use Renderdoc. This lets you capture a frame from the Quest headset, then step through the frame draw by draw, checking draw times and seeing exactly which draw calls might be taking too much time. (It also lets you hunt down unwanted draw calls of rogue objects that might be appearing in your scene for some reason.)
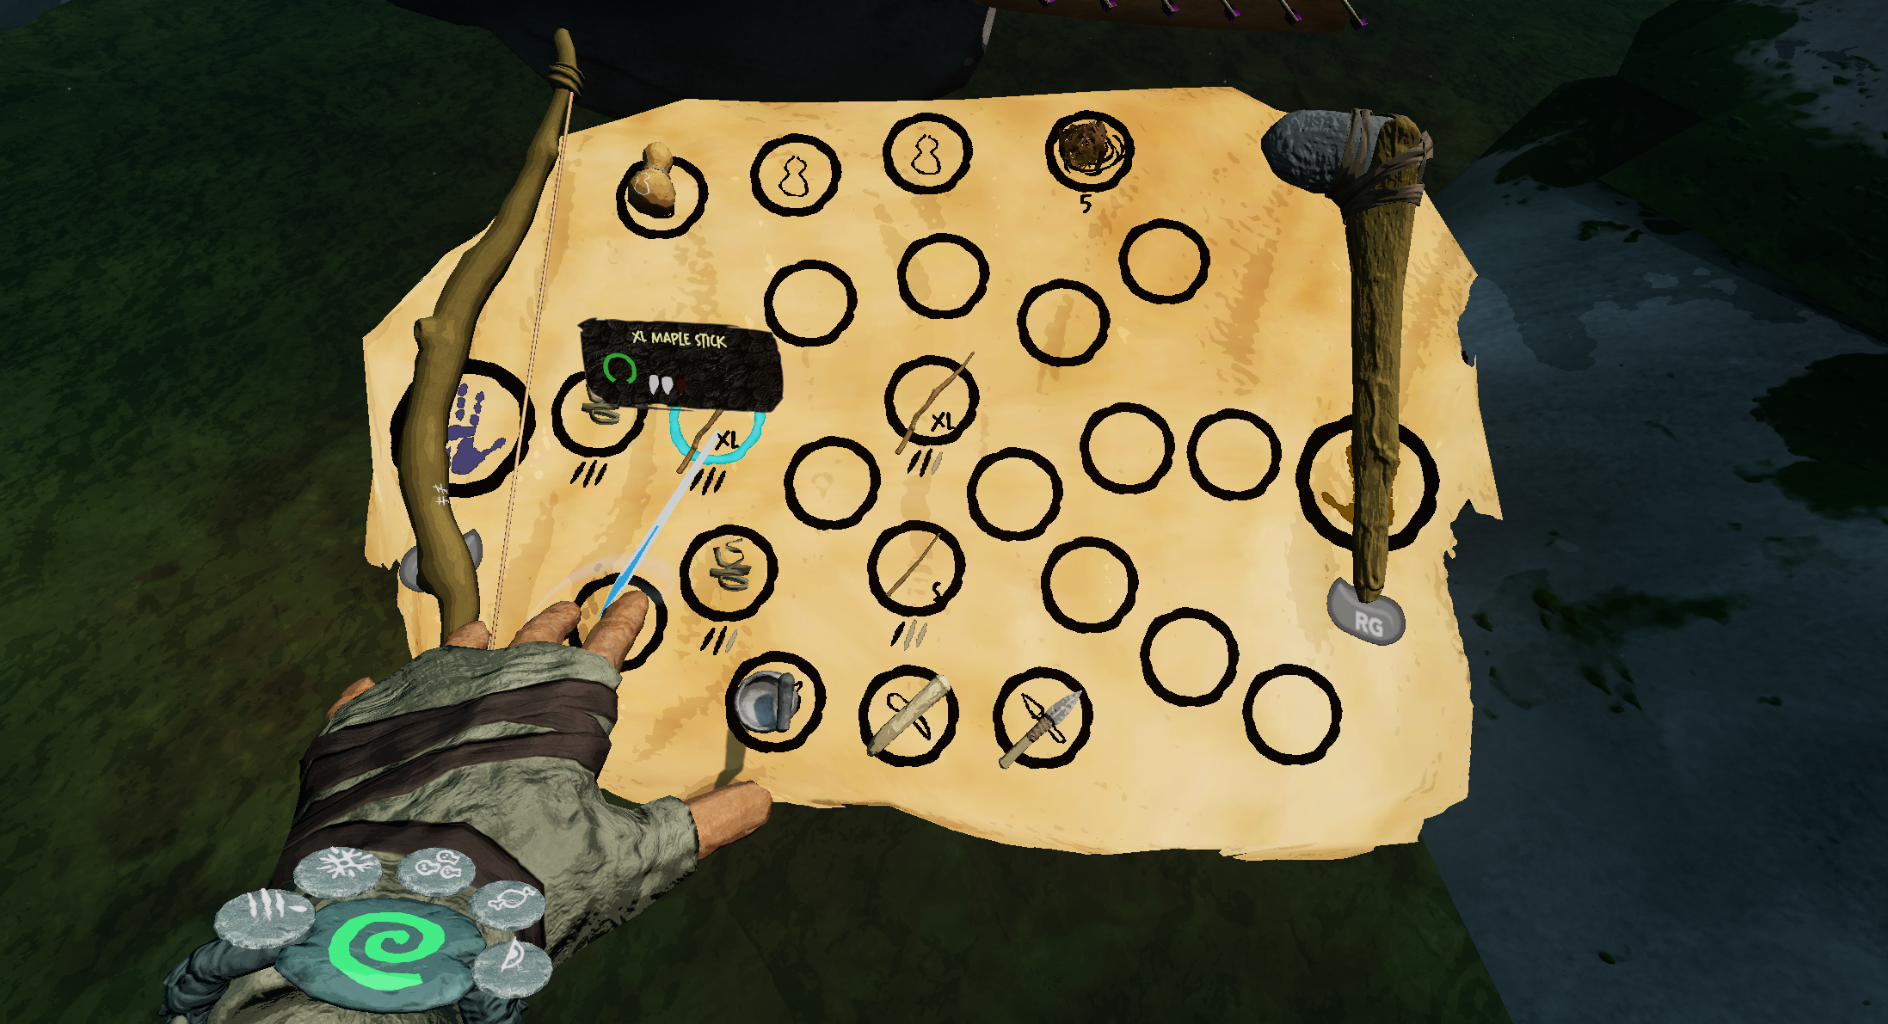
One of the biggest changes from high-spec to mobile was the inventory system. When the player opens their cloak, it displays each usable object as an individual mesh, and the number of draw calls was far too high to display with a level rendering in the background on mobile. We had to bring in an opaque bubble around the player, to block visibility and allow the player to manipulate items without frame rate reduction. This was, by far, the largest compromise we had to make on mobile.
Challenge 8: Post Processing
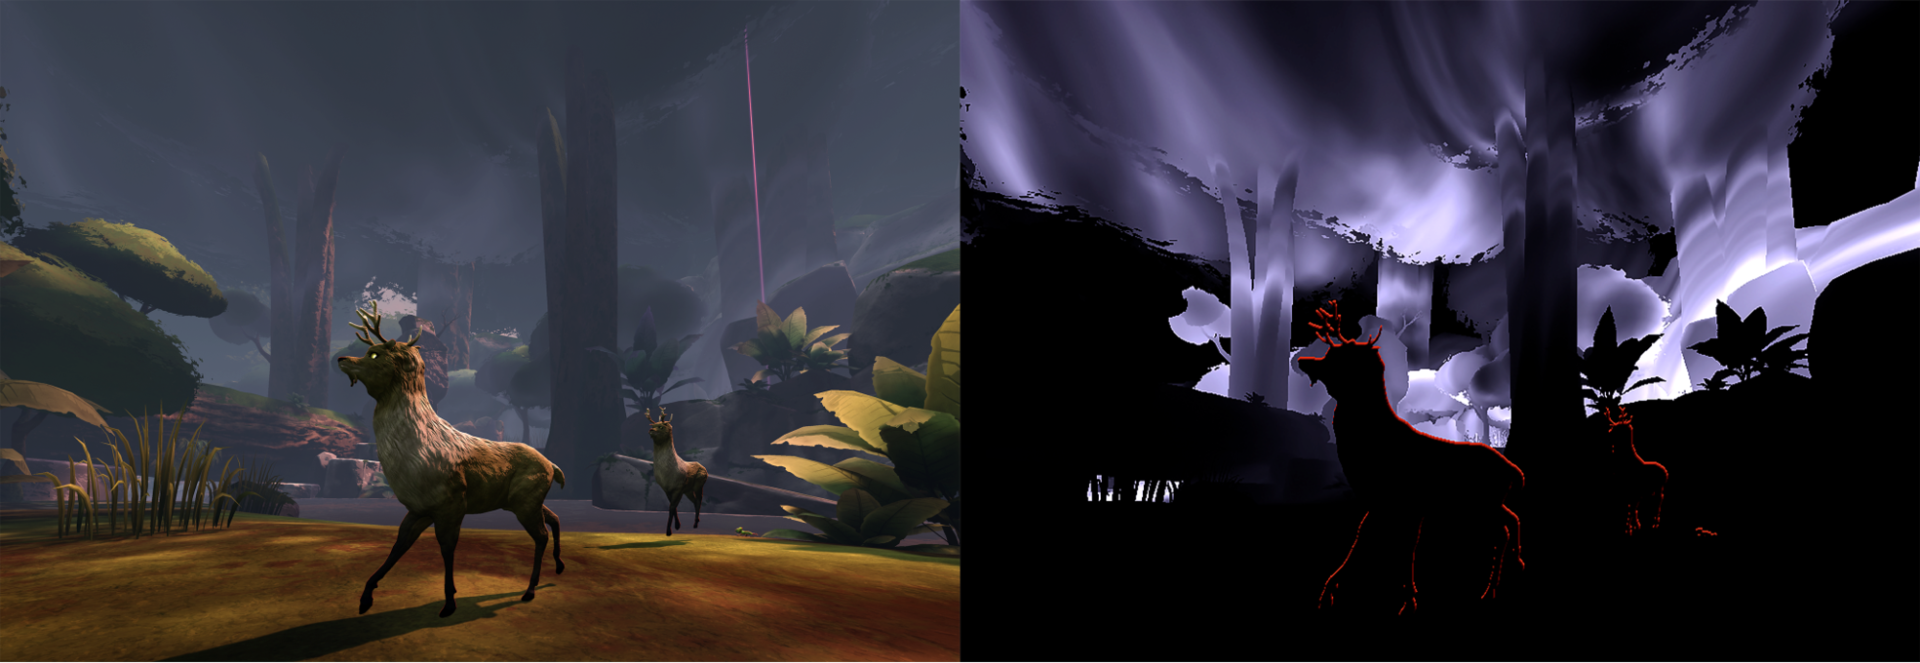
Song in the Smoke makes heavy usage of Post Processing effects; we use CustomDepth to create an edge outline effect on our characters, and slightly desaturate the frame at nighttime.
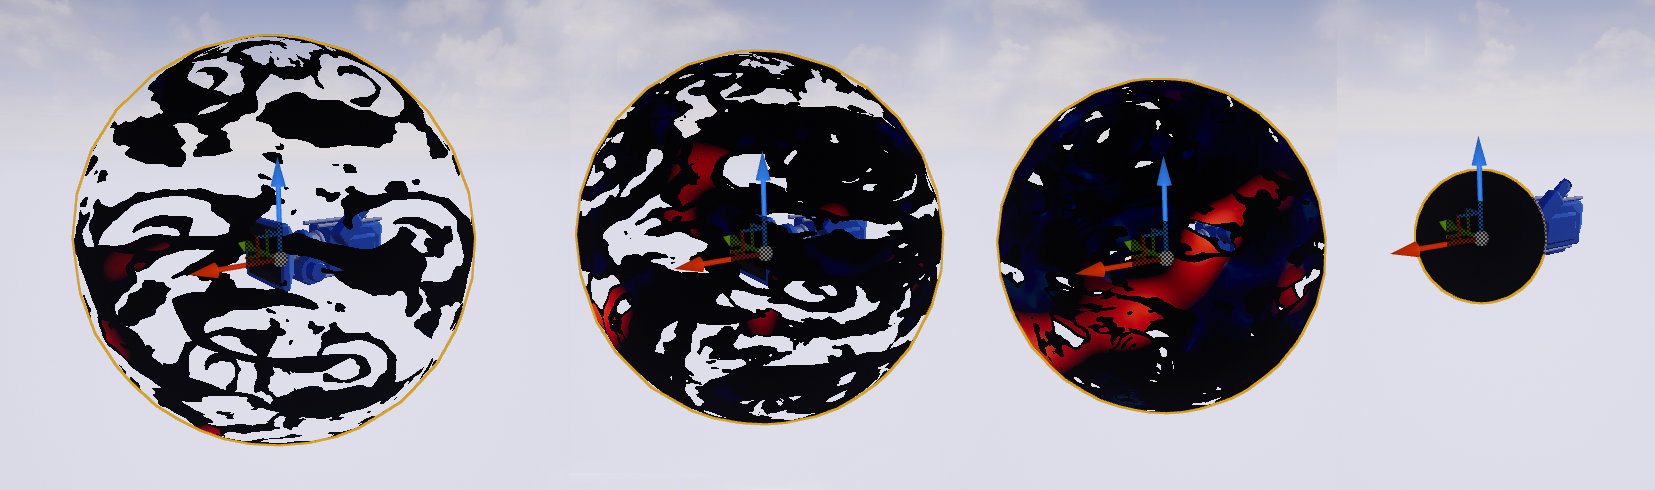
On PS4, We also have a shifting fog effect. It’s made by projecting a rotating cubemap into world space, and clamping it off via Sphere Masks. We use additional sphere masks to add colored fog lights into the world. This effect looks great and is incredibly cheap!
Unfortunately, on Quest, all Post Processing is unavailable, and Post Processing Volumes are simply ignored at run time. To recreate the edge effect and fog we adopted an “inside-out” mentality, rendering the effect as part of each object.
To make outlines, we simply added a rounded Fresnel effect to the character material, and for the fog, we created a world-aligned noise panner MaterialFunction, then added it to every material that was being used in the environment.
One last trick: since there’s no Post Processing, we never actually fade to black! Instead, we make a ghostly sphere appear on top of the player camera, which gets smaller and smaller until it blacks out everything in the scene. It’s a cheap effect, but works great.
Conclusion
There are benefits to shipping a large-scale game on PC and mobile VR simultaneously. Simultaneous development requires extreme discipline when creating assets, and keeping a high-spec and mobile mindset at all times.
However, CPU and GPU optimizations that are discovered during the process can contribute massively to performance; by the end of the project, the high-spec version was running faster and at a higher resolution than we had anticipated, due to so many optimizations for the mobile version.
Making a VR game is a process of thousands of small optimizations -- each change might make a .5% improvement, but that adds up in the end. Good luck, and mind your draw calls!
TEXT_ Colin Williamson, Koichi Yamagishi, Alex Miyamoto (17-BIT)
EDIT_ Hitomi Komura (CGWORLD)