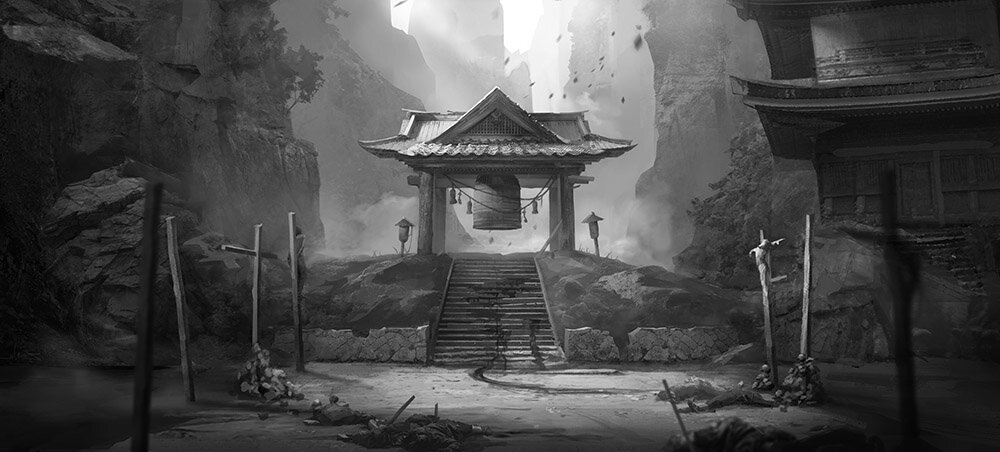
Flying Wild Hog's "Trek to Yomi" is a unique title set in late Edo period Japan that reconstructs the world of the Izanagi-Izanami myth from a unique perspective. The black-and-white visuals, inspired by the films of Akira Kurosawa, once the pride of Japan, are nothing short of stunning. What kind of challenge did the small studio in Rzeszów, a provincial city in Poland, take on?
This article is an English translation and reorganization of an article that appeared in CGWORLD vol. 293 (January 2023 issue).
※日本語記事はこちら
Interviewee
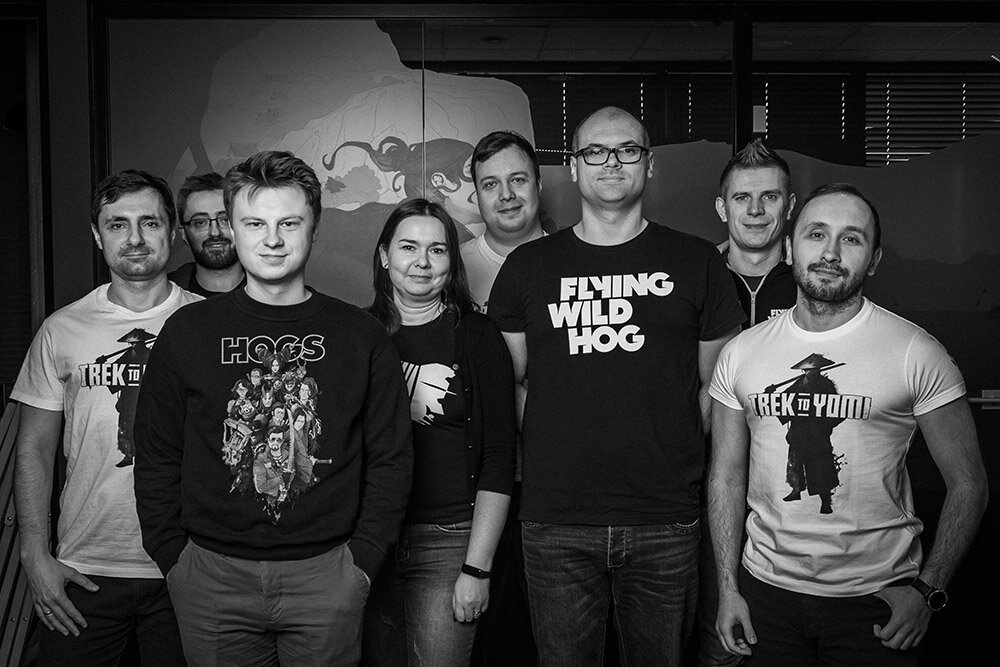
Photo from left.
Michał Rachwał (Character Concept Artist)
Jarosław Bartyna (VFX Artist)
Łukasz Fuksa (Character Artist)
Katarzyna Szymczak-Skalska (Lead Producer)
Leonid Bilousov (Technical Artist)
Grzegorz Szczygieł (Art Director)
Marcin Kryszpin (Game Director / Studio Head)
Paweł Wisz (Lead Animator)
Information
Publisher : Devolver Digital
Developer : Flying Wild Hog
Release : On Sale
Platform : PS5/PS4/Nintendo Switch/Xbox Series X|S/Xbox One/Steam
Genre : Action
www.trektoyomi.com
Developing a game with Japanese setting / language in Poland
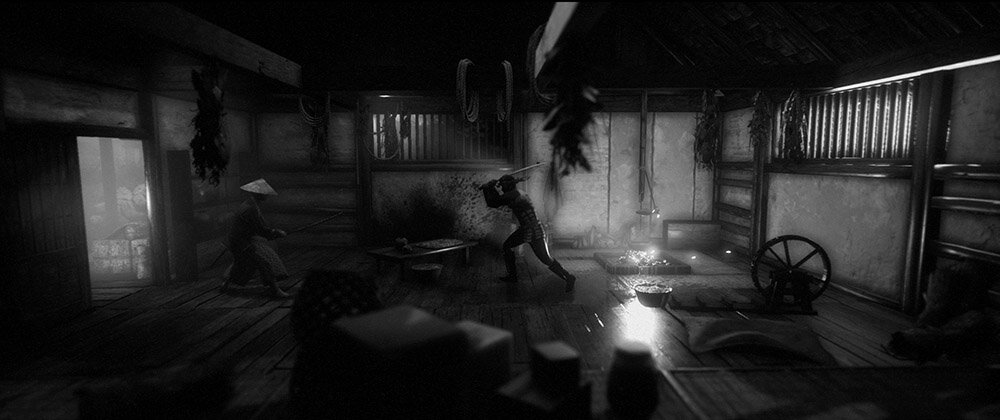
Trek To Yomi is a collaboration between Polish game developer Flying Wild Hog (FWH) and Italian creative director Leonard Menchiari, and although it was developed completely outside Japan, it is in Japanese and set in late Edo period Japan. The game was developed completely outside Japan, but the language used was Japanese and the setting was Japan at the end of the Edo period, which is a unique work from our point of view.
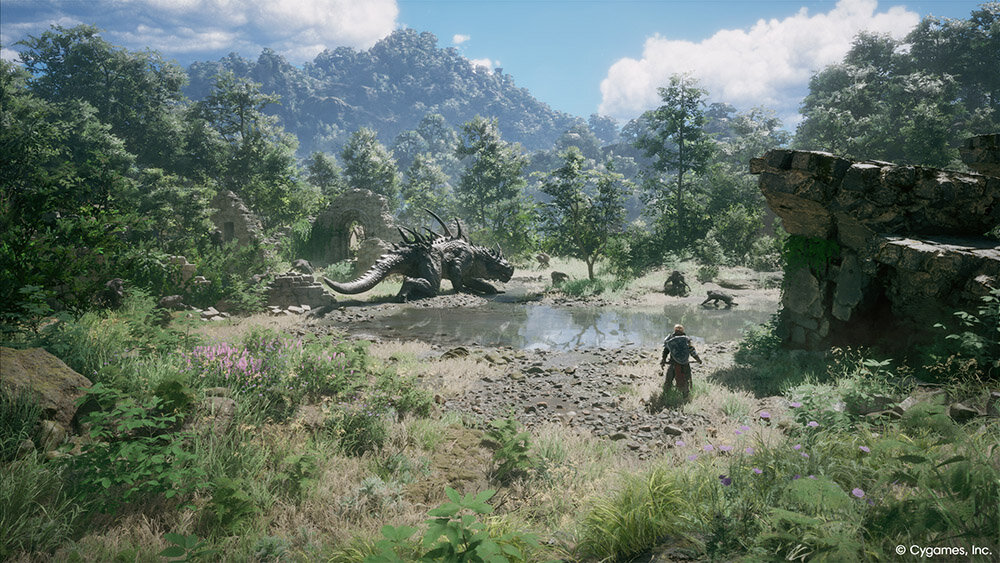
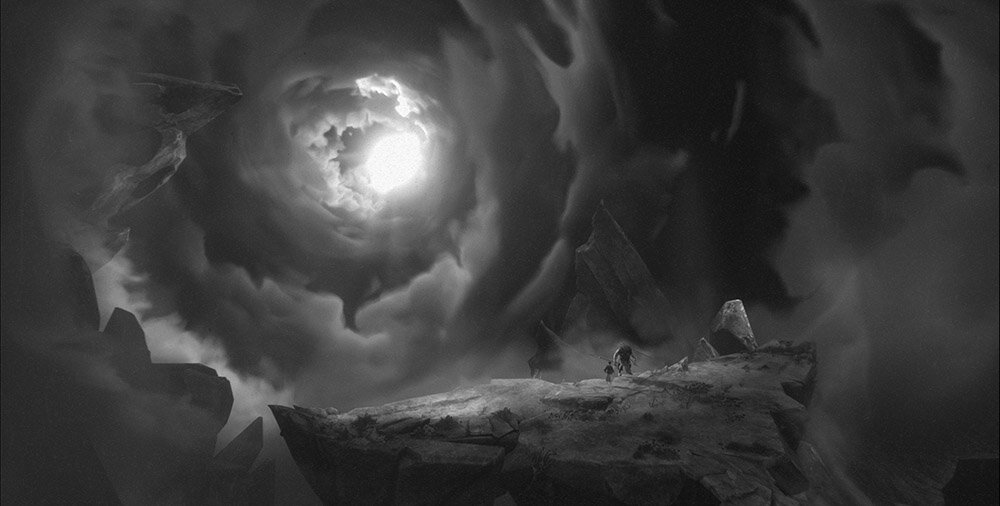
However, their elaborate artwork has received huge reactions beyond the barriers of language and national borders. The work is often compared to Ghost Of Tsushima (2020), but it can be said to have established its own individuality with its emphasis on cinematography and black-and-white expression strongly inspired by the cinema of Akira Kurosawa.
Although FWH is a studio known for its crazy Asian fantasy, the Shadow Warrior series, this game was not developed at its Warsaw headquarter, but as an independent project of its branch studio in Rzeszów, a regional city near Lviv, Ukraine. The author, Saito, then a level designer at FWH Warsaw studio, but was involved in Trek To Yomi a little, by recording placeholder voices and facial animations and providing linguistic and cultural support.
According to game director and studio head Marcin Kryszpin, it all started when Menchiari approached Devolver Digital (Devolver), the publisher of the game, with a proposal.
The studio is closely associated with Devolver, but FWH Rzeszów was approached with the offer because of its history of developing Devolver's marketing title, Devolverland Expo (2020). It was a new challenge for the Rzeszów team, but they found it rewarding when they found out it was a challenge for a samurai film.
We will now take a closer look at how the team tackled the Kurosawa cinematics.
Point 01: Trek to Kurosawa
How did the Polish team analyze and reconstruct Kurosawa's films? This article looks at their ideas and methods.
Art concepts, Japanese samurai films as references.
Historical research by experts
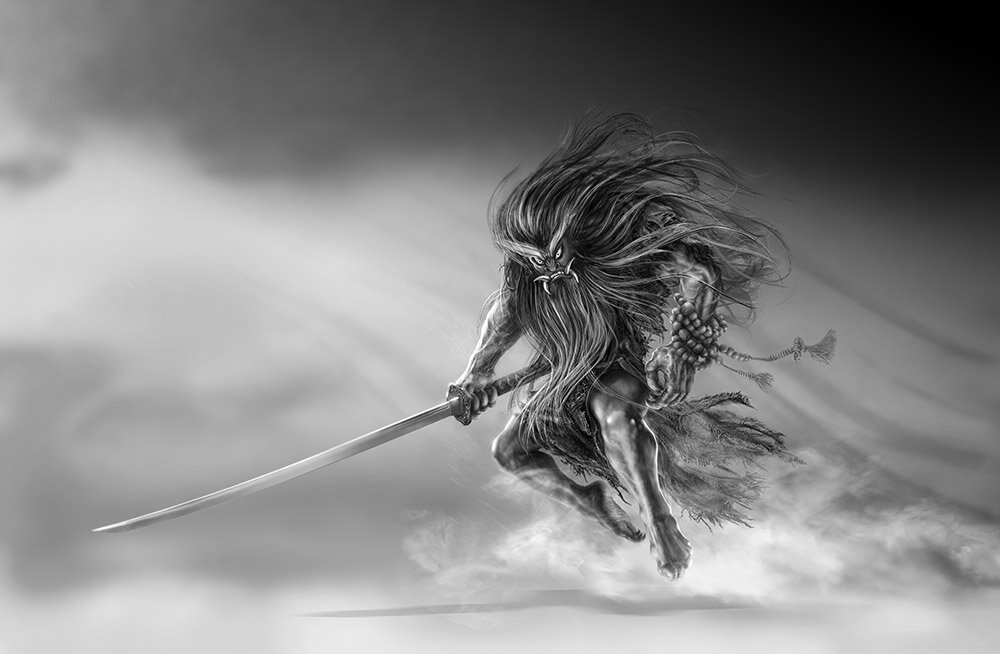
In the development of the game, they tried to create visuals based on as accurate an understanding of history and culture as possible. In some cases, it was difficult to achieve 100% accuracy due to the game design and other factors, and there were also scenes that required a fantastical imagination related to the world of 'After death'.
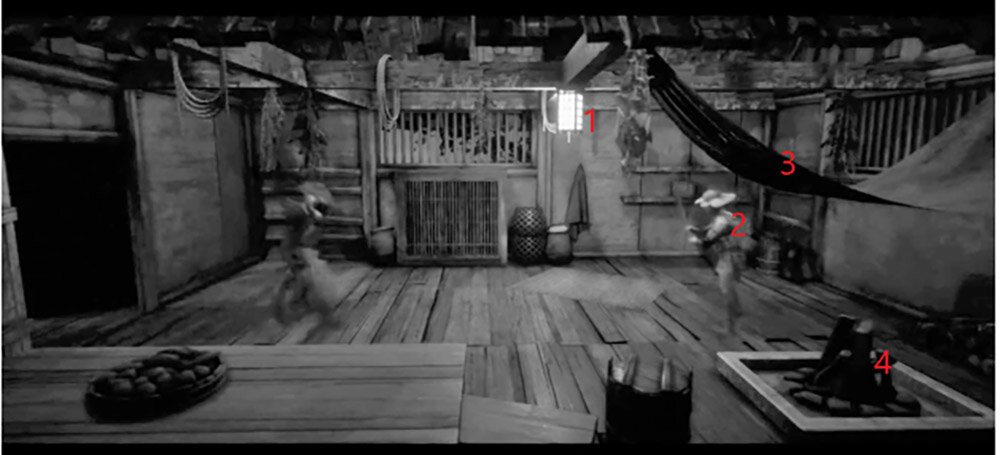
In order to ensure accuracy, the film was also supported by Aki Tabei Matsunaga, a specialist in Edo period history. Katarzyna Szymczak-Skalska, producer, cited examples such as modifying Western-style push doors to sliding doors and replacing hanging lights from ceiling with floor-standing lanterns.
-

Pointed out by Tabei Matsunaga. The numbered sections are those pointed out -

After the corrections had been applied
-
Pointed out by Tabei Matsunaga. -
After the corrections had been applied
Post-processing to reproduce the texture of black and white film
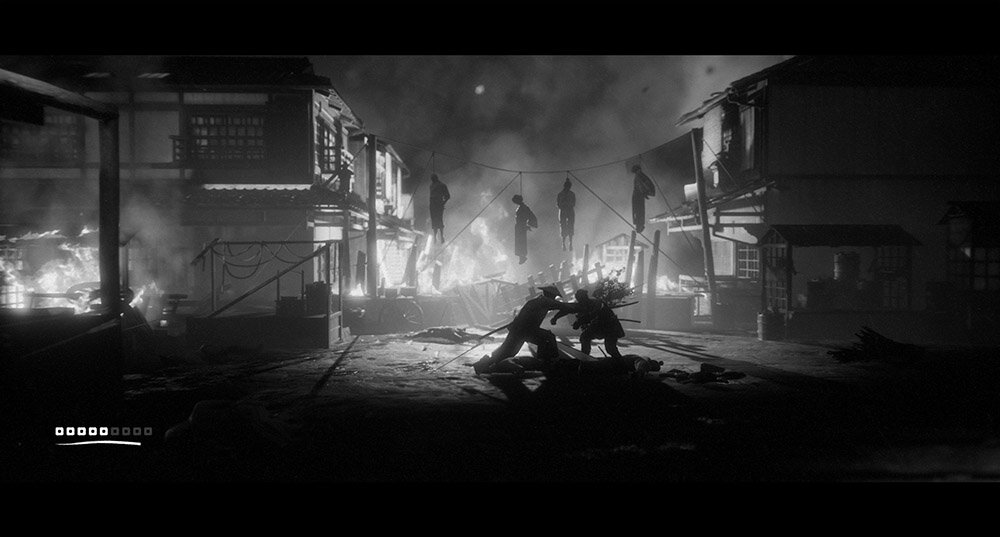
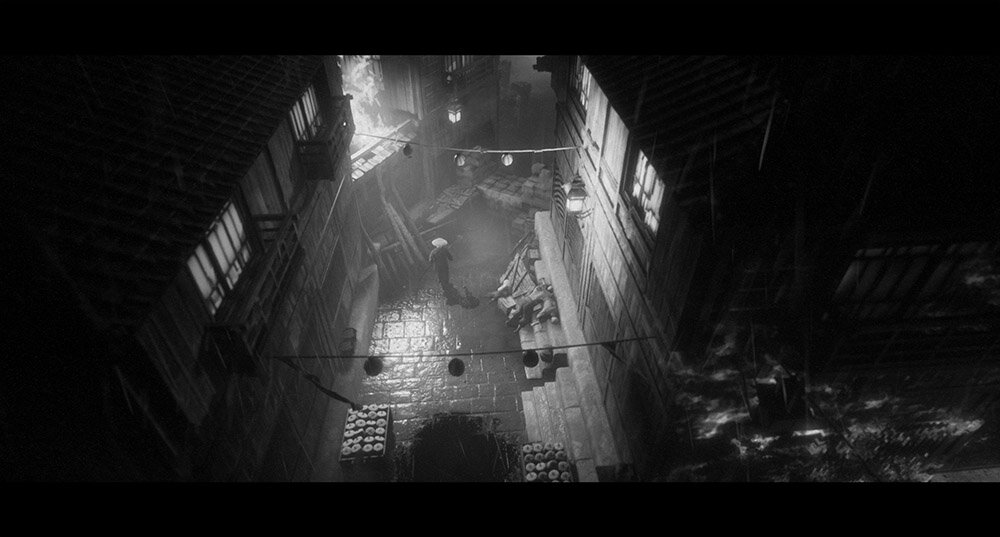
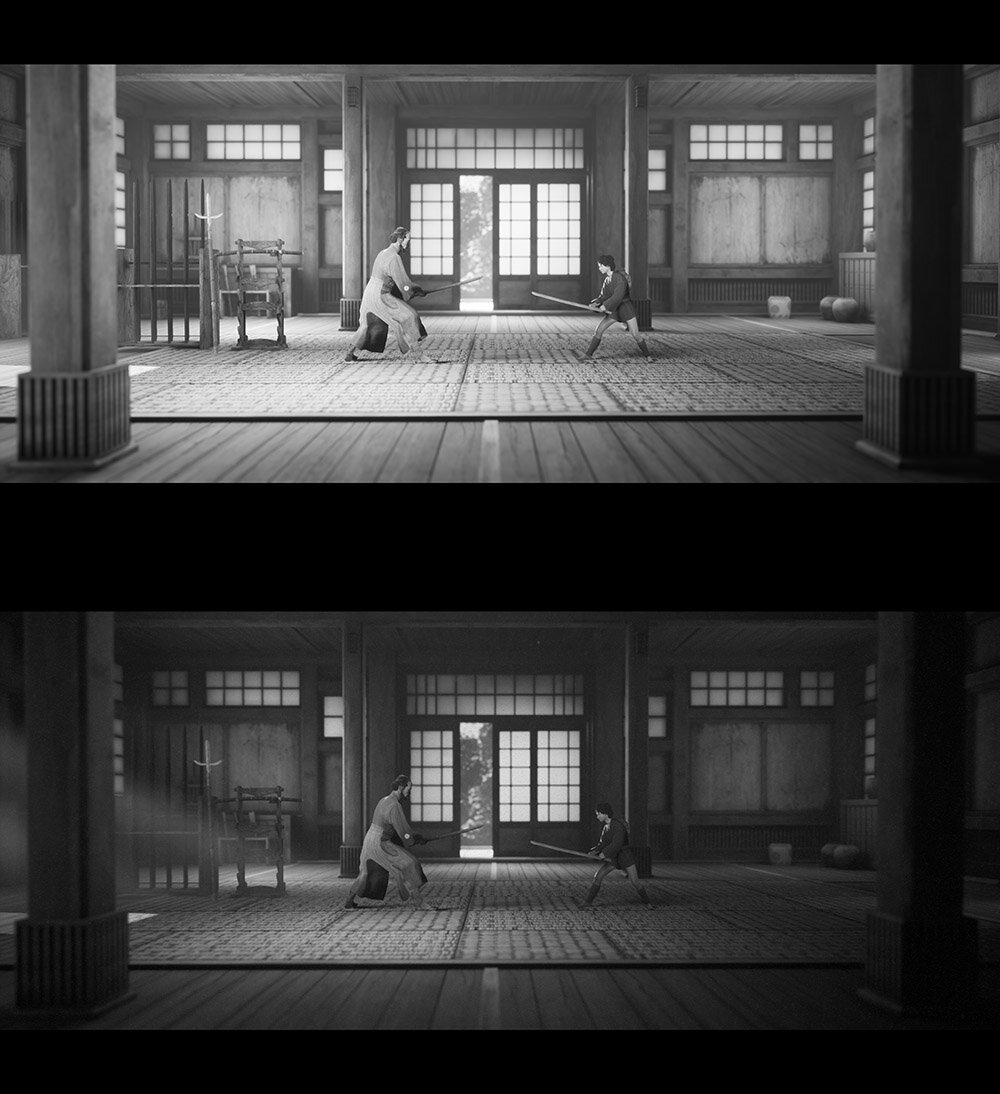
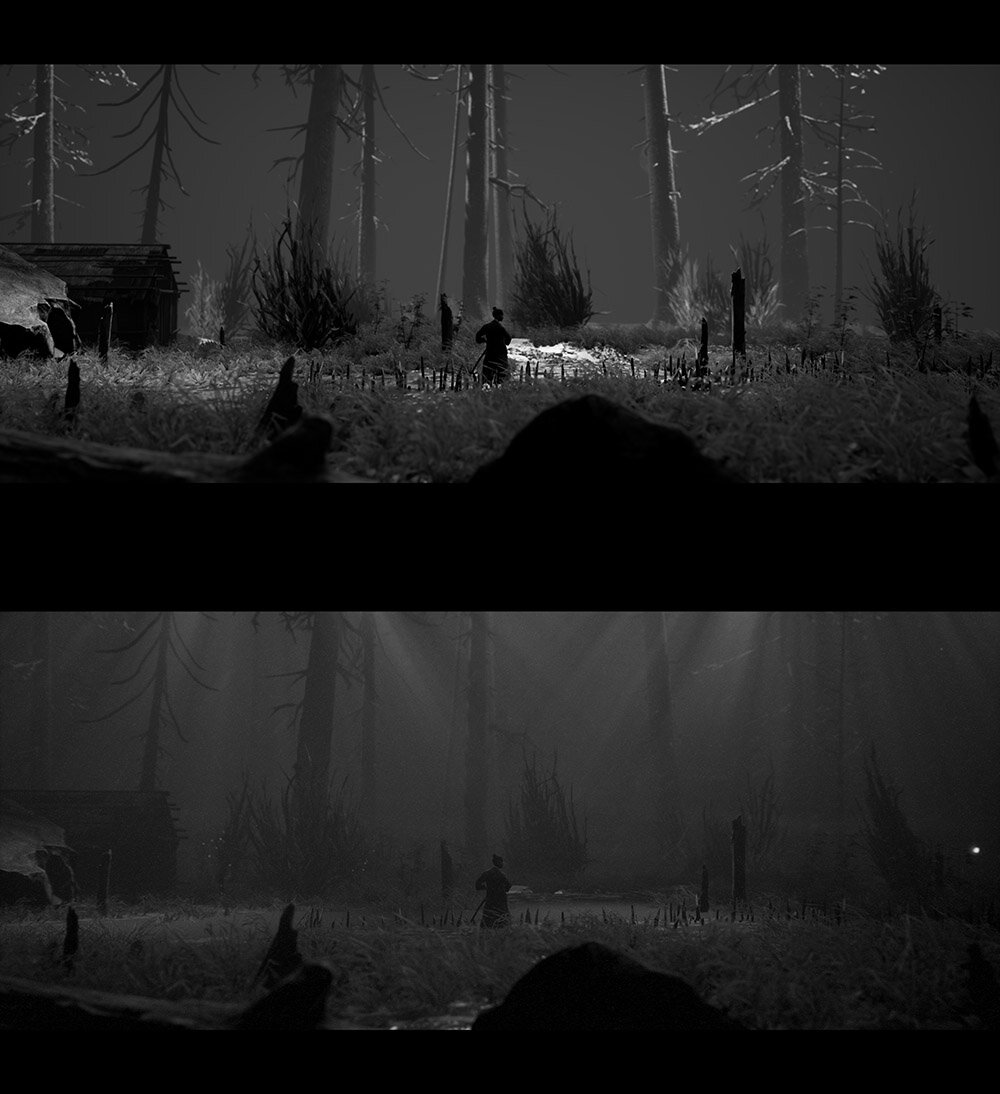
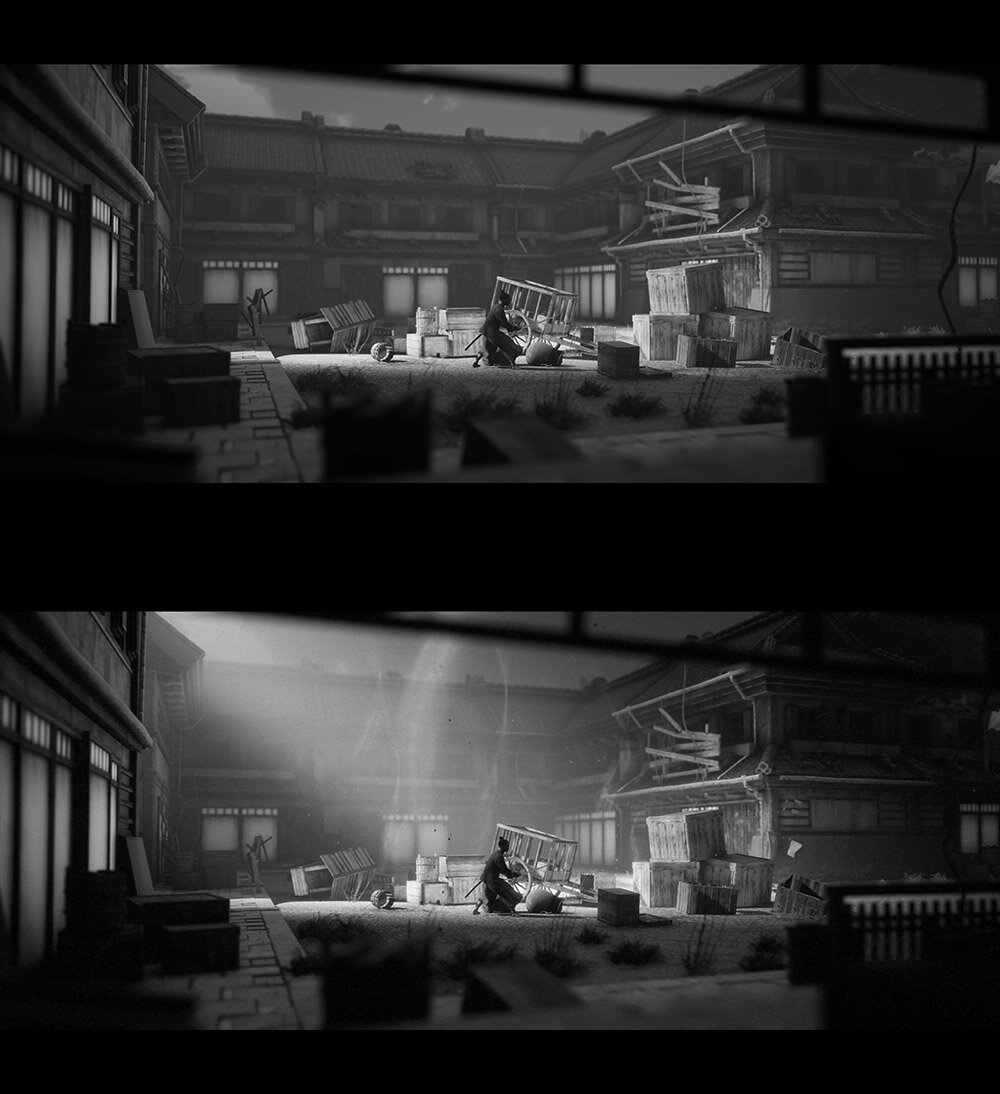
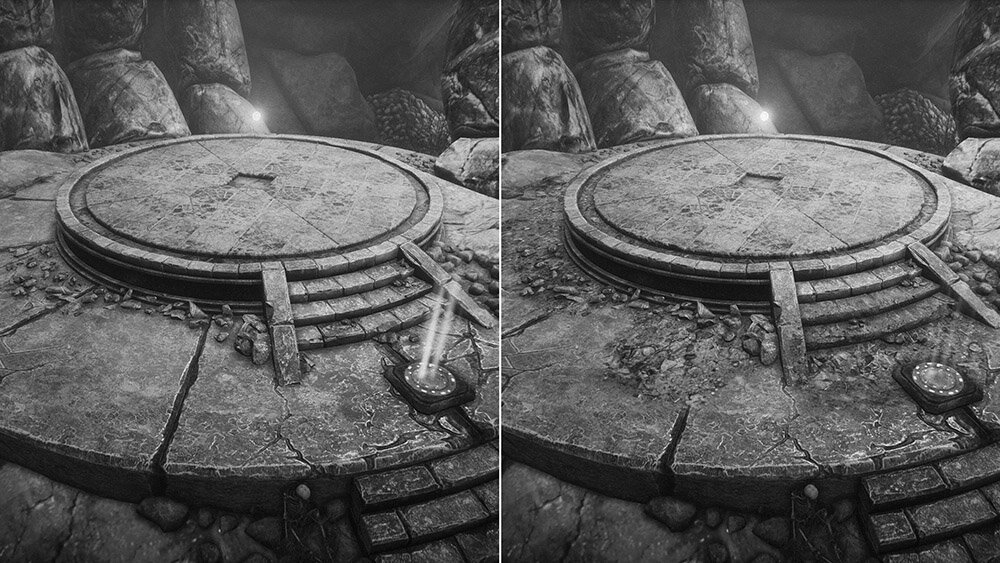
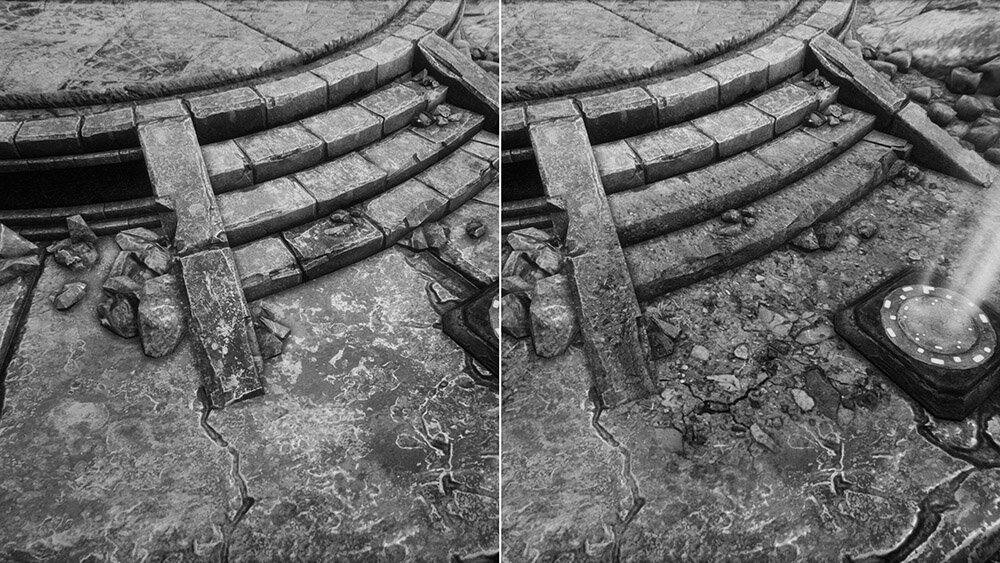
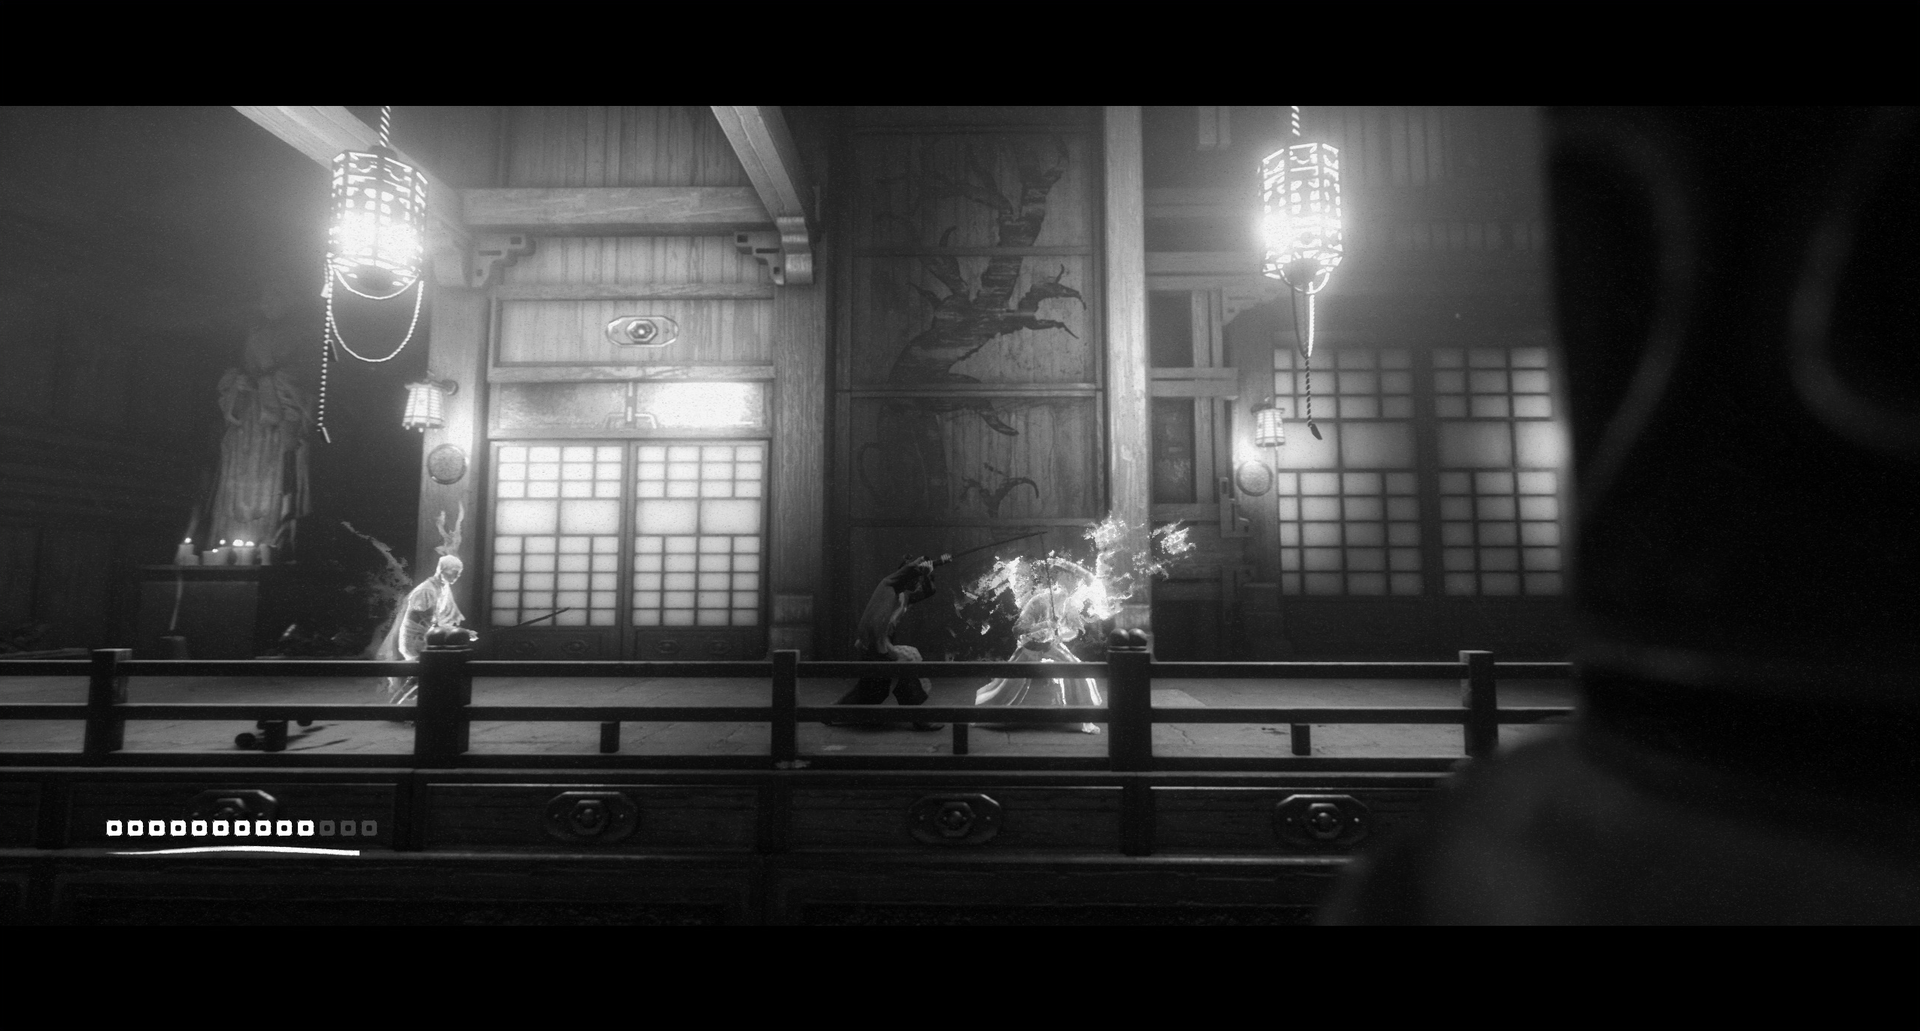
Art director Grzegorz Szczygieł said that in exploring the imperfect film stock of 50s cinema, he created a post-process that reproduced the noise and dirt on the screen, as well as the irregularities in tonality between frames.
In achieving the black-and-white film-like effect, no filter was actually used to reduce color saturation. The film was created in black and white from the outset. The idea was to thoroughly follow the grammar of Kurosawa's films, and to use the brightness and intensity of the lighting to add emotion and accents.
Four post-effects were created: particles, film noise, film scratches and procedural film flicker. Performance is said to be around 0.8-1.0ms when running at 2560✕1440 resolution on RTX 3060. In addition, the camera rendering settings such as brightness and contrast were adjusted for almost every shot. (The top image is before post-processing was applied, the bottom image is after post-processing was applied)

Point 02: Character representation in black and white visuals
How to create characters that look good on a black and white screen?
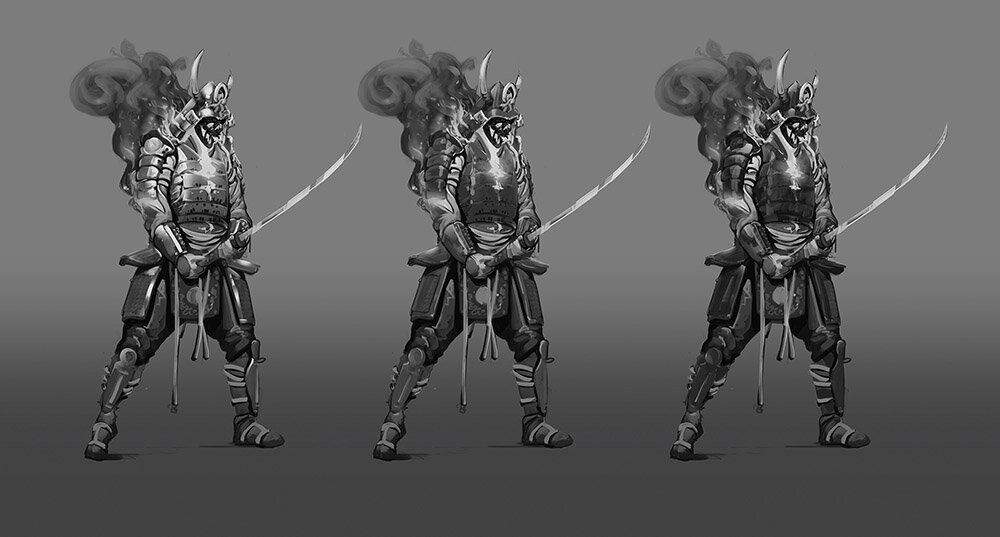
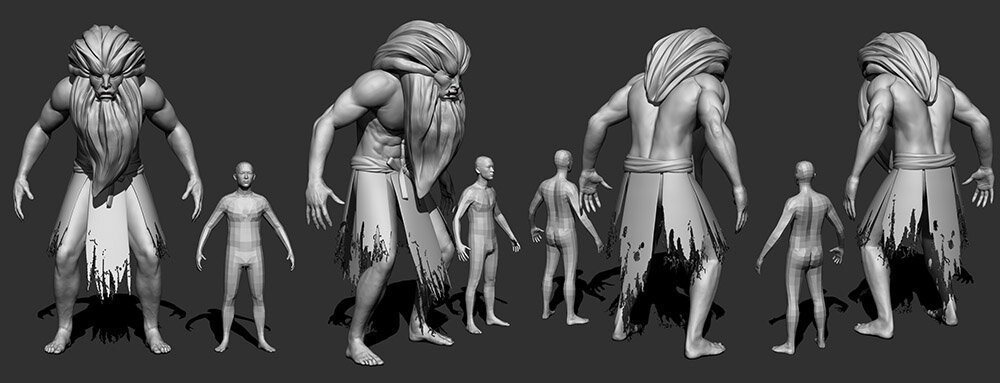
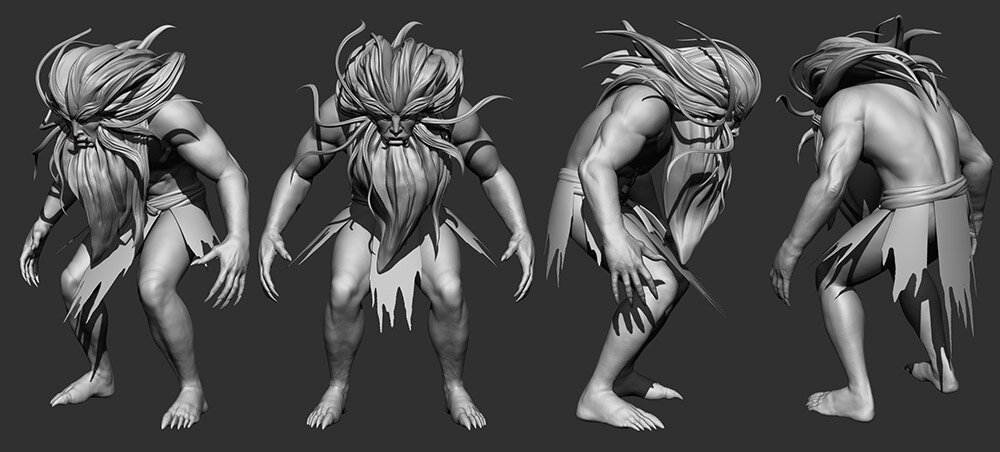
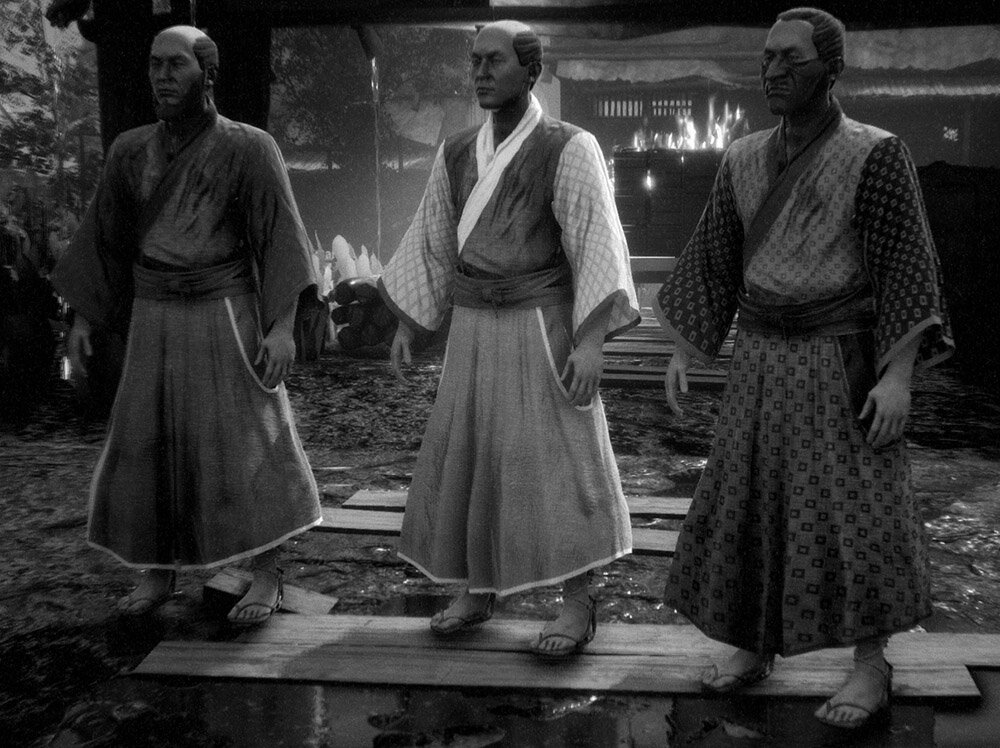
Character models with emphasis on silhouette
According to Łukasz Fuksa, who was in charge of modeling the characters, the most important element in the modeling was the silhouette. The black-and-white nature of the screen made it difficult to distinguish between characters from a close-up camera, which was a major problem, so creating silhouettes that made it easier to distinguish between them played a major role. In order to ensure historical accuracy, an unexpected limitation mentioned by Fuksa was the difficulty in differentiating silhouettes by using something like exaggerated armors, which is common in fantasy.
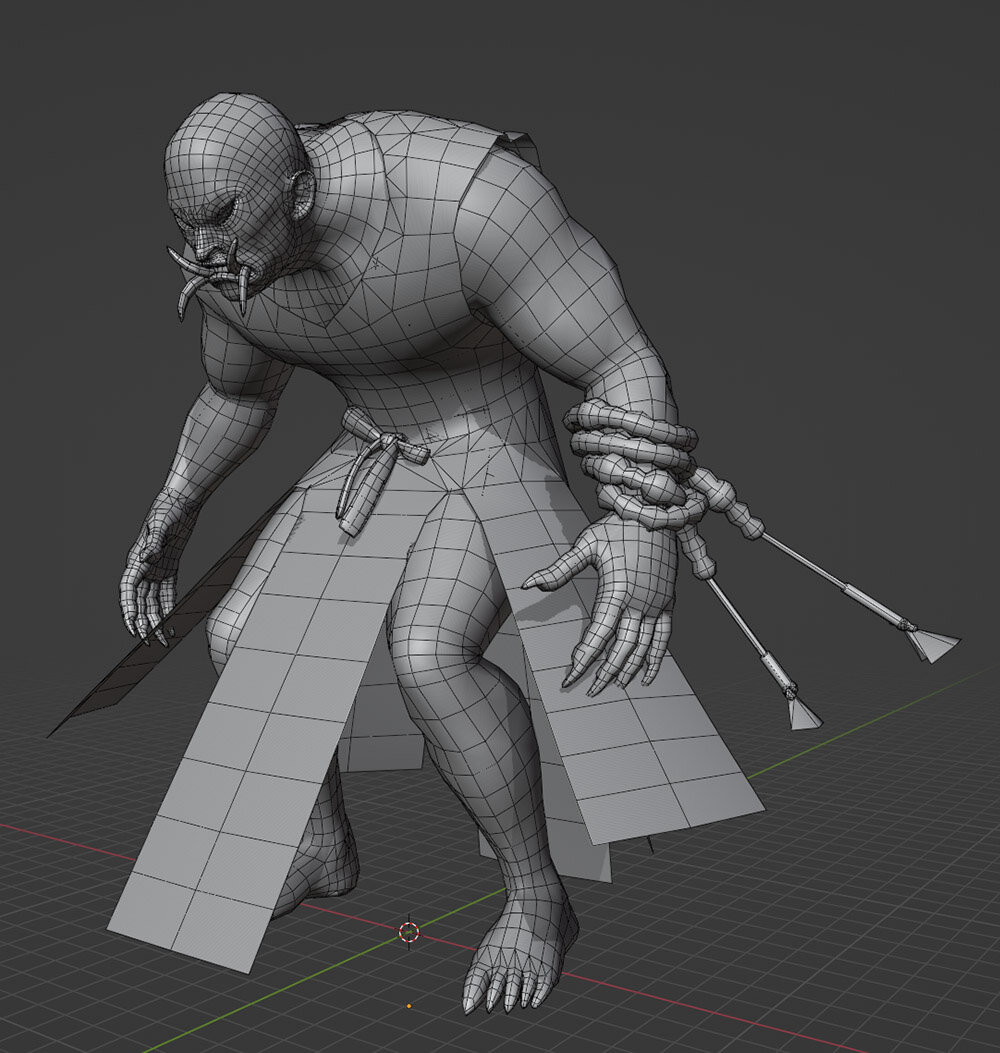
Modeling started with a mid-poly model and established the proportions and silhouette. From there, a high-poly model was created using ZBrush, retopologized to a low-poly model and then baked to create the normals.
In addition, four levels of LOD0-3 were created in the Unreal Engine; LOD0 was only used in cutscenes, LOD1 was used in-game, and LOD2 and 3 were used rarely, depending on the distance from the camera.
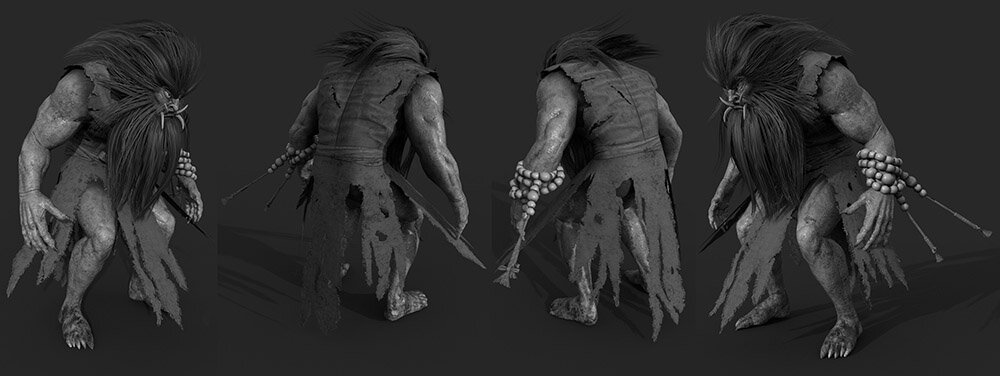
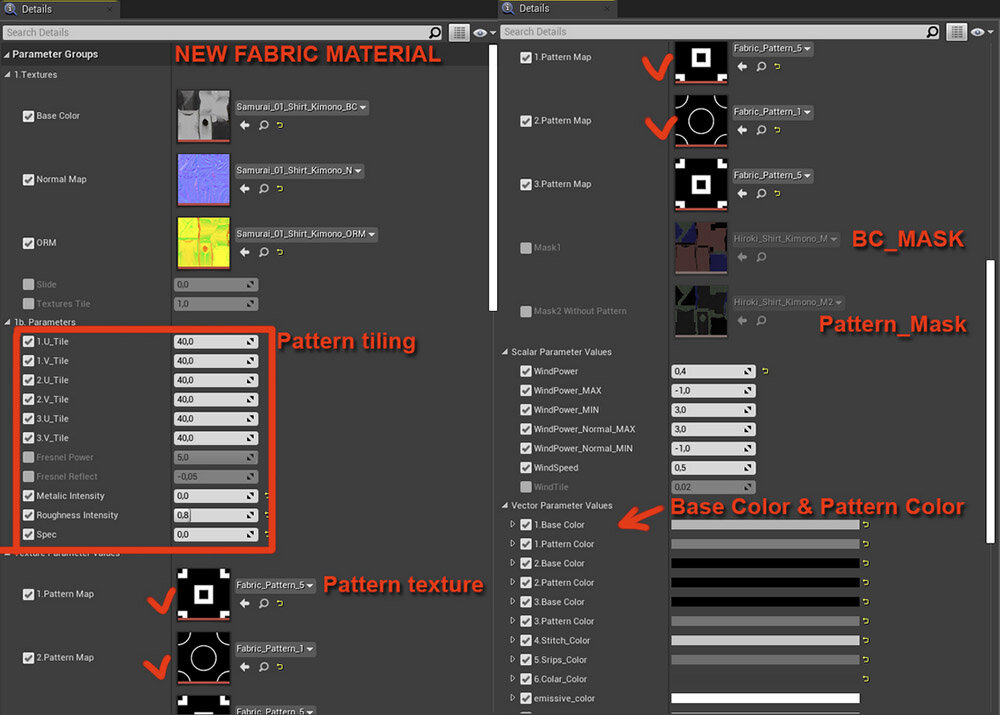
Texture of fabrics shown in gray tones
An important aspect of the texturing was to ensure that the characters did not blend in with each other or with the background in the grey tones. For this reason, a system was introduced whereby the brightness of the characters would switch with the brightness of the background.
They also prepared several texture sets for NPCs and small foes, which could be switched in the material settings. PBR shaders were used, not toons. Kimonos were initially modeled in Marvelous Designer with fine details to be easy to identify from a distance, and then eventually the unnecessary details were smoothed.
Three to four materials were assigned to the characters used in the cutscenes, but small enemies that are only visible from a distance were optimized by atlasing them into a single material.
-
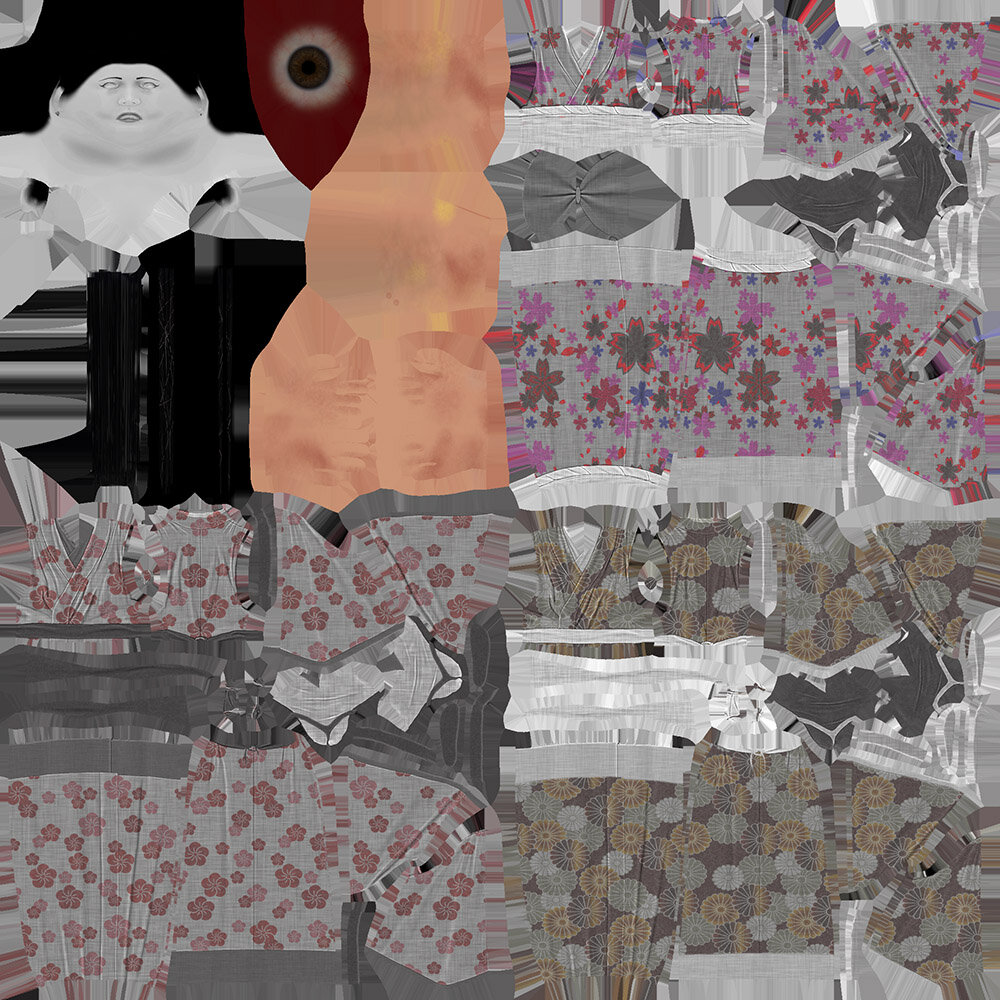
Texture set for base color -

Normal
-
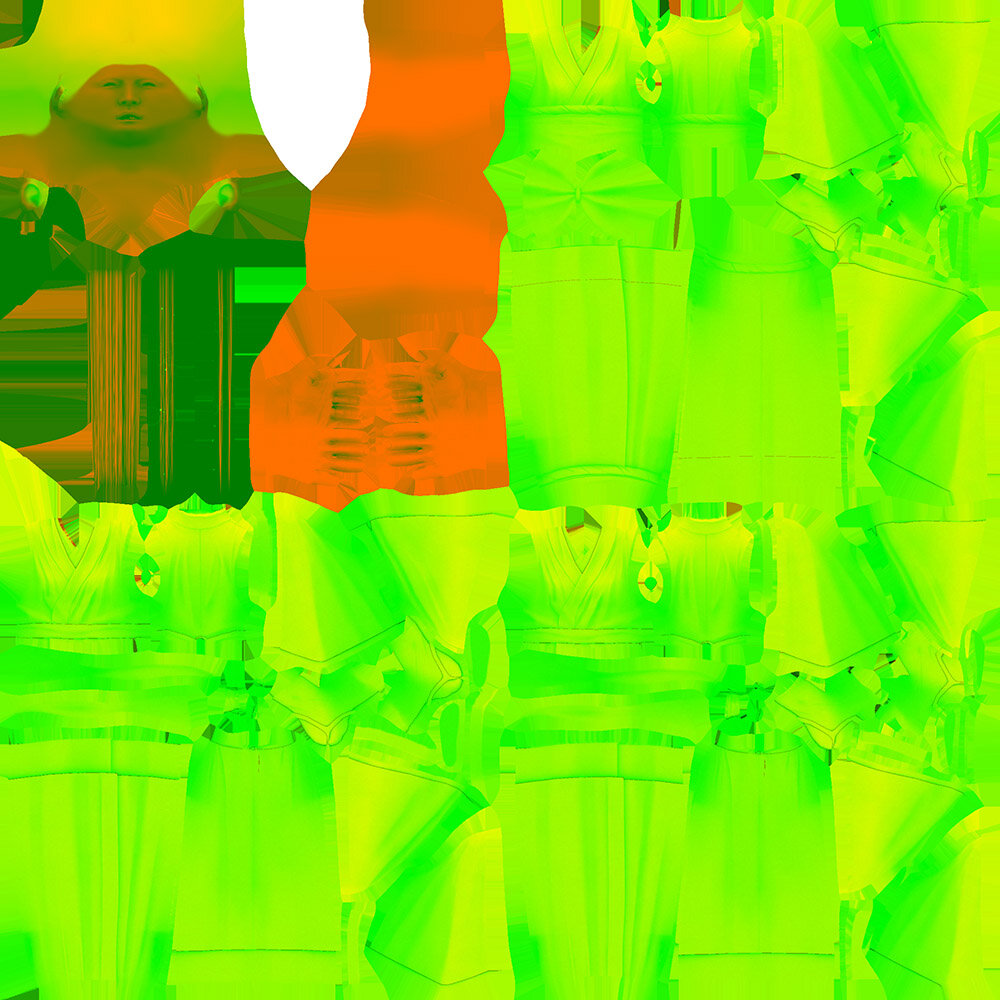
ORM
Point 03: Attempts at samurai sword-fighting action
Flying Wild Hog, which specializes in gore expression, meets samurai cinema. How was this unexpected chemistry created?
Reproduction of Edo period samurai moves
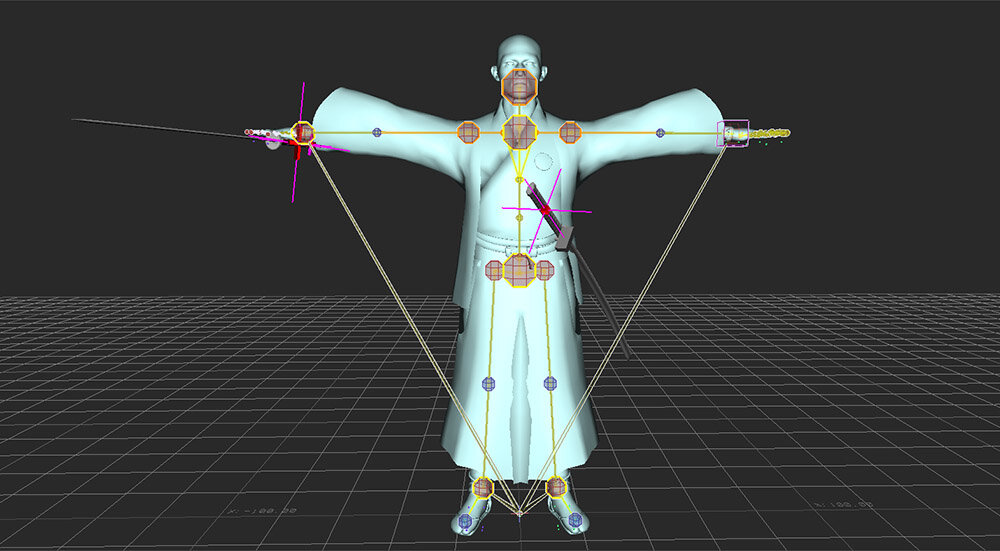
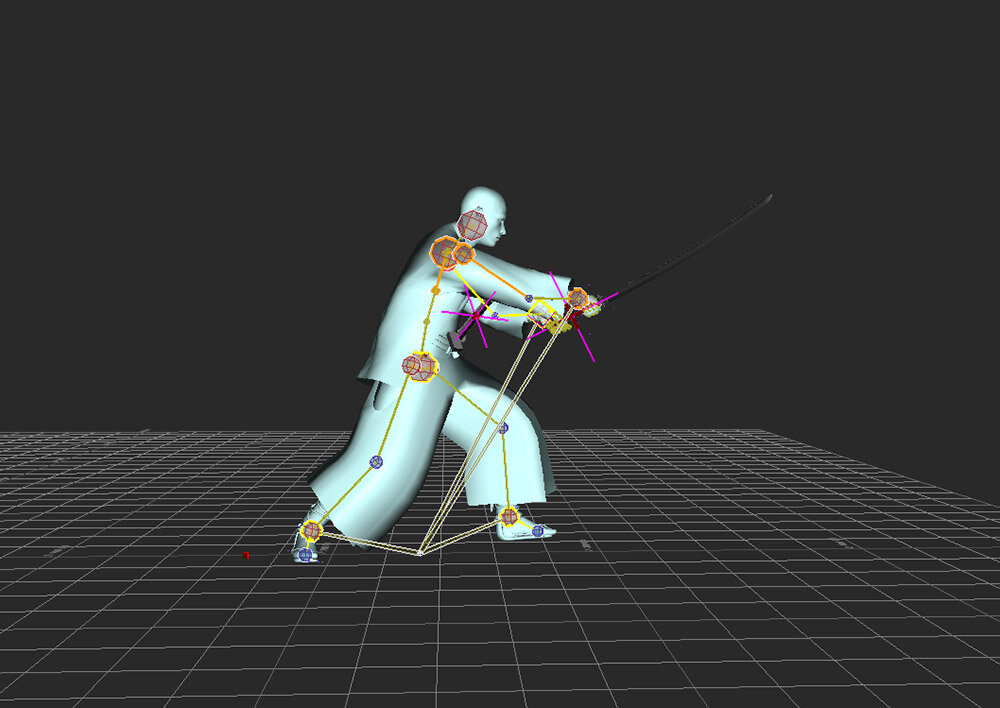
The character skins and bones were set up in 3ds Max and then exported to MotionBuilder, where they were processed in an automated pipeline. Rigs were created in MotionBuilder using Human IK, as were animations. Lead animator Paweł Wisz says that it was very difficult to recreate the moves of Edo period samurais, such as running and sword fighting.
For the combat animation, he says that he used feedback from a motion actor who is also a Polish martial artist to create the animation, focusing on practical body use rather than splendor. For acting during cutscenes, there was reference material from Menchiari and Tabei Matsunaga, as well as hints from the motion actors on how to behave when wearing a kimono.
On the other hand, Japanese lip-sync was required for facial expressions, so a Japanese actor was asked to capture them. In fact, I was also mobilized because facials were needed for the placeholder material, and was given the opportunity to perform with dots all over my face. Life is full of unexpected events.

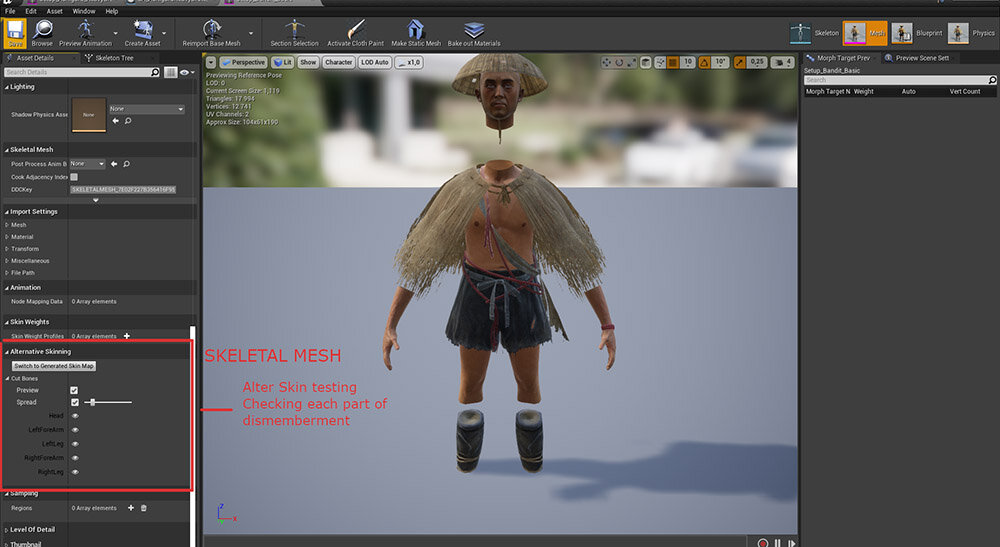
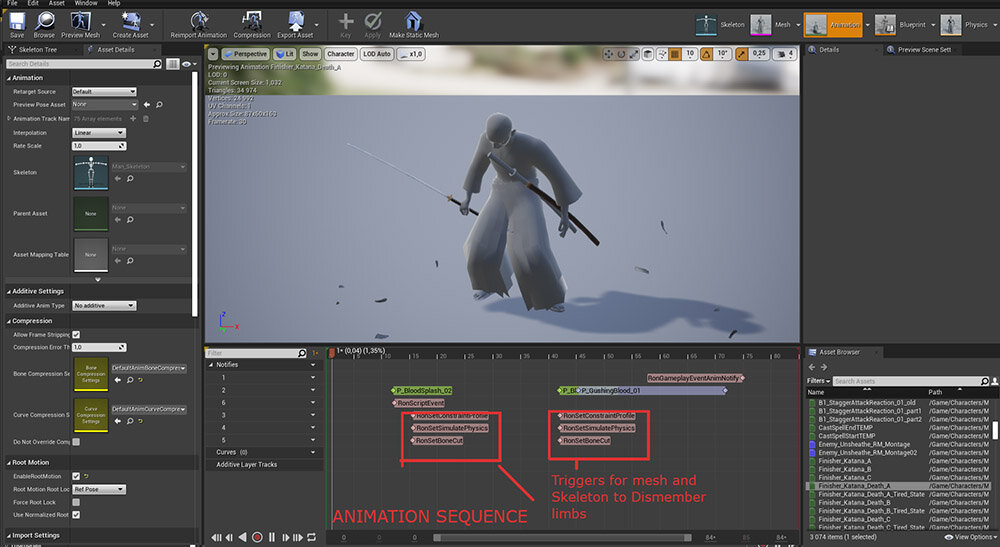
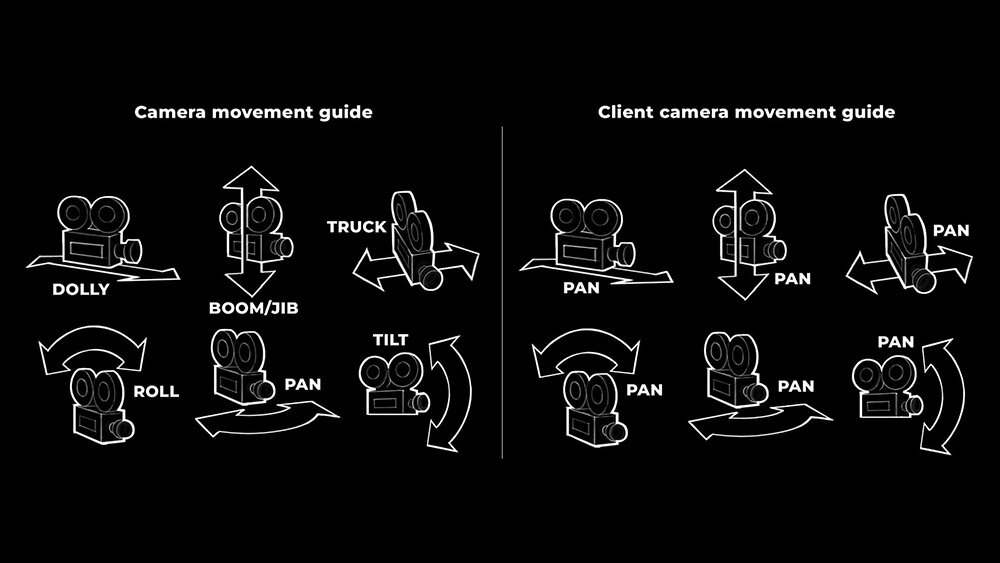
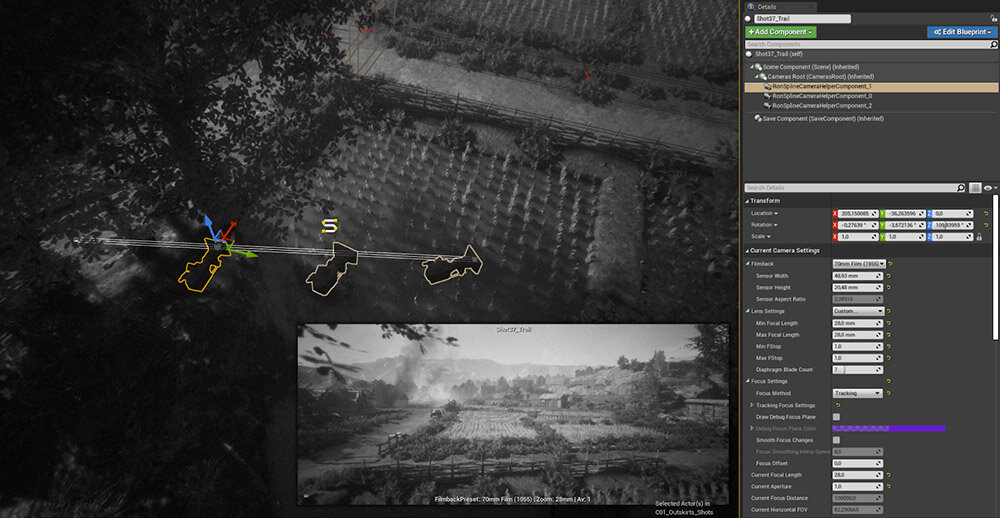
Preparation for cutting with swords

Unique camera system that recreates 50s films cameras
Point 04: Background construction techniques in gray tones
What is the strategy for organizing the vast amount of information on the screen within a limited color palette and for pursuing clear visuals?
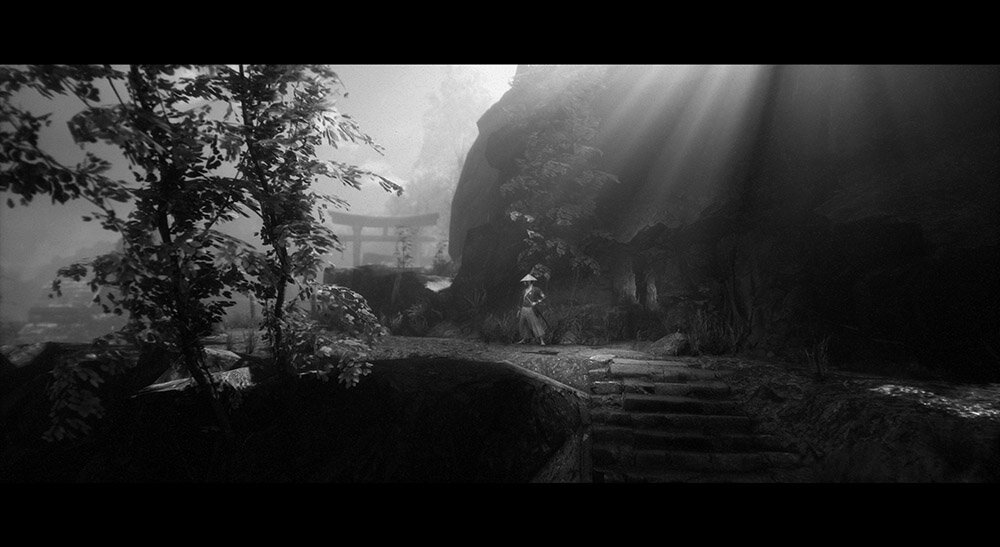
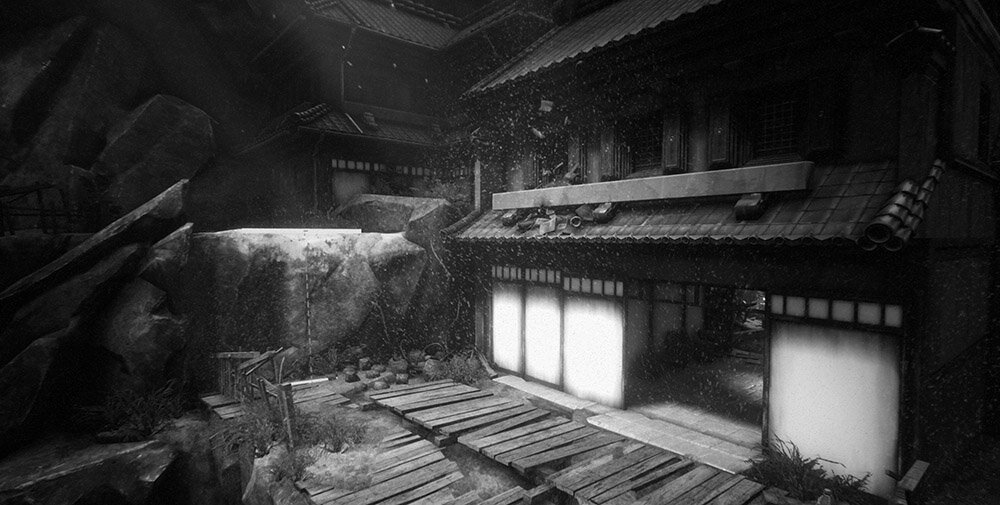
Showing depth with lights
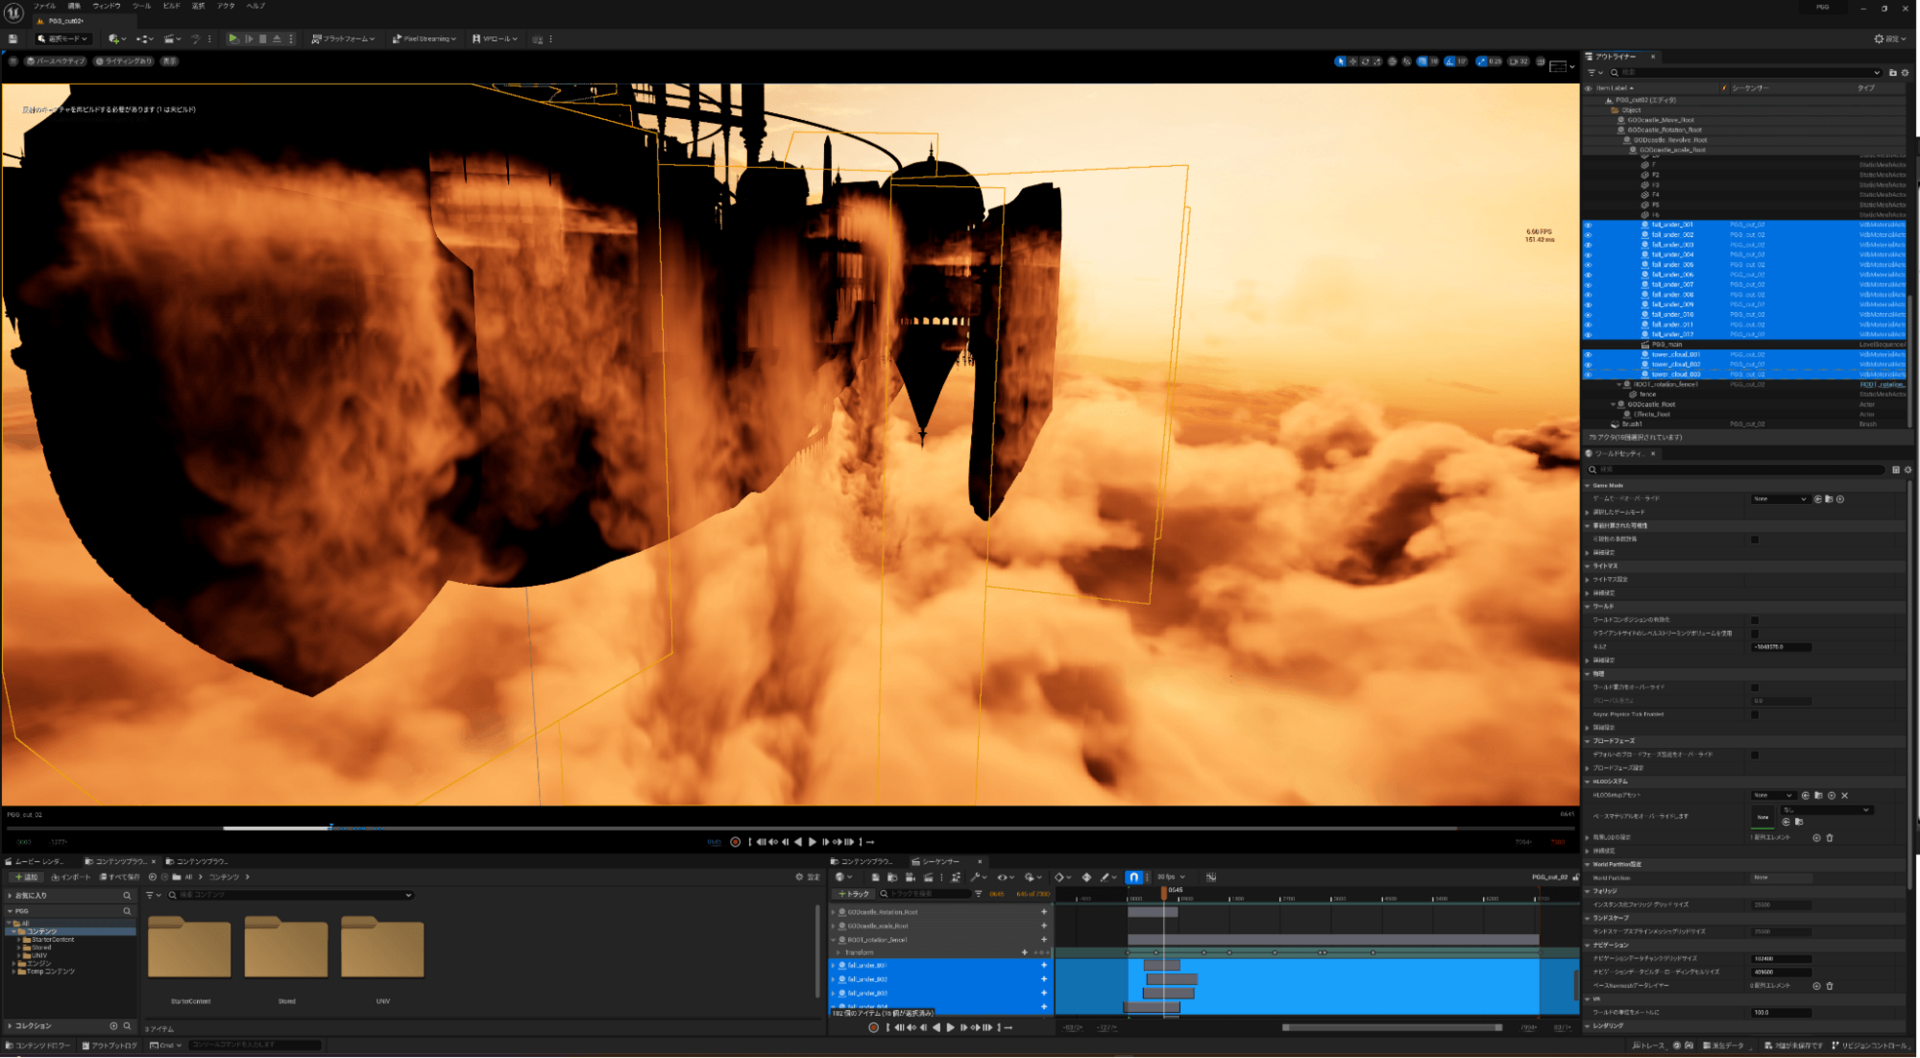
The first step in the field production process for this work is to create a rough layout. Particular attention is paid to distances, landmarks, cut-scene positioning and basic environmental conception. At this stage, they proceeded with a white box and a simple detail mesh.
In Trek To Yomi, the player cannot directly control the camera, so the visual language (placing visual aides such as sign objects and lights) was created by accentuating the brightness and intensity of the lights.

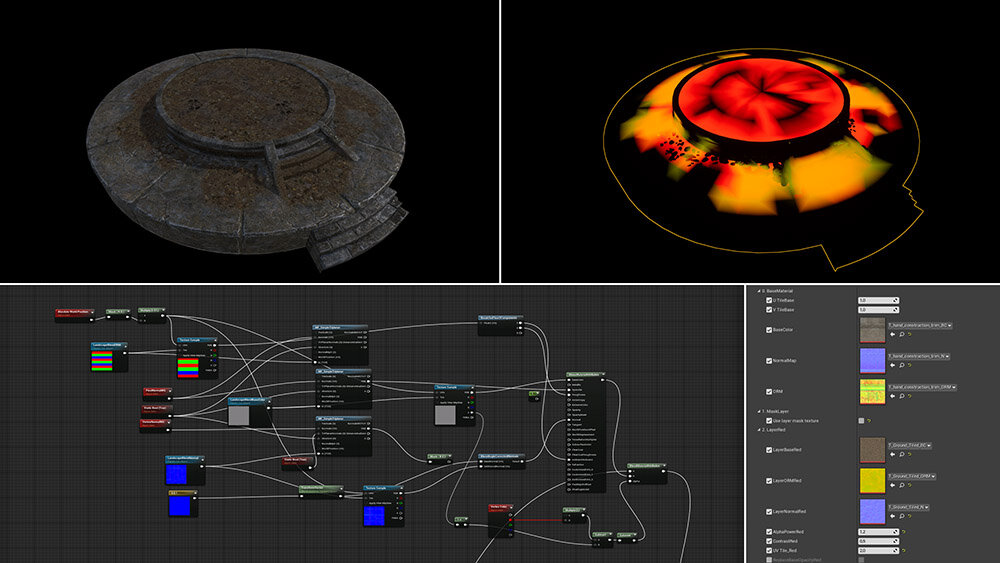
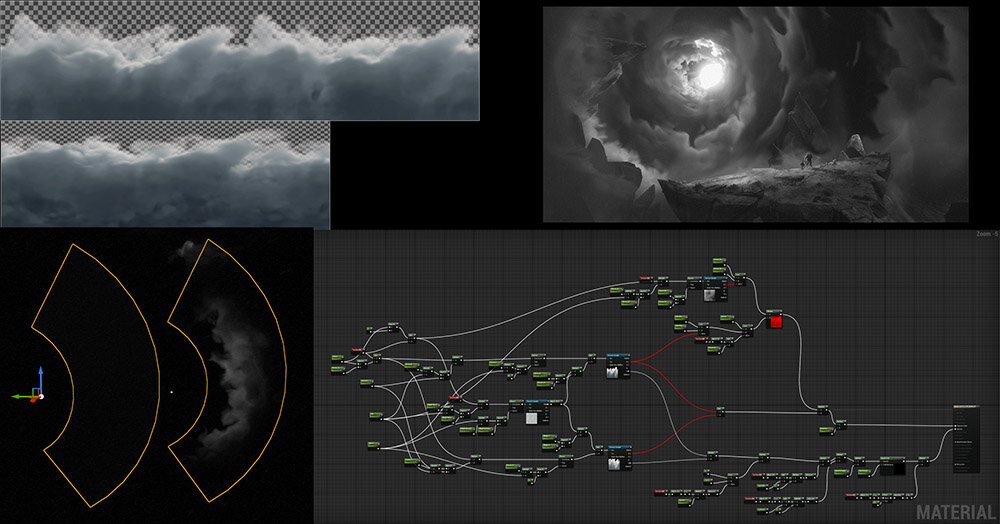
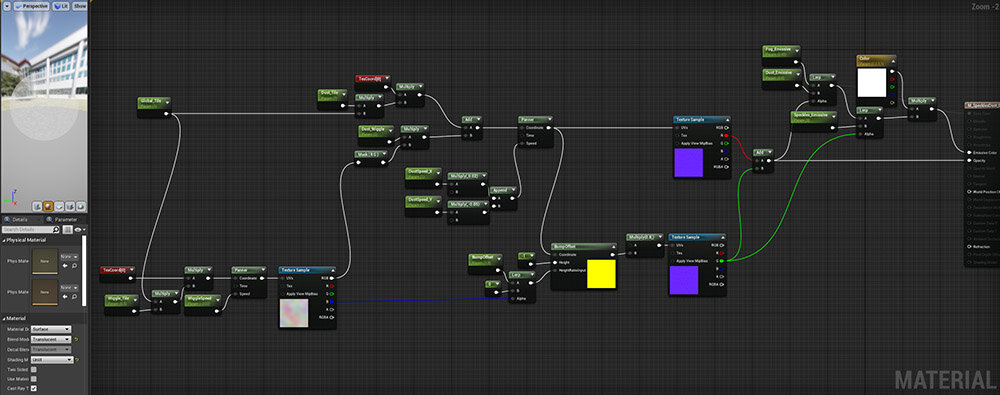
Material utilizing vertex color
A material was created to utilize vertex color and blend multiple textures (stone, mud, etc.) and used for background assets.
-
Example of stone material -
Control of light and shadow
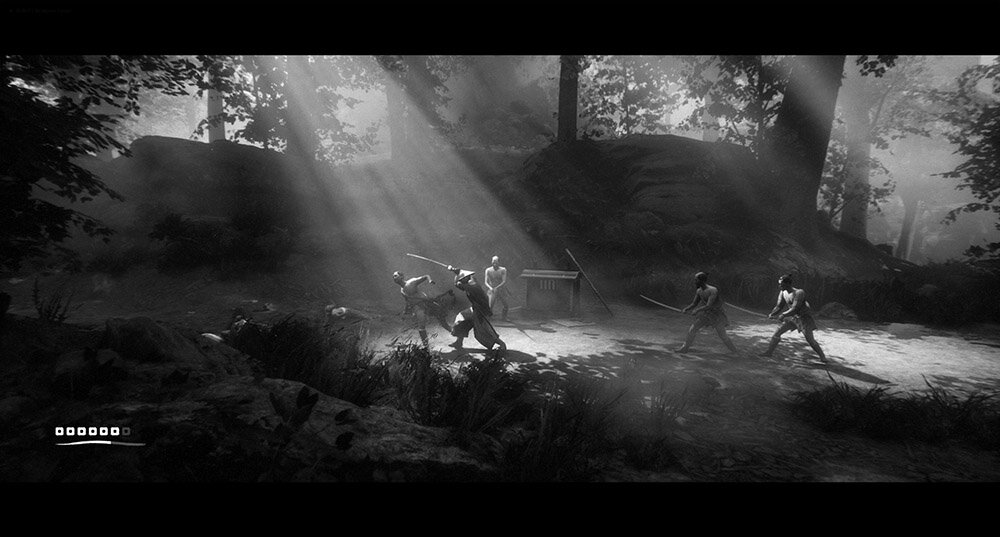
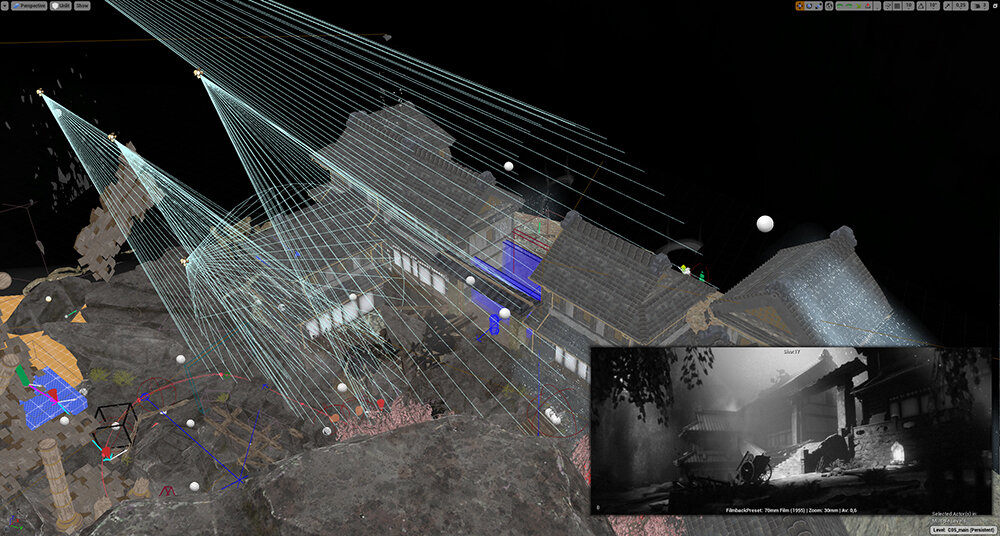
In lighting, the focus was on framing. The emphasis was on elements such as composition, lighting and the correct balance of brightness. They were conscious of what they wanted to show and what was important on the screen.
The point was to find the right balance of lighting and to build the scene. Each individual shot was created by hand, which was time-consuming but effective. Shadows were baked in, but cascading shadows were also used for directional light.
Point 05: Visual effects essential to Kurosawa films
Despite the limited color information, it evokes 'color' as if. The key to this may lie in the effects.
Types of Effects and Production Process
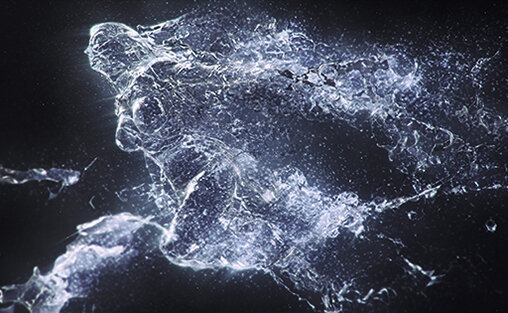
Visual effects play a huge role in Kurosawa films, says VFX artist Jarosław Bartyna. He set the goal to give a sense of dynamism to static scenes and to create contrast with the emissive color of the flames.
The entire effects production process shares the same basic pipeline. First, textures are created, and from there materials are created according to their look and purpose. Textures are created by retrieving them from libraries or simulating them as Flipbook animations in EmberGen or Houdini. The prepared materials are used to create particle effects in Niagara or mesh effects in Blueprint to achieve the aim.
Environmental effects need to be as universal as possible to save texture pools and memory. The vistas in Trek To Yomi are supported by VFX.

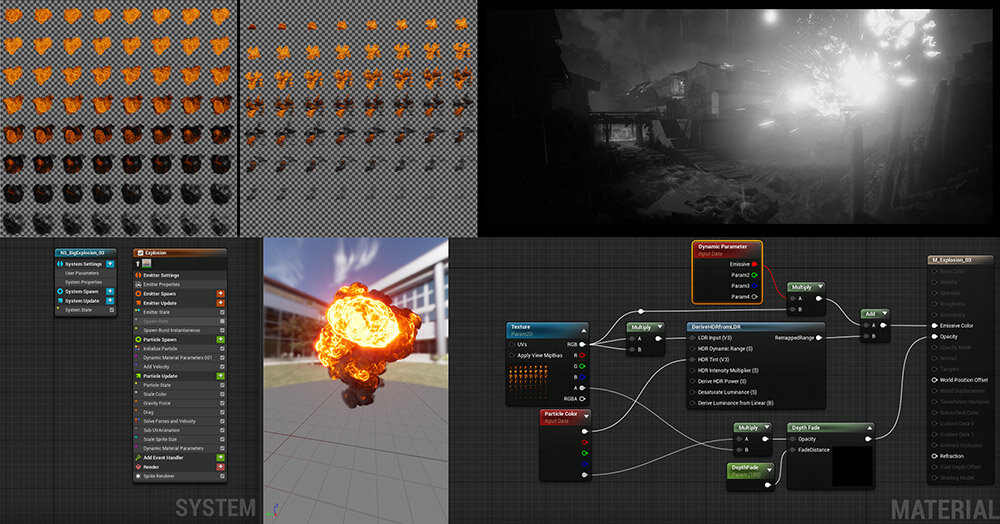
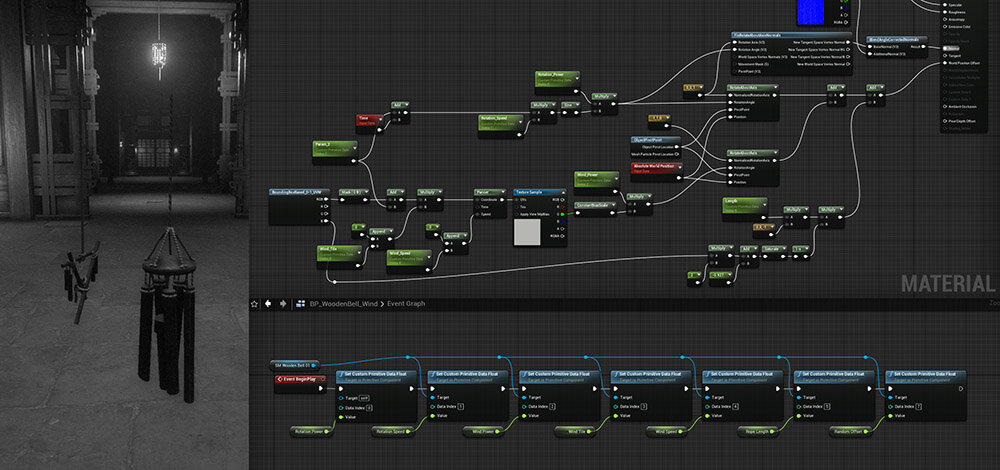
Effects Materials
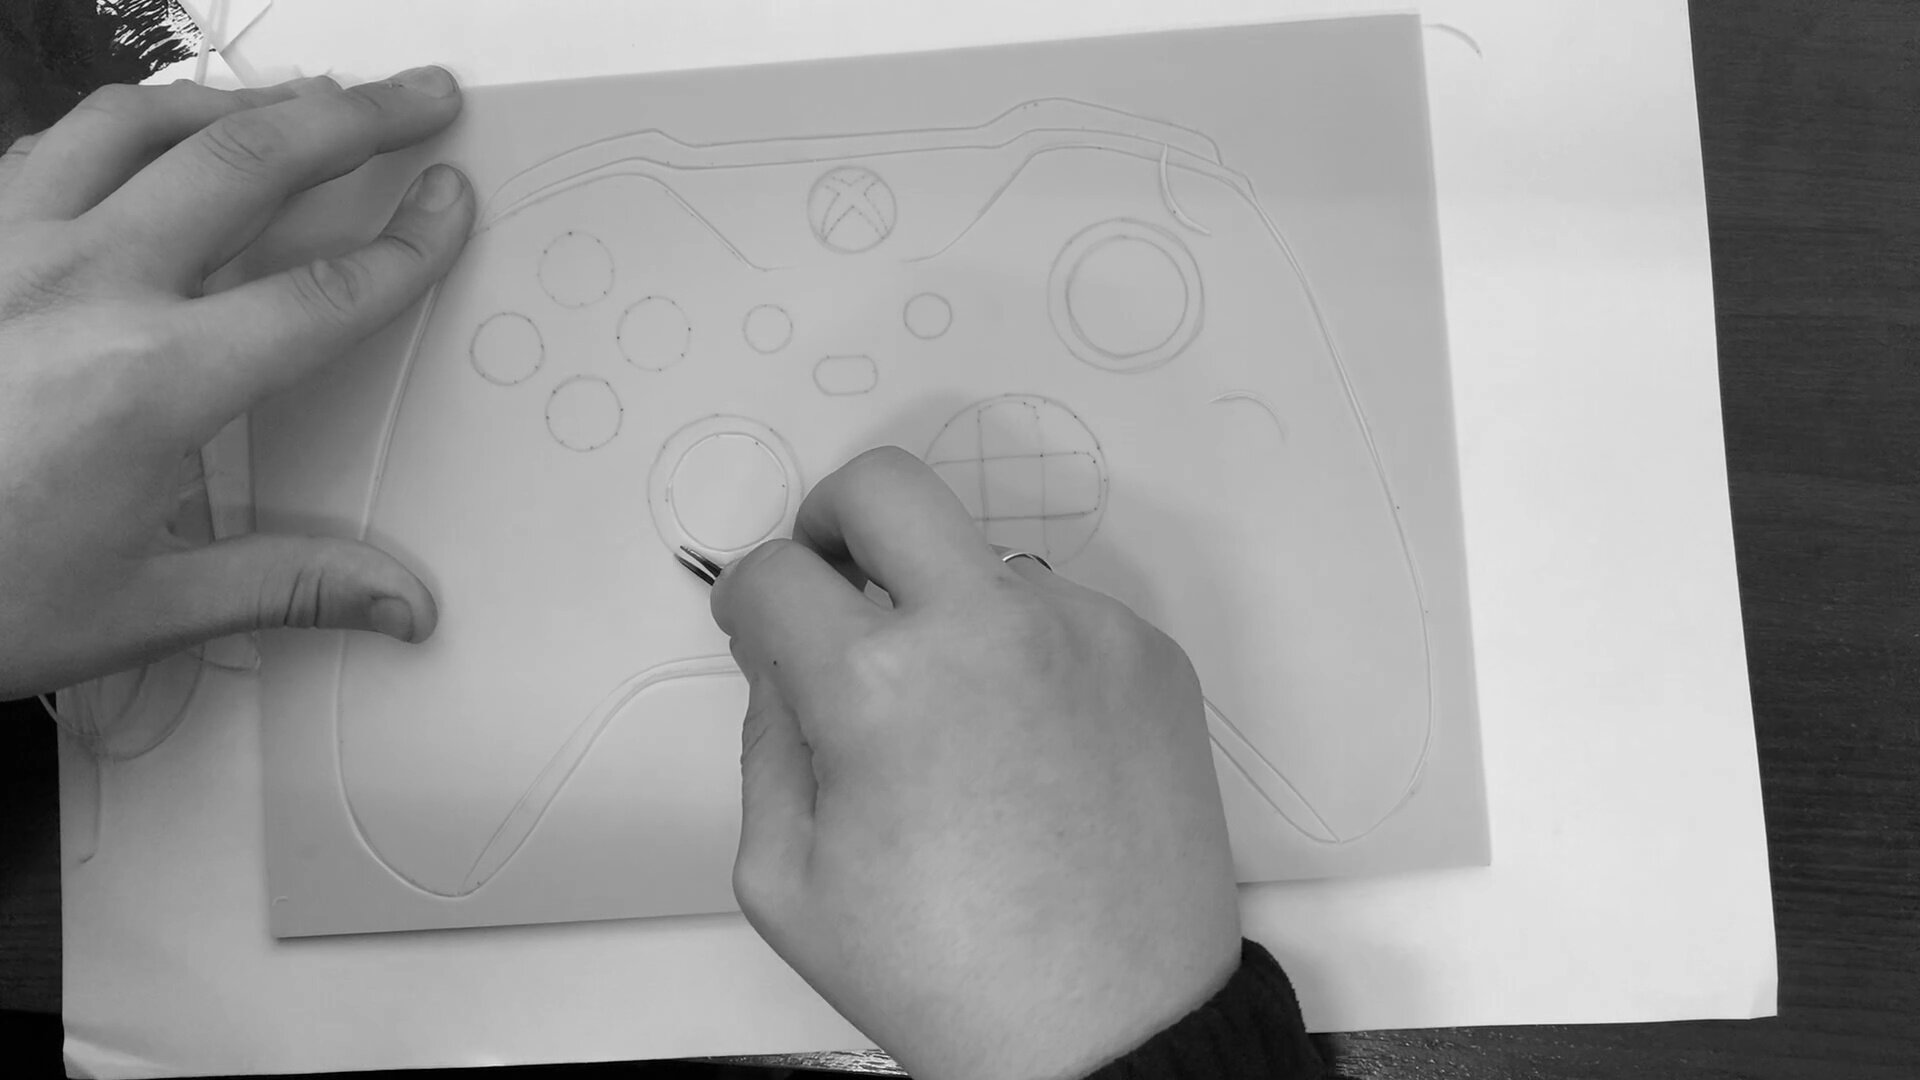
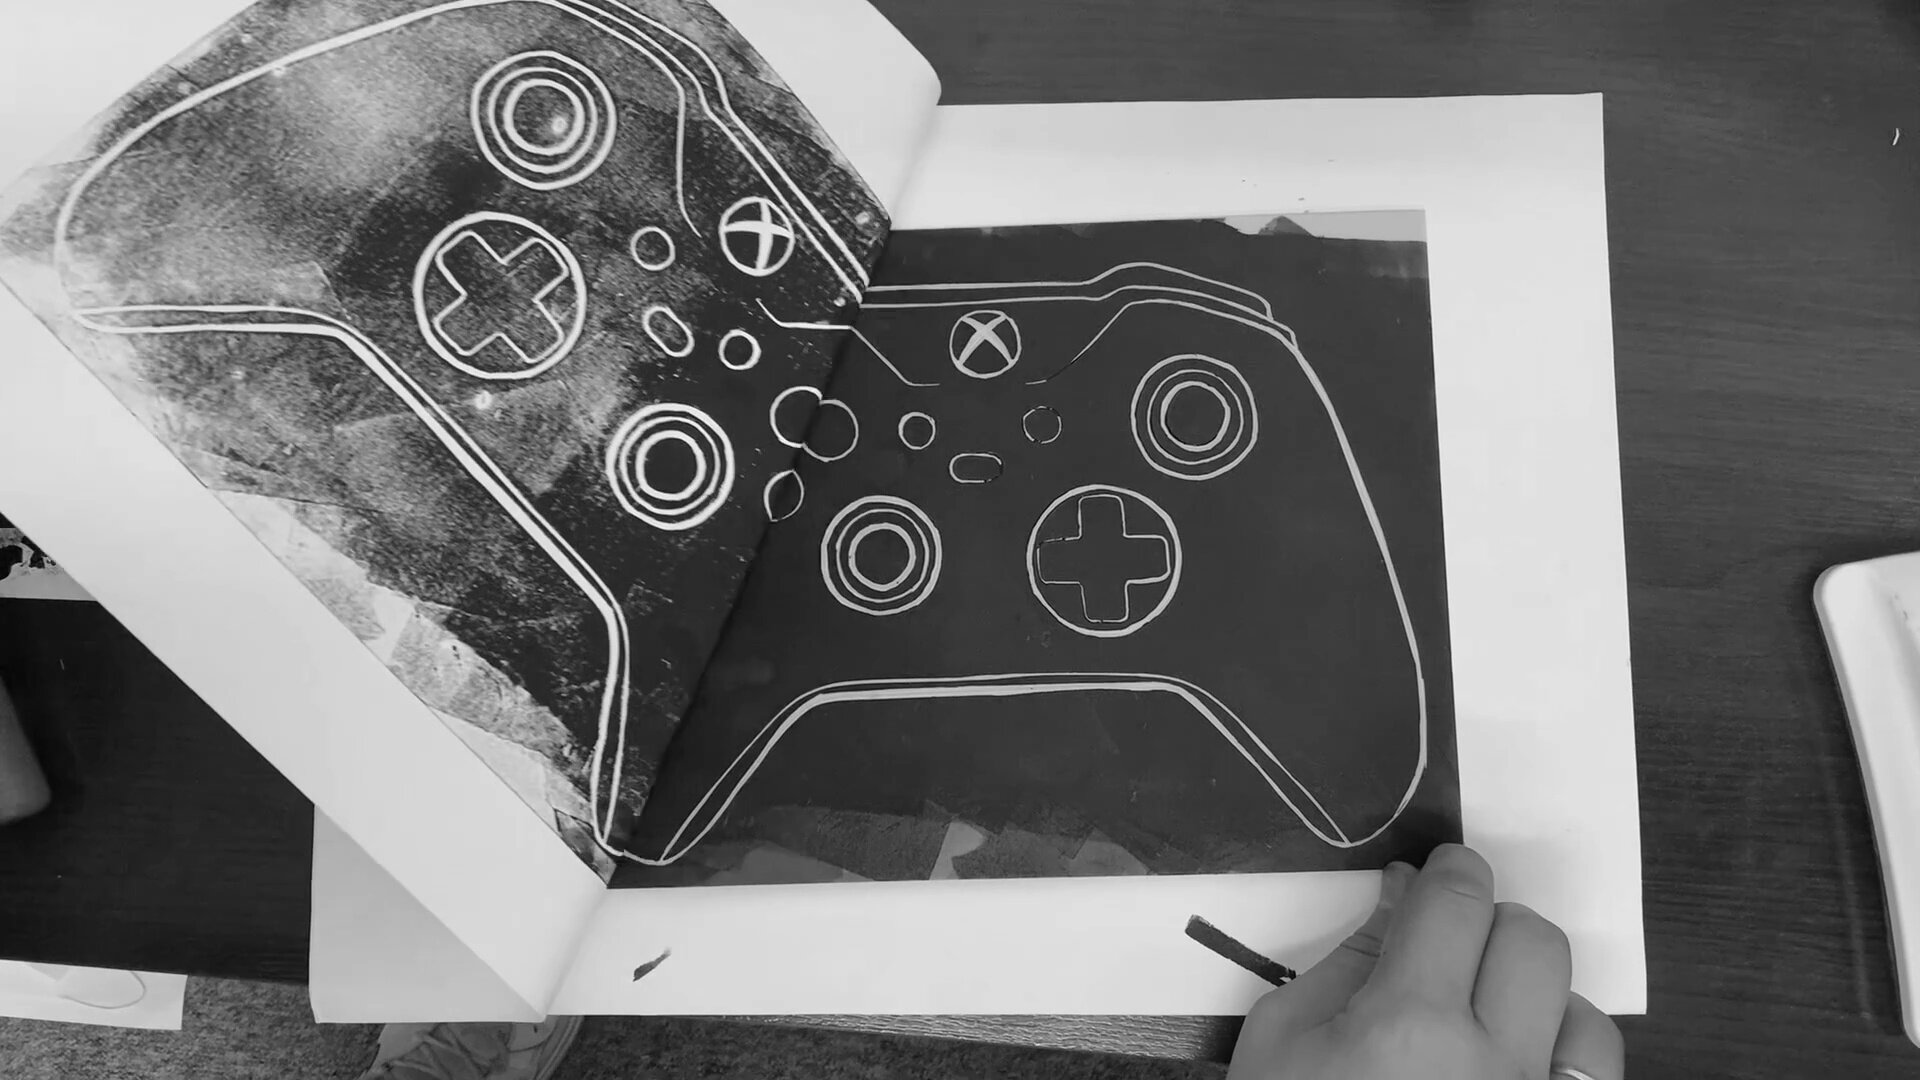
UI made from hand-carved prints
-
While the film also utilizes Japanese brush strokes and brush script in the UI, the information in the UI is kept to a minimum to preserve the cinematic immersion -
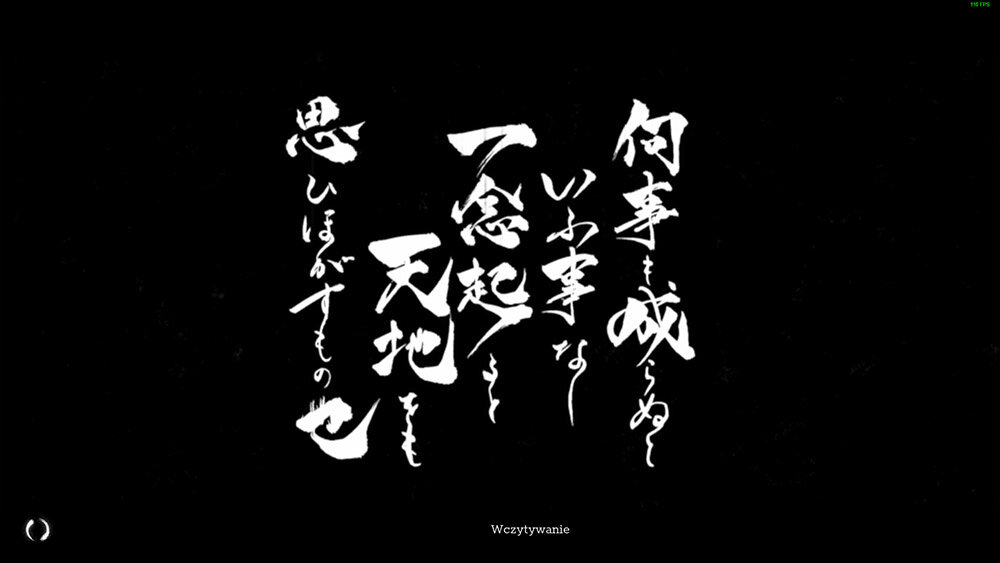
The calligraphy on the loading screen was created by hand-carving prints
CGWORLD vol.293 (January 2023)
Special Feature: AI Applications for Artists
Price: 1,540 yen (tax included)
Format: A4 wide
Total number of pages: 128
Release date: December 9, 2022
TEXT_Shigeki Saito
COOPORATION_Hiroshi Sakakibara
EDIT_Hitomi Komura(CGWORLD)